NVIDIA Jetson TK1学习与开发:如何解决输入和输出音频问题
最后更新于:2022-04-01 16:04:21
若Jetson TK1的音频不能用,可以在终端输入以下命令,再次测试,就可以使用了。(注意:在Jetson TK1硬件上音频处,上面的是话筒,下面的是听筒)。
~~~
amixer cset name="Stereo ADC MIXL ADC2 Switch" 0
amixer cset name="Stereo ADC MIXR ADC2 Switch" 0
amixer cset name="Int Mic Switch" 0
amixer cset name="ADC Capture Switch" 1
amixer cset name="RECMIXL BST1 Switch" 0
amixer cset name="RECMIXR BST1 Switch" 0
amixer cset name="RECMIXL BST2 Switch" 1
amixer cset name="RECMIXR BST2 Switch" 1
amixer cset name="Stereo ADC L1 Mux" "ADC"
amixer cset name="Stereo ADC R1 Mux" "ADC"
amixer cset name="Stereo ADC MIXL ADC1 Switch" 1
amixer cset name="Stereo ADC MIXR ADC1 Switch" 1
amixer cset name="Stereo ADC MIXL ADC2 Switch" 0
amixer cset name="Stereo ADC MIXR ADC2 Switch" 0
amixer cset name="IN1 Mode Control" "Single ended"
amixer cset name="IN2 Mode Control" "Single ended"
amixer cset name="Mic Jack Switch" 1
~~~

NVIDIA Jetson TK1学习与开发(十):人脸检测(Face Detection)
最后更新于:2022-04-01 16:04:19
本文介绍如何使用OpenCV检测人脸,并且给出示例,本平台仍然采用的是 Jetson TK1。
### 1、测试摄像头
为了能够从摄像头中实时检测出人脸,首先要做的就是判断你的摄像头是否可以工作,其基本方法如下:
~~~
sudo apt-get install luvcview
luvcview
~~~


如果摄像头可以正常工作,则出现如下界面:

### 2、安装OpenCV
参考网址:[图文详解OpenCV在Jetson TK1上的安装和使用](http://blog.csdn.net/frd2009041510/article/details/42930113)
### 3、新建工作文件夹并拷贝源码编译
~~~
mkdir ~/faceActivatedGPIO
cd ~/faceActivatedGPIO
~~~

~~~
cp ~/opencv/samples/gpu/cascadeclassifier.cpp .
g++ cascadeclassifier.cpp -lopencv_core -lopencv_imgproc -lopencv_highgui -lopencv_calib3d -lopencv_contrib -lopencv_features2d -lopencv_flann -lopencv_gpu -lopencv_legacy -lopencv_ml -lopencv_objdetect -lopencv_photo -lopencv_stitching -lopencv_superres -lopencv_video -lopencv_videostab -o cascadeclassifier
~~~


### 4、运行得到实验结果
~~~
./cascadeclassifier --cascade ~/opencv-2.4.9/data/haarcascades/haarcascade_frontalface_alt.xml --camera 0
~~~


NVIDIA Jetson TK1学习与开发(九):基于GPU加速的OpenCV人体检测(Full Body Detection)
最后更新于:2022-04-01 16:04:17
## 基于GPU加速的OpenCV人体检测(Full Body Detection)
### 1、CUDA和OpenCV的安装
首先,确定一下自己的平台是否安装好了CUDA和OpenCV。
CUDA的安装可以参考:[http://blog.csdn.net/frd2009041510/article/details/42042807](http://blog.csdn.net/frd2009041510/article/details/42042807)和[http://blog.csdn.net/frd2009041510/article/details/42925205](http://blog.csdn.net/frd2009041510/article/details/42925205)
OpenCV的安装可以参考:[http://blog.csdn.net/frd2009041510/article/details/42930113](http://blog.csdn.net/frd2009041510/article/details/42930113)
### 2、Simply build the OpenCV HOG (Hough Of Gradients) sample person detector program
~~~
cd opencv-2.4.9/samples/gpu
g++ hog.cpp -lopencv_core -lopencv_imgproc -lopencv_highgui -lopencv_calib3d -lopencv_contrib -lopencv_features2d -lopencv_flann -lopencv_gpu -lopencv_legacy -lopencv_ml -lopencv_nonfree -lopencv_objdetect -lopencv_photo -lopencv_stitching -lopencv_superres -lopencv_video -lopencv_videostab -o hog
~~~
进入目录:

编译:

### 3、run the HOG demo
~~~
./hog --video 768x576.avi
~~~
注意:You can run the HOG demo such as on a pre-recorded video of people walking around. The HOG demo displays a graphical output, hence you should plug a HDMI monitor in or use a remote viewer such as X Tunneling or VNC or TeamViewer on your desktop in order to see the output.
结果截图如下:


如果有摄像头,可以执行下面的命令来完成演示:
~~~
./hog --camera 0
~~~

注意:Note: This looks for whole bodies and assumes they are small, so you need to stand atleast 5m away from the camera if you want it to detect you!
结果截图如下:

### 4、HOG demo中的一些控制命令
**You can toggle between CPU vs GPU by pressing 'm', where you will see that the GPU is typically 5x faster at HOG than the CPU!**

NVIDIA Jetson TK1学习与开发(八):图文详解OpenGL在Jetson TK1上的安装和使用
最后更新于:2022-04-01 16:04:15
## 图文详解OpenGL在Jetson TK1上的安装和使用
### 1、入门介绍与资源推介
OpenGL(全写Open Graphics Library)是个定义了一个跨编程语言、跨平台的编程接口规格的专业的图形程序接口。它用于三维图像(二维的亦可),是一个功能强大,调用方便的底层图形库。
OpenGL ES (OpenGL for Embedded Systems) 是 OpenGL 三维图形 API 的子集,针对手机、PDA和游戏主机等嵌入式设备而设计。该API由Khronos集团定义推广,Khronos是一个图形软硬件行业协会,该协会主要关注图形和多媒体方面的开放标准。
下面推荐学习OpenGL的一些网址:
**OpenGL tutorial**:[http://www.opengl-tutorial.org/](http://www.opengl-tutorial.org/)
**OpenGL samples**:[https://github.com/NVIDIAGameWorks/OpenGLSamples](https://github.com/NVIDIAGameWorks/OpenGLSamples)
**Cross-platform OpenGL and OpenGL ES samples (for Windows, Android, and Linux)**:[https://developer.nvidia.com/gameworks-opengl-samples](https://developer.nvidia.com/gameworks-opengl-samples)
**OpenGL study documentation**:[http://docs.nvidia.com/gameworks/index.html#gameworkslibrary/graphicssamples/opengl_samples/opengl_index.htm](http://docs.nvidia.com/gameworks/index.html#gameworkslibrary/graphicssamples/opengl_samples/opengl_index.htm)
### 2、OpenGL Graphics and Compute Samples下载
下载地址:[https://developer.nvidia.com/gameworksdownload#?tx=$gameworks,graphics_library$graphics_api,opengl_4.3](https://developer.nvidia.com/gameworksdownload#?tx=$gameworks,graphics_library$graphics_api,opengl_4.3)
如下图所示:

The OpenGL Graphics and Compute Samples pack is a resource for cross-platform OpenGL 4 (GL4) and OpenGL ES 2 and 3 (ES2 and ES3) development, targeting Android, Windows, and Linux (x86/x64 and Linux for Tegra). The samples run on all four target platforms from a single source base.
### 3、OpenGL Samples Prerequisites

### 4、OpenGL Samples Setup Guide
将下载好的gl-graphics-compute-samples-linux-2.0拷贝到Jetson TK1平台中,如下图:


解压samples pack并且把它移到工作目录,如下图:


Install the Linux target pre-requisites:


~~~
sudo apt-get update(this is critical, or else the next line will do nothing)
sudo apt-get install g++
~~~
进入目录make:

生成的apps位于..../samples/bin/linux-arm32/,如下图所示:

### 5、示例演示
进入apps所在的目录后,./xxxx即可,以Bindless Graphics Sample为例,演示结果如下图所示:

NVIDIA Jetson TK1学习与开发(七):图文详解OpenCV在Jetson TK1上的安装和使用
最后更新于:2022-04-01 16:04:12
## 图文详解OpenCV在Jetson TK1上的安装和使用
本文介绍如何在Jetson TK1上安装并且使用OpenCV,并给出了示例,供大家参考学习。
### 1、Jetson TK1平台的OpenCV优化包下载
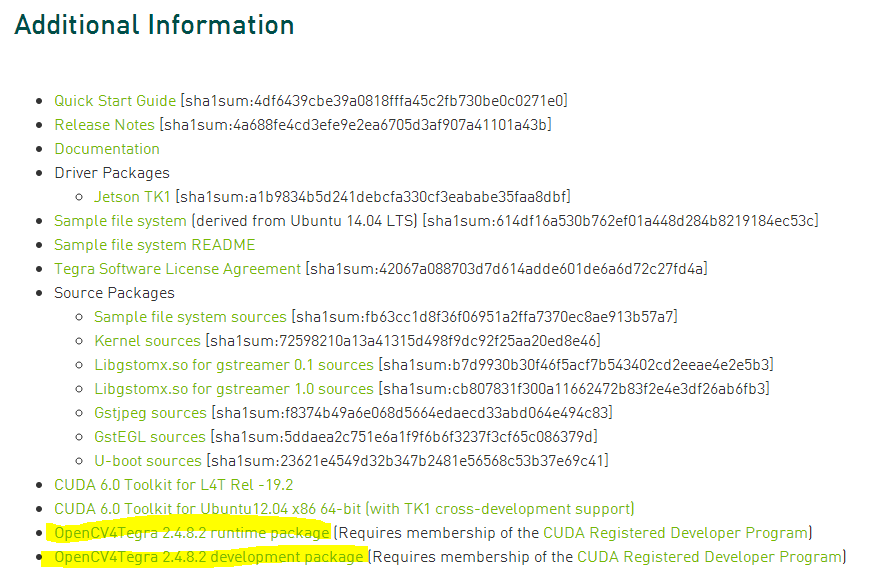
下载地址:[https://developer.nvidia.com/linux-tegra-rel-19](https://developer.nvidia.com/linux-tegra-rel-19)(需要注册才可以下载)
如下图所示
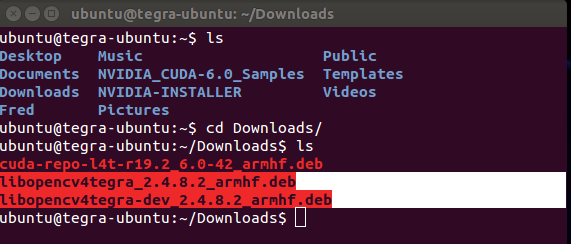
下载后拷贝到TK1平台中,如下图所示

### 2、使能通用存储库和更新apt-get


~~~
sudo apt-add-repository universe
sudo apt-get update
~~~
### 3、安装OpenCV优化包


~~~
sudo dpkg -i libopencv4tegra_2.4.8.2_armhf.deb
sudo dpkg -i libopencv4tegra-dev_2.4.8.2_armhf.deb
~~~
### 4、安装一些函数库


~~~
# Some general development libraries
sudo apt-get install build-essential make cmake cmake-curses-gui g++
# libav video input/output development libraries
sudo apt-get install libavformat-dev libavutil-dev libswscale-dev
# Video4Linux camera development libraries
sudo apt-get install libv4l-dev
# Eigen3 math development libraries
sudo apt-get install libeigen3-dev
# OpenGL development libraries (to allow creating graphical windows)
sudo apt-get install libglew1.6-dev
# GTK development libraries (to allow creating graphical windows)
sudo apt-get install libgtk2.0-dev
~~~
### 5、下载OpenCV源码
下载地址:[http://opencv.org/](http://opencv.org/)(注意选择OpenCV for Linux/Mac)
或者在TK1平台上直接下载,方法是:
~~~
wget http://downloads.sourceforge.net/project/opencvlibrary/opencv-unix/2.4.9/opencv-2.4.9.zip
~~~
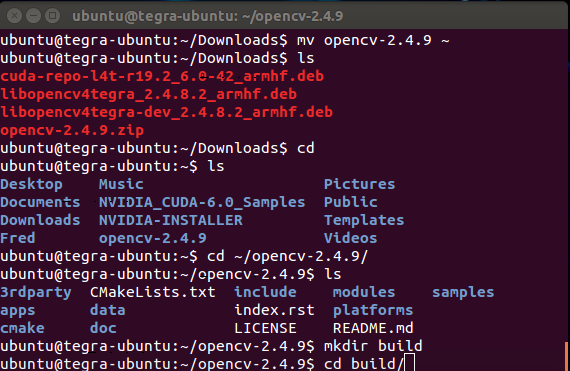
下载成功后见下图:

### 6、解压OpenCV源码,并进行配置


~~~
cd Downloads
unzip opencv-2.4.9.zip
mv opencv-2.4.9 ~
~~~
~~~
cd ~/opencv-2.4.9
mkdir build
cd build
~~~
~~~
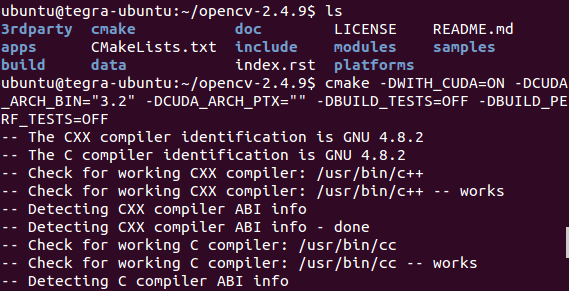
cmake -DWITH_CUDA=ON -DCUDA_ARCH_BIN="3.2" -DCUDA_ARCH_PTX="" -DBUILD_TESTS=OFF -DBUILD_PERF_TESTS=OFF
~~~
自己也可以根据需要进行配置(If you want to customize any more of the build settings such as whether to support Firewire cameras or Qt GUI, it is easiest to use the curses interactive version of CMake from here on:):
~~~
ccmake ..
~~~
### 7、 build & install OpenCV using a single command
Now you should be ready to build OpenCV and then install it. Unfortunately, OpenCV is currently experiencing a problem with CMake where installing the built libraries (that normally takes a few seconds) re-compiles the whole OpenCV (that normally takes close to an hour). So to save time, instead of running "make -j4 ; make install", we will build & install OpenCV using a single command.
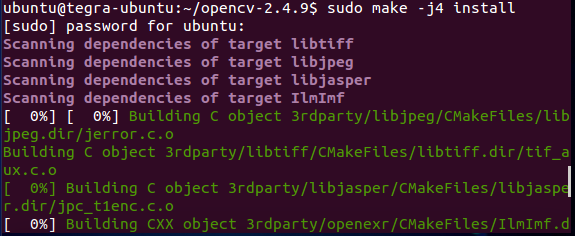
To build & install the OpenCV library using all 4 Tegra CPU cores (takes around 40 minutes), including copying the OpenCV library to "/usr/local/include" and "/usr/local/lib":
~~~
sudo make -j4 install
~~~
### 8、make sure your system searches the "/usr/local/lib" folder for libraries
Finally, make sure your system searches the "/usr/local/lib" folder for libraries:
~~~
echo "# Use OpenCV and other custom-built libraries." >> ~/.bashrc
echo "export LD_LIBRARY_PATH=$LD_LIBRARY_PATH:/usr/local/lib/" >> ~/.bashrc
source ~/.bashrc
~~~


### 9、测试OpenCV并运行几个例子
~~~
# Make sure we have installed a C++ compiler.
sudo apt-get install build-essential g++
~~~

### 第一个示例:
~~~
# Test a simple OpenCV program. Creates a graphical window, hence you should plug a HDMI monitor in or use a remote viewer such as X Tunneling or VNC or TeamViewer on your desktop.
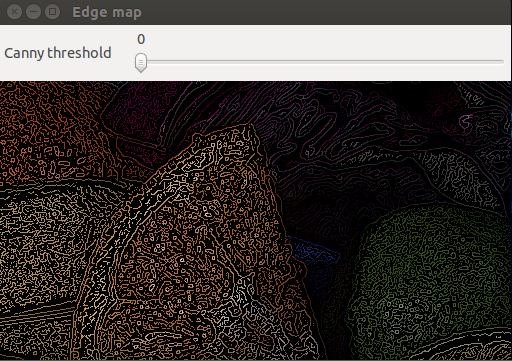
cd ~/opencv-2.4.9/samples/cpp
g++ edge.cpp -lopencv_core -lopencv_imgproc -lopencv_highgui -o edge
./edge
~~~

### 第二个示例:
~~~
# If you have a USB webcam plugged in to your board, then test one of the live camera programs.
g++ laplace.cpp -lopencv_core -lopencv_imgproc -lopencv_highgui -lopencv_calib3d -lopencv_contrib -lopencv_features2d -lopencv_flann -lopencv_gpu -lopencv_legacy -lopencv_ml -lopencv_objdetect -lopencv_photo -lopencv_stitching -lopencv_superres -lopencv_video -lopencv_videostab -o laplace
./laplace
~~~


(注意:此示例没有演示出来,待解决。。。,错误提示见上图。)
### 第三个示例:
~~~
# Test a GPU accelerated OpenCV sample.
cd ../gpu
g++ houghlines.cpp -lopencv_core -lopencv_imgproc -lopencv_highgui -lopencv_calib3d -lopencv_contrib -lopencv_features2d -lopencv_flann -lopencv_gpu -lopencv_legacy -lopencv_ml -lopencv_objdetect -lopencv_photo -lopencv_stitching -lopencv_superres -lopencv_video -lopencv_videostab -o houghlines
./houghlines ../cpp/logo_in_clutter.png
~~~


CPU与GPU的实验结果如下图:

最终的处理结果见下面的三个图:分别是原图、CPU处理后、GPU处理后的结果。
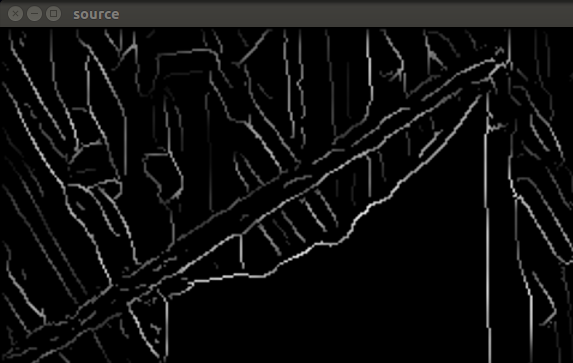
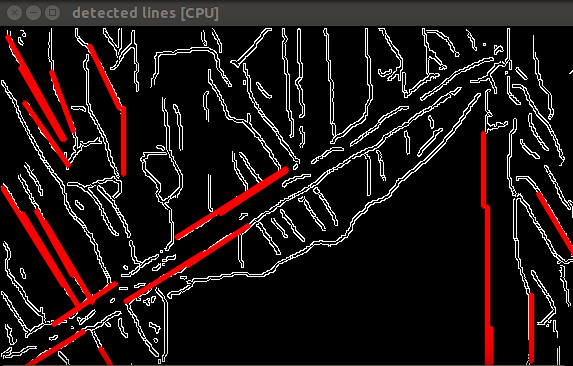
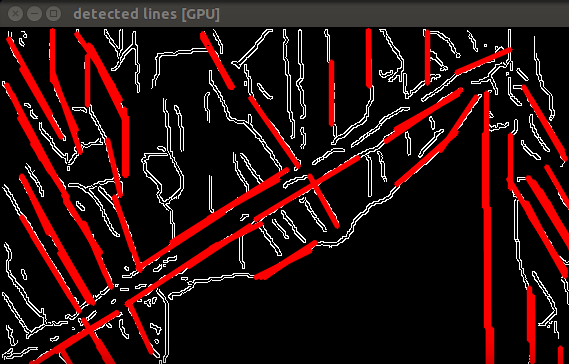
(If the houghlines GPU sample program worked then you have successfully installed OpenCV and its GPU module!)
### 10、更多参考学习资料
[Using OpenCV with gcc and CMake](http://docs.opencv.org/doc/tutorials/introduction/linux_gcc_cmake/linux_gcc_cmake.html)
[official opencv tutorials](http://docs.opencv.org/doc/tutorials/tutorials.html)
[OpenCV Reference Manual PDF file](http://docs.opencv.org/opencv2refman.pdf)
NVIDIA Jetson TK1学习与开发(六):如何安装CUDA
最后更新于:2022-04-01 16:04:10
本文介绍如何安装CUDA,以CUDA6.0为例介绍。
### 1、Installing the CUDA Toolkit onto your device for native CUDA development
Download the .deb file for the CUDA Toolkit for L4T either using a web browser on the device, or download on your PC then copy the file to your device using a USB flash stick or across the network. (Make sure you download the Toolkit for L4T and not the Toolkit for Ubuntu since that is for cross-compilation instead of native compilation).
On the device, install the .deb file and the CUDA Toolkit. eg:
~~~
cd ~/Downloads
# Install the CUDA repo metadata that you downloaded manually for L4T
sudo dpkg -i cuda-repo-l4t-r19.2_6.0-42_armhf.deb
# Download & install the actual CUDA Toolkit including the OpenGL toolkit from NVIDIA. (It only downloads around 15MB)
sudo apt-get update
# Install "cuda-toolkit-6-0" if you downloaded CUDA 6.0, or "cuda-toolkit-6-5" if you downloaded CUDA 6.5, etc.
sudo apt-get install cuda-toolkit-6-0
# Add yourself to the "video" group to allow access to the GPU
sudo usermod -a -G video $USER
~~~
Add the 32-bit CUDA paths to your .bashrc login script, and start using it in your current console:
~~~
echo "# Add CUDA bin & library paths:" >> ~/.bashrc
echo "export PATH=/usr/local/cuda/bin:$PATH" >> ~/.bashrc
echo "export LD_LIBRARY_PATH=/usr/local/cuda/lib:$LD_LIBRARY_PATH" >> ~/.bashrc
source ~/.bashrc
~~~
Verify that the CUDA Toolkit is installed on your device:
~~~
nvcc -V
~~~
### 2、Installing & running the CUDA samples (optional)
If you think you will write your own CUDA code or you want to see what CUDA can do, then follow this section to build & run all of the CUDA samples.
Install writeable copies of the CUDA samples to your device's home directory (it will create a "NVIDIA_CUDA-6.0_Samples" folder):
~~~
cuda-install-samples-6.0.sh /home/ubuntu
~~~
Build the CUDA samples (takes around 15 minutes on Jetson TK1):
~~~
cd ~/NVIDIA_CUDA-6.0_Samples
make
~~~
Run some CUDA samples:
~~~
1_Utilities/deviceQuery/deviceQuery
1_Utilities/bandwidthTest/bandwidthTest
cd 0_Simple/matrixMul
./matrixMulCUBLAS
cd ../..
cd 0_Simple/simpleTexture
./simpleTexture
cd ../..
cd 3_Imaging/convolutionSeparable
./convolutionSeparable
cd ../..
cd 3_Imaging/convolutionTexture
./convolutionTexture
cd ../..
~~~
### 3、注意事项(some notes)
Note: Many of the CUDA samples use OpenGL GLX and open graphical windows. If you are running these programs through an SSH remote terminal, you can remotely display the windows on your desktop by typing "export DISPLAY=:0" and then executing the program. (This will only work if you are using a Linux/Unix machine or you run an X server such as the free "Xming" for Windows). eg:
~~~
export DISPLAY=:0
cd ~/NVIDIA_CUDA-6.0_Samples/2_Graphics/simpleGL
./simpleGL
cd ~/NVIDIA_CUDA-6.0_Samples/3_Imaging/bicubicTexture
./bicubicTexture
cd ~/NVIDIA_CUDA-6.0_Samples/3_Imaging/bilateralFilter
./bilateralFilter
~~~
Note: the Optical Flow sample (HSOpticalFlow) and 3D stereo sample (stereoDisparity) take rougly 1 minute each to execute since they compare results with CPU code.
Some of the CUDA samples use other libraries such as OpenMP or MPI or OpenGL.
If you want to compile those samples then you'll need to install these toolkits like this:
~~~
(to be added)
~~~
NVIDIA Jetson TK1学习与开发(五):helloworld的C版本与C++版本
最后更新于:2022-04-01 16:04:08
从本篇博文开始,将一一探索Jetson TK1的开发过程,那就从最简单的hello world开始吧。
本次将介绍hello world的两种写法。
### 1、C版本hello world
新建helloworld.c:

输入代码:

编译链接运行:

### 2、C++版本hello world
新建helloworld.cpp:

输入代码:

编译链接运行:

对,就是这么简单!大家都会的。。。
NVIDIA Jetson TK1学习与开发(四):一些细节问题
最后更新于:2022-04-01 16:04:05
本文把自己在学习或开发Jetson TK1过程中遇到的一些细节性的问题罗列出来,并提供解决方案。
首先就是wiki上提供的一些注意事项,网址:[http://elinux.org/Jetson_TK1](http://elinux.org/Jetson_TK1)
### 1、An important step before connecting the Jetson to Internet
It is really important to tell "apt" not to overwrite the file "libglx.so" if you upgrade the system. "libglx.so" is a specific file in NVIDIA's graphics driver that might get replaced by an incorrect version from Ubuntu that stops you from being able to boot into the graphical environment! So please execute this command on your Jetson before you connect it to Internet or perform an update:
~~~
sudo apt-mark hold xserver-xorg-core
~~~
Now you can allow Ubuntu to update itself automatically or you can run "sudo apt-get upgrade" without problems.
### 2、Add the Universe package repositories, since you will often need packages from Universe for code development
~~~
sudo apt-add-repository universe
sudo apt-get update
~~~
### 3、If you will use the shell command-line a lot
Install "bash-completion" (it allows you to hit the "Tab" key to auto-complete your shell commands) and "command-not-found" (it shows which package you probably need to install if you run an unavailable command). These 2 tools are extremely useful when using the commandline, but were not installed by default in Ubuntu 14.04. Simply run this:
~~~
sudo apt-get install bash-completion command-not-found
exit
~~~
### 4、change the shell prompt
You probably should also change the shell prompt (by adjusting "PS1" in the ".bashrc" file in your home directory) to be more useful, such as getting the shell prompt to have a different color than regular commands, and make it obvious if a command returned with an error. There are thousands of custom .bashrc configurations on the web, including Shervin's that provides a different colored shell prompt depending on whether a command was succesful or returned an error.
### 5、If you will use the graphical environment (Unity) a lot
turn off the desktop shopping suggestions that are enabled by default in Ubuntu 14.04 (despite the spyware concerns discussed by huge numbers of people) by running this:
~~~
gsettings set com.canonical.Unity.Lenses disabled-scopes "['more_suggestions-amazon.scope', \
'more_suggestions-u1ms.scope', 'more_suggestions-populartracks.scope', 'music-musicstore.scope', \
'more_suggestions-ebay.scope', 'more_suggestions-ubuntushop.scope', 'more_suggestions-skimlinks.scope']"
~~~
### 6、If you need more disk space on the eMMC
The eMMC on the Jetson has a capacity of 16GB, however some instructions or boards default to only using 8GB of the drive (or 12GB, see discussion). If you require more disk space in your rootfs such as for installing toolkits or compiling large projects, you can flash the Jetson (from a Linux desktop) to have a larger filesystem (**note that this will erase all data on the Jetson TK1, and it takes roughly 1 hour to flash the whole eMMC!**):
~~~
sudo ./flash.sh -S 14580MiB jetson-tk1 mmcblk0p1
~~~
结果截图如下:(注意:慎重使用此命令。因为会清空你的所有数据)

The maximum value of the flash.sh -S flag that works successfully is 14580MiB. Greater values (like 16GiB) are beyond the capacity of the eMMC when the other system-required partitions are included.
### 7、Shutting down Jetson TK1 safely
Just like any Linux computer, the recommended way to shut-down or turn off Jetson TK1 is to click Shutdown in the GUI or run this in a terminal, to ensure the filesystem will not be corrupt:
~~~
sudo shutdown -h now
~~~
相信仍然有很多细节性的问题亟待发现并解决,待续。。。。
NVIDIA Jetson TK1学习与开发(三):图文详解Jetson TK1平台搭建
最后更新于:2022-04-01 16:04:03
## 图文详解Jetson TK1平台搭建
在[《NVIDIA Jetson TK1学习与开发(一)》](http://blog.csdn.net/frd2009041510/article/details/41901239)和[《NVIDIA Jetson TK1学习与开发(二)》](http://blog.csdn.net/frd2009041510/article/details/41912775)中已经对TK1的基本资源进行了简单介绍,并且推荐了一些很有用的网址供大家学习。本文将图文详解Jetson TK1平台的搭建。
### 1、开箱第一步
开箱后进入唯一的目录下,

会看到installer.sh,在当前路径执行以下命令:
~~~
sudo ./installer
~~~
(注意:此命令只能执行一次)
重启,
~~~
sudo reboot
~~~
重启后进入开机登陆界面,账号和密码均是:ubuntu
### 2、平台开发的选择
一般来说,对嵌入式的开发有两种选择,原生编译(native compilation)和交叉编译(cross-compilation)。
所谓原生编译,就是在目标板上直接运行自己的代码,以TK1为例,就是说在TK1目标板上编译代码;所谓交叉编译,这也是我们大多数采用的编译方法,简单来说就是在台式机上编译,然后挂载在目标板上运行的方式。
对于开发TK1,推荐使用原生编译。
### 3、下载并安装CUDA包
下载安装包:[https://developer.nvidia.com/cuda-toolkit-60](https://developer.nvidia.com/cuda-toolkit-60)

(注意:下载的版本要与TK1的CUDA Driver版本一致,否则后面的samples无法执行。)
下载后如下图所示:

安装方法:

~~~
sudo dpkg -i xxx.deb
~~~
### 4、更新apt-get

~~~
sudo apt-get update
~~~
### 5、安装samples和toolkit


~~~
sudo apt-get install cuda-samples-6-0
sudo apt-get install cuda-toolkit-6-0
~~~
### 6、设置当前用户下可以访问GPU

~~~
sudo usermod -a -G video $USER
~~~
### 7、修改环境变量

~~~
cd
vim .bashrc
~~~
在最后一行加上:

~~~
export PATH=/usr/local/cuda-6.0/bin:$PATH
export LD_LIBRARY_PATH=/usr/local/cuda-6.0/lib:$LD_LIBRARY_PATH
~~~
最后不要忘记执行下面的命令:

~~~
source .bashrc
~~~
### 8、查看编译环境是否安装成功

~~~
cd /usr/local/cuda
nvcc -V
~~~
从图中可以看到已经成功安装了CUDA6.0了。
### 9、编译与运行例程
查看当前目录中是否有samples:

~~~
ll
~~~
(注意是字母l。)
复制samples:

~~~
cuda-install-samples-6.0.sh /home/ubuntu/
~~~
然后,
~~~
cd
ls
~~~
可以看到NVIDIA_CUDA-6.0_Samples。

最后,
~~~
make
~~~

make完成后,可以在...NVIDIA_CUDA-6.0_Samples/bin/armv7/linux/release/gnueabihf/下可以看到编译成功的可执行文件。

### 10、示例演示
在...NVIDIA_CUDA-6.0_Samples/bin/armv7/linux/release/gnueabihf/路径下完成已提供的例子即可。
以下提供两个例子,效果截图如下所示:


至此,整个平台已经搭好,剩余的就是靠自己了。
NVIDIA Jetson TK1学习与开发(二):入门指导
最后更新于:2022-04-01 16:04:01
对于第一次使用TK1的童鞋们,可以仔细阅读以下网址提供的资料:[http://elinux.org/Jetson_TK1](http://elinux.org/Jetson_TK1)
TK1开发板的一些资料下载网址:[https://developer.nvidia.com/jetson-tk1](https://developer.nvidia.com/jetson-tk1)
入门视频教学:[http://www.iqiyi.com/a_19rrhc0aql.html](http://www.iqiyi.com/a_19rrhc0aql.html)
需要注意的是:
1、由于Jetson TK1只提供一个USB接口,因此若想连接鼠标、键盘、优盘等外设,可以自己购买一个USB扩展接口来使用。
2、Jetson TK1提供的显示接口是HDMI,对没有HDMI接口显示器的童鞋,可以买一个HDMI转VGA或者DVI接口线即可。
对于不了解这些接口的童鞋,请看下图,依次为HDMI、VGA、DVI。


下面给出Jetson TK1的硬件粗略图:

为了熟悉此平台,可以把以下的应用在自己的硬件上一一实现:基本方法可参见上面提供的网址。

NVIDIA Jetson TK1学习与开发(一):NVIDIA Jetson TK1介绍
最后更新于:2022-04-01 16:03:58
经同学推荐,向NVIDIA申请了一套NVIDIA Jetson TK1,首先感谢NVIDIA的慷慨,申请地址为:[https://registration.nvidia.com/ahr.aspx](https://registration.nvidia.com/ahr.aspx)。考虑到我的TK1将于本月底邮寄到我手中,为了好好利用该资源做研究,故提前熟悉下。
从今天开始,将记录个人学习开发TK1的点点滴滴,首先呢,就是对TK1做个简单介绍了。
下图是官网上的介绍:

下表是TEGRA K1 处理器规格参数:

前言
最后更新于:2022-04-01 16:03:55
> 原文出处:[NVIDIA Jetson TK1学习与开发笔记](http://blog.csdn.net/column/details/jetsontk1-fred.html)
作者:[frd2009041510](http://blog.csdn.net/frd2009041510)
**本系列文章经作者授权在看云整理发布,未经作者允许,请勿转载!**
# NVIDIA Jetson TK1学习与开发笔记
> NVIDIA Jetson TK1是全球首款嵌入式超级计算机,该平台采用与世界各地超级计算机相同的 NVIDIA Kepler™ 计算核心。 它能够为你提供一个全功能 NVIDIA CUDA® 平台,让你能够快速开发和部署用于计算机视觉、机器人学以及医学等领域的计算密集型系统。