商业级项目——基金客户端的架构设计与开发(上)
最后更新于:2022-04-01 14:32:52
本项目是通力基金的商业级项目,声明:在此仅用于交流学习。该项目主要有三个主要功能模块:1、基金模块:包括基金的查询、展示等功能;2、账户模块:包括登录、充值、提现、收藏等功能;3、辅助模块:消息中心、帮助、意见反馈等。
项目运行首先会有一个闪屏页,然后进入的是一个新手引导页(只显示一次),可以向右滑动,共4页图片,当滑到最后一张时,图片中会有一个进入的按钮,点击这个按钮进可以进入到App的主页。
主页中:下面是4个导航,根据用户点击的不同,会切换至不同的界面。
ok,我们现在开始来分享一下这个软件的实现过程。新手引导页的话很简单,很多人都做过。总之就是使用一个viewPager来实现,使用一个pagerAdapter来填充viewpager的内容,如果直接继承pagerAdapter这个抽象类,需要重写getCount()、isViewFromObject()、destroyItem()、instantiateItem()等4个方法才可以为viewpager填充内容。我以前的博客中详细介绍了新手引导页的开发,传送门:[http://blog.csdn.net/sdksdk0/article/details/50043843 ](http://blog.csdn.net/sdksdk0/article/details/50043843) [点击打开链接](http://blog.csdn.net/sdksdk0/article/details/50043843)。所以这里就不再重复写了。
下面来分享一个这个主界面的设计,首先使用的是一个非常经典的方法:TabHost。TabHost允许将多个控件放在同一个区域内,然后通过点击按钮来替换,这样就不用调用FragmentManager来进行替换的操作。
下面来看一下这个主界面的布局文件:
~~~
<?xml version="1.0" encoding="utf-8"?>
<RelativeLayout xmlns:android="http://schemas.android.com/apk/res/android"
android:layout_width="match_parent"
android:layout_height="match_parent">
<TabHost
android:id="@android:id/tabhost"
android:layout_width="match_parent"
android:layout_height="match_parent"
android:visibility="visible">
<RelativeLayout
android:id="@+id/content_view"
android:layout_width="match_parent"
android:layout_height="match_parent">
<FrameLayout
android:id="@android:id/tabcontent"
android:layout_width="match_parent"
android:layout_height="match_parent"
android:layout_above="@+id/bottom_view">
<fragment
android:id="@+id/jijin_view"
android:name="com.zhilinghui.fund.fragment.JijinFragment"
android:layout_width="match_parent"
android:layout_height="match_parent" />
<fragment
android:id="@+id/member_view"
android:name="com.zhilinghui.fund.fragment.MemberFragment"
android:layout_width="match_parent"
android:layout_height="match_parent" />
<RelativeLayout
android:id="@+id/fs_view"
android:layout_width="match_parent"
android:layout_height="match_parent">
<fragment
android:name="com.zhilinghui.fund.fragment.FSFragment"
android:layout_width="match_parent"
android:layout_height="match_parent" />
</RelativeLayout>
<fragment
android:id="@+id/settings_view"
android:name="com.zhilinghui.fund.fragment.SettingsFragment"
android:layout_width="match_parent"
android:layout_height="match_parent" />
</FrameLayout>
<RelativeLayout
android:id="@+id/bottom_view"
android:layout_width="match_parent"
android:layout_height="wrap_content"
android:layout_alignParentBottom="true"
android:background="@drawable/tab_bar_bg"
android:gravity="center_vertical">
<TabWidget
android:id="@android:id/tabs"
android:layout_width="match_parent"
android:layout_height="wrap_content" />
<ImageView
android:id="@+id/tab_selected"
android:layout_width="wrap_content"
android:layout_height="wrap_content"
android:adjustViewBounds="true"
android:background="@drawable/tab_scroll"
android:contentDescription="@null"
android:visibility="gone" />
<ImageView
android:id="@+id/notice_logo"
android:layout_width="wrap_content"
android:layout_height="wrap_content"
android:layout_alignParentRight="true"
android:layout_marginRight="12dp"
android:layout_marginTop="10dp"
android:adjustViewBounds="true"
android:background="@drawable/notice_logo"
android:contentDescription="@null"
android:visibility="gone" />
</RelativeLayout>
</RelativeLayout>
</TabHost>
<RelativeLayout
android:id="@+id/index_view"
android:layout_width="match_parent"
android:layout_height="match_parent"
android:background="@color/transparent"
android:orientation="vertical">
<android.support.v4.view.ViewPager
android:id="@+id/viewpager_index"
android:layout_width="match_parent"
android:layout_height="match_parent" />
<com.zhilinghui.fund.widget.PageControlView
android:id="@+id/pageControlView_index"
android:layout_width="wrap_content"
android:layout_height="wrap_content"
android:layout_alignParentBottom="true"
android:layout_centerHorizontal="true"
android:layout_marginBottom="30dp" />
</RelativeLayout>
~~~
在Activity中要找到这些按钮:
~~~
setContentView(R.layout.a_main);
bottom_view = (RelativeLayout) findViewById(R.id.bottom_view);
mTabHost = (TabHost) findViewById(android.R.id.tabhost);
mTabs = (TabWidget) findViewById(android.R.id.tabs);
mTabs.setDividerDrawable(null);
~~~
从上面的布局文件中,我们可以看到,这个TabHost里面是加了图片和文字的,这样看起来会更加美观一点,添加图片的方法如下:
~~~
tab01 = (LinearLayout) LayoutInflater.from(this).inflate(R.layout.item_tab_view, null);
tab01.setBackgroundResource(R.drawable.tab_jijin_drawable);
tab02 = (LinearLayout) LayoutInflater.from(this).inflate(R.layout.item_tab_view, null);
tab02.setBackgroundResource(R.drawable.tab_member_drawable);
tab03 = (LinearLayout) LayoutInflater.from(this).inflate(R.layout.item_tab_view, null);
tab03.setBackgroundResource(R.drawable.tab_fs_drawable);
tab04 = (LinearLayout) LayoutInflater.from(this).inflate(R.layout.item_tab_view, null);
tab04.setBackgroundResource(R.drawable.tab_settings_drawable);
mTabHost.addTab(mTabHost.newTabSpec("0")
.setIndicator(tab01)
.setContent(R.id.jijin_view));
mTabHost.addTab(mTabHost.newTabSpec("1")
.setIndicator(tab02)
.setContent(R.id.member_view));
mTabHost.addTab(mTabHost.newTabSpec("2")
.setIndicator(tab03)
.setContent(R.id.fs_view));
mTabHost.addTab(mTabHost.newTabSpec("3")
.setIndicator(tab04)
.setContent(R.id.settings_view));
mTabHost.setCurrentTab(0); //设当前 Tab 为 0
~~~
添加点击事件:
~~~
mTabHost.setOnTabChangedListener(mOnTabChangeListener);
~~~
设置适配器:
~~~
// 导航栏适配器
adapter = new NavigatePagerAdapter(this, ids, mIndexOverListener, page_control);
viewpager.setAdapter(adapter);
viewpager.setOnPageChangeListener(mOnPageChangeListener);
~~~
(因为我虚拟机的分辨率没设置好,貌似图片有点失真了)
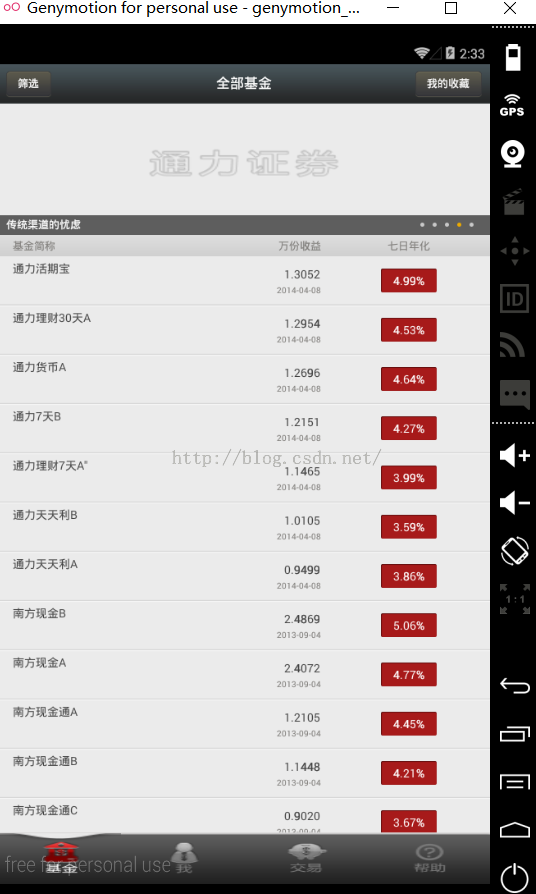
在第一页中上面那个可以滑动的自然也是一个viewpager了,下面就是一个listview第一个页面还具有下列刷新(包括上下箭头和时间)和加载更多的功能。基金是有一个后台的,从服务器传输数据显示在这个轮播条上面。下面的数据条目也是一样,因为这里没有过多的图片,所以不需要设置图片缓存(而某些项目的listview条目中有图片的话,我们就应该要考虑增加图片缓存功能了,从而避免太耗用户流量或内存溢出等问题)。当我们点击这个基金进去的时候,例如第一个“活期通力宝",就会跳转到另一个界面,这里详细的描述了该基金的信息,例如基金经理、基金代码、收益率、同类排名等内容,然后还会加上一个折线图,从而更加清晰的描述这个项目,给用户带来更好的体验。还有就是当数据与后台传输的时候,在这个界面还会有一个圆圈在转动,若网络无法连接,则会有一个我们自定义好了的提示界面,说网络无法连接。(在这里不提供公司的后台接口,所以这里的数据虚拟化了显示)。
~~~
@Override
public void onRefresh() {
mController.execute(new UIAsyncTask(getFavHandler, mDatabaseAdapter, BaseHandlerUI.REQUEST_GET_FAV));
}
@Override
public void onLoadMore() {
onLoad();
}
private void onLoad() {
mListView.stopRefresh();
mListView.stopLoadMore();
}
~~~
~~~
@SuppressLint("SetJavaScriptEnabled")
private void loadUrl() {
showProgressDialog(context, context.getString(R.string.dlg_loading));
thread = new Thread(new Runnable() {
@SuppressWarnings("deprecation")
@Override
public void run() {
webview.getSettings().setJavaScriptEnabled(true);
// webview.getSettings().setPluginsEnabled(true);
webview.getSettings().setSupportZoom(true);
webview.getSettings().setBuiltInZoomControls(true);
//加载url前,设置图片阻塞
webview.getSettings().setBlockNetworkImage(true);
webview.loadUrl(bean.url);
MyWebViewClient myWebView = new MyWebViewClient();
webview.setWebViewClient(myWebView);
}
});
thread.start();
}
~~~
全部基金listview的适配:
~~~
@SuppressLint("ResourceAsColor")
public class Text_Adapter
extends BaseAdapter {
List<FundTitleBean> items = new ArrayList<FundTitleBean>();
private LayoutInflater mInflater;
private OnClickListener mOnClick;
Context context;
private boolean left = true;
public Text_Adapter(Context context, List<FundTitleBean> items,
OnClickListener mOnClick, boolean left) {
super();
this.context = context;
this.mInflater = LayoutInflater.from(context);
this.items = items;
this.mOnClick = mOnClick;
this.left = left;
}
@Override
public int getCount() {
return items.size();
}
@Override
public Object getItem(int position) {
return position;
}
@Override
public long getItemId(int position) {
return position;
}
@Override
public View getView(int position, View convertView, ViewGroup parent) {
ViewHolder holder; // ViewHolder 是内部类, 只有一个成员(name) TextView
if (convertView == null) {
holder = new ViewHolder();
convertView = mInflater.inflate(R.layout.item_list_txt_view, null);
holder.name = (TextView) convertView
.findViewById(R.id.name); // 这里的 name 是一个 TextView
convertView.setTag(holder);
} else {
holder = (ViewHolder) convertView.getTag(); //getTag 返回: 一个 Object 引用
}
holder.name.setOnClickListener(mOnClick);
holder.name.setTag(position);
holder.name.setText(items.get(position).name);
if (items.get(position).isSelected) {
if (left) {
convertView.setBackgroundResource(R.drawable.choose_s_left);
} else {
convertView.setBackgroundResource(R.drawable.choose_s_right);
}
} else {
convertView.setBackgroundResource(R.drawable.choose_list_selector);
}
return convertView;
}
private class ViewHolder {
TextView name;
}
}
~~~
无网络时的错误提示Activity代码:
~~~
public void initView() {
title = (TextView) findViewById(R.id.title_txt);
title.setText(getString(R.string.dlg_net_err));
left_btn = (TextView) findViewById(R.id.left_btn);
left_btn.setVisibility(View.VISIBLE);
left_btn.setOnClickListener(this);
left_btn.setVisibility(View.VISIBLE);
right_btn = (TextView) findViewById(R.id.right_btn);
right_btn.setVisibility(View.GONE);
}
~~~
说到这里,还需要分享一个知识就是关于Application的使用:在很多大型项目中都会有
~~~
Application和Actovotu,Service一样是android框架的一个系统组件,当android程序启动时系统会创建一个 application对象,用来
* 存储系统的一些信息。通常我们是不需要指定一个Application的,这时系统会自动帮我们创建,如果需要创建自己 的Application,也很简
* 单创建一个类继承 Application并在manifest的application标签中进行注册(只需要给Application标签增加个name属性把自己
* 的 Application的名字定入即可)。
* android系统会为每个程序运行时创建一个Application类的对象且仅创建一个,所以Application可以说是单例 (singleton)模式的一个类.且
* application对象的生命周期是整个程序中最长的,它的生命周期就等于这个程序的生命周期。因为它是全局 的单例的,所以在不同的Activity,Service中
* 获得的对象都是同一个对象。所以通过Application来进行一些,数据传递,数据共享 等,数据缓存等操作。
* <p/>
* 二.程序的入口
* Android使用Google Dalvik VM,相对于传统Java VM而言有着很大的不同,在Sun的Java体系中入口点和标准c语言一样是main(),
* 而每个Android程序都包含着一个Application实例,一个Application实例中有多个Activity、 Service、ContentProvider或
* Broadcast Receiver。
* 其实在android.app.Application这个包的onCreate才是真正的Android入口点,只不过大多数开发者无需重写该类。
* <p/>
* 第一步、写一个全局的单例模式的MyApplication继承自Application 重写onCreate
* 第二步、配置全局的Context
* <application
android:name="com.zhilinghui.fund.app.GFFApp"></application>
~~~
ok,今天主要是分享了一下这个商业级基金项目的导航设置和第一个界面(主界面)的设计与功能介绍。下一次将分享”个人中心“、”交易界面"、“帮助中心”的设计与实现,当然,在下一篇博客中我会贴出这个项目的源码哦!今天的就暂不提供源码,欢迎关注!
### 记住:下一次博客会贴出整个项目的源码。可免费下载使用!欢迎关注!