(十八)——使用意图筛选器和实现浏览网页(附源码)
最后更新于:2022-04-01 20:17:09
**使用意图筛选器**
**[点击下载源码](http://download.csdn.net/detail/u012904198/7374025)**
1、创建一个Intents项目,给该项目添加一个新类,命名为MyBrowserActivity,在res/layout文件夹下新增一个browser.xml;
2、在AndroidManifest.xml文件中添加如下代码:
添加权限:
~~~
~~~
action:动作;category:类别;data:指明获取的数据类型。
3、在main.xml文件中添加三个Button:
~~~
~~~
4、在IntentsActivity.java文件中添加三个Button对应的三个点击方法:
~~~
public void onClickWebBrowser(View v) {
Intent intent = new Intent(android.content.Intent.ACTION_VIEW,
Uri.parse("http://网址"));//此处输入百度网址,CSDN不让加链接...
//使用createChooser()的好处:
//1、将显示的选择对话框的标题改掉,且没有了Use by default for this action选项
//2、当没有活动与程序的Intent对象匹配时,应用程序不会崩溃
//startActivity(intent.createChooser(intent, "Open URL using..."));
startActivity(intent);
}
public void onClickMakeCalls(View v) {
Intent intent = new Intent(android.content.Intent.ACTION_DIAL,
Uri.parse("tel:+651234567"));
startActivity(intent);
}
public void onClickLaunchMyBrowser(View v) {
Intent intent = new Intent("net.zenail.MyBrowser");
intent.setData(Uri.parse("http://网址"));//此处输入百度网址,CSDN不让加链接...
startActivity(intent);
}
~~~
5、在browser.xml中添加一个WebView:
~~~
';
(十七)——使用意图调用内置应用程序
最后更新于:2022-04-01 20:17:06
**使用意图调用内置应用程序**
1、创建一个新的Android项目并命名为Intents,在main.xml文件中添加两个Button:
~~~
~~~
2、在IntentsActivity.java文件中添加如下代码:
~~~
public void onClickWebBrowser(View v) {//浏览器
Intent intent = new Intent(android.content.Intent.ACTION_VIEW,
Uri.parse("http://网址"));//网址处输入百度网址,CSDN不让直接写网址...
startActivity(intent);
}
public void onClickMakeCalls(View v) {//打电话
Intent intent = new Intent(android.content.Intent.ACTION_DIAL,
Uri.parse("tel:+651234567"));
startActivity(intent);
}
~~~
3、运行程序,效果如下:

点击Web Browser:

点击Make Calls:

总结:
在Android中,意图通常是成对出项:动作(Action)和数据(data)。动作描述了要执行什么,数据则指定了受影响的对象。
动作的一些示例:Action_VIEW、ACTION_DIAL、ACTION_PICK;
数据的一些示例:tel:+651234567、geo:37.827500,-122.481670、content://contacts。
';
(十六)——碎片之间进行交互(附源码)
最后更新于:2022-04-01 20:17:04
**碎片之间进行交互**
**[点击下载源码](http://download.csdn.net/detail/u012904198/7337195)**
很多时候,一个活动中包含一个或者多个碎片,它们彼此协作,向用户展示一个一致的UI。在这种情况下,碎片之间能进行通信并交换数据十分重要。
1、使用上一篇中创建的同一个项目,在fragment.xml中添加TextView的标识id:
~~~
android:id="@+id/lblFragment1"
~~~
2、在fragment2.xml中添加一个Button,用于与fragment1进行交互:
~~~
~~~
3、将两个碎片重新添加到main.xml中:
~~~
';
(十五)——碎片的生命周期(附源码)
最后更新于:2022-04-01 20:17:02
**碎片的生命周期**
**[点击下载源码](http://download.csdn.net/detail/u012904198/7336969)**
与活动类似,碎片具有自己的生命周期。理解了碎片的生命周期后,我们可以在碎片被销毁时正确地保存其实例,在碎片被重建时将其还原到前一个状态。
1、使用上一篇的项目Fragments,在Fragment1.java文件中添加如下代码:
~~~
package net.zenail.Fragments;
import android.app.Activity;
import android.os.Bundle;
import android.support.v4.app.Fragment;
import android.util.Log;
import android.view.LayoutInflater;
import android.view.View;
import android.view.ViewGroup;
public class Fragment1 extends Fragment {
@Override
public View onCreateView(LayoutInflater inflater, ViewGroup container,
Bundle savedInstanceState) {
// TODO Auto-generated method stub
Log.d("Fragment 1", "onCreateView");
// 实例化布局文件
return inflater.inflate(R.layout.fragment1, container, false);
}
@Override
public void onAttach(Activity activity) {
// TODO Auto-generated method stub
super.onAttach(activity);
Log.d("Fragment 1", "onAttach");
}
@Override
public void onCreate(Bundle savedInstanceState) {
// TODO Auto-generated method stub
super.onCreate(savedInstanceState);
Log.d("Fragment 1", "onCreate");
}
@Override
public void onActivityCreated(Bundle savedInstanceState) {
// TODO Auto-generated method stub
super.onActivityCreated(savedInstanceState);
Log.d("Fragment 1", "onActivityCreated");
}
@Override
public void onStart() {
// TODO Auto-generated method stub
super.onStart();
Log.d("Fragment 1", "onStart");
}
@Override
public void onResume() {
// TODO Auto-generated method stub
super.onResume();
Log.d("Fragment 1", "onResume");
}
@Override
public void onPause() {
super.onPause();
Log.d("Fragment 1", "onPause");
};
public void onStop() {
// TODO Auto-generated method stub
super.onStop();
Log.d("Fragment 1", "onStop");
}
@Override
public void onDestroyView() {
// TODO Auto-generated method stub
super.onDestroyView();
Log.d("Fragment 1", "onDestroyView");
}
@Override
public void onDestroy() {
// TODO Auto-generated method stub
super.onDestroy();
Log.d("Fragment 1", "onDestroy");
}
@Override
public void onDetach() {
// TODO Auto-generated method stub
super.onDetach();
Log.d("Fragment 1", "onDetach");
}
}
~~~
2、按Ctrl+F11,将Android模拟器切换到横向模式;
3、在Eclipse中按下F11键,在模拟器上调试应用程序;
4、当应用程序加载到模拟器中后,LogCat窗口会显示如下内容:

5、单击模拟器上的Home按钮,LogCat窗口中显示如下输出:

6、在模拟器上长按Home按钮,再单击Fragments以启动应用程序,LogCat显示如下:

7、最后,单击模拟器中Back按钮,LogCat窗口显示如下输出:

8、由上面的实例可知,碎片经历的过程如下:
碎片被创建时:onAttach()-->onCreate()-->onCreateView()-->onActivityCreated();
碎片进入后台模式时:onPause()-->onStop();
碎片变为可见时:onStart()-->onResume();
碎片被销毁时:onPause()-->onStop()-->onDestroyView()-->onDestroy()-->onDetach();
9、与活动一样,碎片可以使用Bundle对象在以下状态中还原碎片的实例:
onCreate()、onCreateView()、onActivityCreated()。
';
(十四)——在运行时添加碎片(附源码)
最后更新于:2022-04-01 20:17:00
**在运行时添加碎片**
**[点击获取源码](http://download.csdn.net/detail/u012904198/7336767)**
将UI分割为多个可配置的部分是碎片的优势之一,但其真正强大之处在于可在运行时动态地把它们添加到活动中。
1、使用上一篇创建的Fragments项目,在main.xml文件中注释掉两个元素;
2、在FragmentActivity.java中添加下面的代码:
~~~
FragmentManager fragmentManager = getSupportFragmentManager();//向活动添加碎片
FragmentTransaction fragmentTransaction = fragmentManager
.beginTransaction();//添加FragmentTransaction来操作碎片
//获取设备当前的屏幕信息:判断处于纵向模式还是横向模式
WindowManager windowManager = getWindowManager();
Display display = windowManager.getDefaultDisplay();
if (display.getWidth() > display.getHeight()) {
//横向模式
Fragment1 fragment1 = new Fragment1();
fragmentTransaction.replace(android.R.id.content, fragment1);
} else {
//纵向模式
Fragment2 fragment2 = new Fragment2();
fragmentTransaction.replace(android.R.id.content, fragment2);
}
fragmentTransaction.commit();提交更改
~~~
3、在模拟器上运行程序,效果如下:
当设备处于纵向模式时,显示碎片2,:

当设备处于横向模式时,显示碎片1:

';
(十三)——碎片(一)
最后更新于:2022-04-01 20:16:57
**碎片**
碎片可看作另外一种形式的活动,可以创建碎片来包含视图。
碎片总是嵌入在活动中,一般有两种常见形式:
1、碎片A和碎片B分别处于不同的活动中,当选择碎片A中的某一项时,触发碎片B启动;
2、碎片A和碎片B处于同一个活动中,共享同一活动,以创建更佳的用户体验。
[点此下载完整源码~](http://download.csdn.net/detail/u012904198/7327509)**(代码适用于本文章所讲)**
1、创建一个名为“Fragments”的项目,在res/layout文件夹下,分别新建fragment1.xml、fragment2.xml;在当前包名下,分别新建Fragment1.java、Fragment2.java:
fragment1.xml:
~~~
~~~
fragment2.xml:
~~~
~~~
Fragment1.java:
~~~
package net.zenail.fragments;
import android.app.Fragment;
import android.os.Bundle;
import android.view.LayoutInflater;
import android.view.View;
import android.view.ViewGroup;
public class Fragment1 extends Fragment {// 继承Fragment基类
// 绘制碎片UI:使用一个LayoutInflauter对象来增大指定XML文件中的UI。container参数引用父ViewGroup,准备用于嵌入碎片的活动。
// savedInstanceState参数允许将碎片还原到前一次保存的状态。
@Override
public View onCreateView(LayoutInflater inflater, ViewGroup container,
Bundle savedInstanceState) {
// TODO Auto-generated method stub
return inflater.inflate(R.layout.fragment1, container, false);
}
}
~~~
Fragment2.java:
~~~
package net.zenail.fragments;
import android.app.Fragment;
import android.os.Bundle;
import android.view.LayoutInflater;
import android.view.View;
import android.view.ViewGroup;
public class Fragment2 extends Fragment {
@Override
public View onCreateView(LayoutInflater inflater, ViewGroup container,
Bundle savedInstanceState) {
// TODO Auto-generated method stub
return inflater.inflate(R.layout.fragment2, container, false);
}
}
~~~
2、在main.xml文件中添加两个碎片:
~~~
';
(十二)——使用意图传递数据的几种方式
最后更新于:2022-04-01 20:16:55
**使用意图传递数据的几种方式**
**[点此获取完整代码](http://download.csdn.net/detail/u012904198/7312525)**
我们除了要从活动返回数据,也常常要传递数据给活动。对此我们可以使用Intent对象将这些数据传递给目标活动。
1、创建一个名为PassingData的项目,在activity_main.xml文件中添加一个Button:
~~~
~~~
2、在res/layout文件夹中添加一个新的secondactivity.xml文件,添加TextView和Button:
~~~
~~~
5、在MainActivity.java文件中添加如下代码:
~~~
public void onClick(View view) {
Intent intent = new Intent("net.zenail.PassingData.SecondActivity");
// 法一:使用putExtra()方法为Intent对象添加了两个键/值对:String和integer类型
intent.putExtra("str1", "This is a string");
intent.putExtra("age1", 25);
// 法二:创建Bundle对象,向其添加两个键/值对,再使用putExtras添加给Intent对象
Bundle extras = new Bundle();
extras.putString("str2", "This is another string");
extras.putInt("age2", 35);
intent.putExtras(extras);
// 启动活动并设置1为请求码
startActivityForResult(intent, 1);
}
@Override
protected void onActivityResult(int requestCode, int resultCode, Intent data) {
// TODO Auto-generated method stub
super.onActivityResult(requestCode, resultCode, data);
if (requestCode == 1) {
if (resultCode == RESULT_OK) {
// 用getIntExtra()获取用putExtra()设置的整数值
Toast.makeText(this,
Integer.toString(data.getIntExtra("age3", 0)),
Toast.LENGTH_SHORT).show();
// 用getData()获取用setData()设置的字符串值
Toast.makeText(this, data.getData().toString(),
Toast.LENGTH_SHORT).show();
}
}
}
~~~
6、运行,效果如下:
点击按钮:

出现如下画面:


消息框消失,点击按钮,出现如下画面:


';
(十一)——从意图返回结果
最后更新于:2022-04-01 20:16:53
**从意图返回结果**
startActivity()方法调用另一个活动,但并没有返回结果给当前活动。此时如想从一个活动中回传数据,就要使用startActivityForResult()方法。
**[点此获取完整代码~ ](http://download.csdn.net/detail/u012904198/7311961)**
1、使用上一篇中创建的项目,在secondactivity.xml文件中添加文本框和按钮,代码如下:
~~~
';
(十)——使用意图链接活动
最后更新于:2022-04-01 20:16:51
**使用意图链接活动**
1、新建一个名为“UsingIntent”的项目,右击src文件夹下的包名,选择New-->Class选项,并将新的类文件名命名为“SecondActivity”;
2、打开AndroidManifest.xml文件,添加如下代码:
~~~
~~~
3、在res/layout文件夹下新建一个secondactivity.xml文件,修改代码如下:
~~~
~~~
4、打开SecondActivity.java文件,添加如下代码,添加创建方法:
~~~
protected void onCreate(Bundle savedInstanceState) {
// TODO Auto-generated method stub
super.onCreate(savedInstanceState);
setContentView(R.layout.secondactivity);
}
~~~
5、在activity_main.xml文件中添加如下代码,新建一个Button:
~~~
~~~
6、在MainActivity.java中添加如下代码,添加点击方法:
~~~
public void onClick(View v) {
startActivity(new Intent("net.zenail.SecondActivity"));// 将意图筛选器的名称传进去
// 如果要调用的活动是定义在同一个项目中,则可以重写上面的方法: startActivity(new Intent(this,
// SecondActivity.class));
}
~~~
7、运行,效果如下:


**[点击下载完整代码~](http://download.csdn.net/detail/u012904198/7309201)**
';
(九)——更复杂的进度对话框
最后更新于:2022-04-01 20:16:48
**显示操作进度的对话框**
1、使用上一篇创建的同一项目,在activity_main.xml文件中添加一个Button:
~~~
~~~
2、在MainActivity.java文件中添加具体的进度条实现代码:
首先添加onClick3()方法:
~~~
public void onClick3(View v) {
showDialog(1);// id为1,在调用回调方法onCreateDialog()时,将id传进去,使其选择case 1情况。
progressDialog.setProgress(0);// 从0开始
new Thread(new Runnable() {
@Override
public void run() {
// TODO Auto-generated method stub
for (int i = 1; i <= 10; i++) {
try {
Thread.sleep(1000);
progressDialog.incrementProgressBy(100 / 10);// 步进为10
} catch (InterruptedException e) {
// TODO: handle exception
e.printStackTrace();
}
}
progressDialog.dismiss();// 销毁对话框
}
}).start();
}
~~~
再在onCreateDialog()回调方法中添加id=1时的代码(即实现显示操作进度对话框的代码):
~~~
case 1:
progressDialog = new ProgressDialog(this);
progressDialog.setIcon(R.drawable.ic_launcher);
progressDialog.setTitle("Downloading files...");
progressDialog.setProgressStyle(ProgressDialog.STYLE_HORIZONTAL);// 设置进度条样式
progressDialog.setButton(DialogInterface.BUTTON_POSITIVE, "OK",// 设置OK按钮
new DialogInterface.OnClickListener() {
@Override
public void onClick(DialogInterface dialog, int which) {
// TODO Auto-generated method stub
Toast.makeText(getBaseContext(), "OK clicked!",
Toast.LENGTH_SHORT).show();
}
});
progressDialog.setButton(DialogInterface.BUTTON_NEGATIVE, "Cancel",// 设置取消按钮
new DialogInterface.OnClickListener() {
@Override
public void onClick(DialogInterface dialog, int which) {
// TODO Auto-generated method stub
Toast.makeText(getBaseContext(), "Cancel clicked!",
Toast.LENGTH_SHORT).show();
}
});
return progressDialog;
~~~
3、运行一下,效果如下:

**[点击此处下载完整代码~](http://download.csdn.net/detail/u012904198/7307257)**
';
(八)——显示进度对话框
最后更新于:2022-04-01 20:16:46
**显示进度对话框**
我们常常有这样的经历:执行某一应用程序时,需要等待一会,这时会显示一个进度(Please Wait)对话框,让用户知道操作正在进行。
我们继续在上一篇中的程序中添加代码~
1、在上一篇的activity_main.xml文件中添加一个Button,添加后的代码如下:
~~~
~~~
2、在MainActivity.java中添加一个onClick2()方法,添加的代码块如下:
~~~
public void onClick2(View v) {
// ---show the dialog---
final ProgressDialog dialog = ProgressDialog.show(this,
"Doing something", "Please wait...", true);//创建一个进度对话框
new Thread(new Runnable() {//使用Runnable代码块创建了一个Thread线程
@Override
public void run() {//run()方法中的代码将在一个单独的线程中执行
// TODO Auto-generated method stub
try {
// ---simulate doing something lengthy---
Thread.sleep(5000);//模拟一个耗时5秒的操作
// ---dismiss the dialog---
dialog.dismiss();//5秒钟后,调用dismiss方法关闭进度对话框
} catch (InterruptedException e) {
// TODO: handle exception
e.printStackTrace();
}
}
}).start();
}
~~~
3、运行,点击第二个按钮,效果如下:

5秒后,进度条自动消失,程序恢复原来的状态~
**[点击下载完整代码~](http://download.csdn.net/detail/u012904198/7305765)**
';
(七)——显示对话框窗口
最后更新于:2022-04-01 20:16:44
显示对话框窗口
1、创建Dialog1项目,在activity_main.xml文件中添加一个Button:
~~~
~~~
2、在MainActivity.java文件中实现创建对话框,添加代码如下:
~~~
package com.example.dialog;
import android.os.Bundle;
import android.app.Activity;
import android.app.AlertDialog;
import android.app.Dialog;
import android.content.DialogInterface;
import android.view.Menu;
import android.view.View;
import android.widget.Toast;
public class MainActivity extends Activity {
CharSequence[] items = { "Google", "Apple", "Microsoft" };
boolean[] itemsChecked = new boolean[items.length];
@Override
protected void onCreate(Bundle savedInstanceState) {
super.onCreate(savedInstanceState);
setContentView(R.layout.activity_main);
}
@SuppressWarnings("deprecation")
public void onClick(View v) {
showDialog(0);//点击按钮时,显示对话框,此方法接受一个整型参数,用来标识要显示的特定对话框(这里只创建了标识为0的对话框)。
}
@Override
@Deprecated
//onCreateDialog()方法是一个用于创建由活动管理的对话框的回调方法。当调用showDialog()时,将调用此回调方法。
protected Dialog onCreateDialog(int id) {
// TODO Auto-generated method stub
switch (id) {
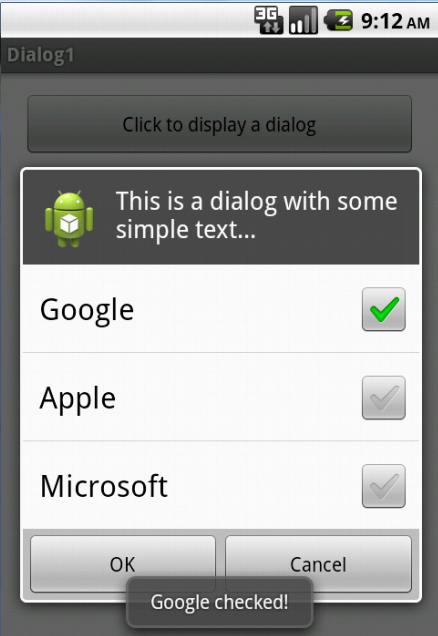
case 0://要创建一个对话框,需要使用AlertDialog类的Builder构造函数来设置不同的属性,如图标、标题、按钮及复选框等。
return new AlertDialog.Builder(this)//调用AlertDialog对象的Builder构造函数。
.setIcon(R.drawable.ic_launcher)
.setTitle("This is a dialog with some simple text...")
.setPositiveButton("OK",//设置OK按钮
new DialogInterface.OnClickListener() {//设置点击事件
@Override
public void onClick(DialogInterface dialog,
int which) {
// TODO Auto-generated method stub
Toast.makeText(getBaseContext(),
"OK clicked!", Toast.LENGTH_SHORT)
.show();
}
})
.setNegativeButton("Cancel",//设置Cancel按钮
new DialogInterface.OnClickListener() {//设置点击事件
@Override
public void onClick(DialogInterface dialog,
int which) {
// TODO Auto-generated method stub
Toast.makeText(getBaseContext(),
"Cancel clicked!",
Toast.LENGTH_SHORT).show();
}
})
.setMultiChoiceItems(items, itemsChecked,//设置复选框
new DialogInterface.OnMultiChoiceClickListener() {//设置点击事件
@Override
public void onClick(DialogInterface dialog,
int which, boolean isChecked) {
// TODO Auto-generated method stub
Toast.makeText(
getBaseContext(),
items[which]//通过传入检验是否点击的参数isChecked来选择返回的消息。
+ (isChecked ? " checked!"
: " unchecked!"),
Toast.LENGTH_SHORT).show();
}
}).create();
}
return null;
}
@Override
public boolean onCreateOptionsMenu(Menu menu) {
// Inflate the menu; this adds items to the action bar if it is present.
getMenuInflater().inflate(R.menu.main, menu);
return true;
}
}
~~~
3、运行一下,显示如下图:
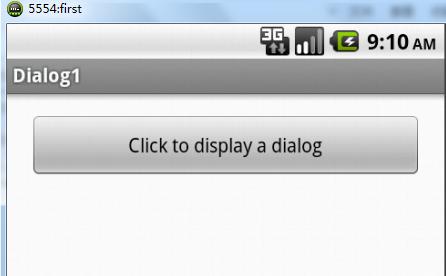
点击按钮:
';
Android常见UI组件之ListView(二)——定制ListView
最后更新于:2022-04-01 20:16:42
**Android常见UI组件之ListView(二)——定制ListView**
这一篇接上篇,展示ListView中选择多个项及实现筛选功能~
1、在位于res/values文件夹下的strings.xml文件中添加如下代码:
~~~
BasicView5
Settings
Hello world!
- Dwight D. Eisenhower
- John F. Kennedy
- Lyndon B. Johnson
- Richard Nixon
- Gerald Ford
- Jimmy Carter
- Ronald Reagan
- George H.W. Bush
- Bill Clinton
- George W. Bush
- Barack Obama
~~~
2、修改上一篇中的BasicView5.java文件的代码,修改后的代码如下:
~~~
package com.example.basicview5;
import android.os.Bundle;
import android.app.Activity;
import android.app.ListActivity;
import android.view.Menu;
import android.view.View;
import android.widget.ArrayAdapter;
import android.widget.ListView;
import android.widget.Toast;
public class MainActivity extends ListActivity {
String[] presidents;//将列表信息存储在strings.xml文件中,再以编程方式读取
@Override
protected void onCreate(Bundle savedInstanceState) {
super.onCreate(savedInstanceState);
// ---no need to call this---//
// setContentView(R.layout.activity_main);
ListView listView = getListView();// 获取ListActivity的列表视图
listView.setChoiceMode(ListView.CHOICE_MODE_MULTIPLE);// 可以选择多个项
listView.setTextFilterEnabled(true);//启用筛选功能,在键盘上输入,ListView自动筛选
// getResources()方法以编程方式检索与应用程序捆绑的资源
presidents = getResources().getStringArray(R.array.presidents_array);
setListAdapter(new ArrayAdapter(this,
android.R.layout.simple_list_item_checked, presidents));
}
public void onListItemClick(ListView parent, View v, int position, long id) {
Toast.makeText(this, "You have selected " + presidents[position],
Toast.LENGTH_SHORT).show();
}
@Override
public boolean onCreateOptionsMenu(Menu menu) {
// Inflate the menu; this adds items to the action bar if it is present.
getMenuInflater().inflate(R.menu.main, menu);
return true;
}
}
~~~
3、运行程序,效果如下:

4、在activity_main.xml文件中添加代码如下:
~~~
~~~
5、在BasicView5.java文件中添加代码,如下:
~~~
package com.example.basicview5;
import android.os.Bundle;
import android.app.Activity;
import android.app.ListActivity;
import android.view.Menu;
import android.view.View;
import android.widget.ArrayAdapter;
import android.widget.ListView;
import android.widget.Toast;
public class MainActivity extends ListActivity {
String[] presidents;//将列表信息存储在strings.xml文件中,再以编程方式读取
@Override
protected void onCreate(Bundle savedInstanceState) {
super.onCreate(savedInstanceState);
// ---need to call this---//
setContentView(R.layout.activity_main);//由于在xml文件中添加了一个ListView部分填充一个活动,所以需要加载活动内容。
ListView listView = getListView();// 获取ListActivity的列表视图
listView.setChoiceMode(ListView.CHOICE_MODE_MULTIPLE);// 可以选择多个项
listView.setTextFilterEnabled(true);//启用筛选功能,在键盘上输入,ListView自动筛选
// getResources()方法以编程方式检索与应用程序捆绑的资源
presidents = getResources().getStringArray(R.array.presidents_array);
setListAdapter(new ArrayAdapter(this,
android.R.layout.simple_list_item_checked, presidents));
}
public void onListItemClick(ListView parent, View v, int position, long id) {
Toast.makeText(this, "You have selected " + presidents[position],
Toast.LENGTH_SHORT).show();
}
public void onClick(View view) {
ListView listView = getListView();
String itemsSelected = "Selected items: \n";
for(int i = 0; i < listView.getCount(); i++) {
if(listView.isItemChecked(i)) {//找出被选中的item
itemsSelected += listView.getItemAtPosition(i) + "\n";//返回指定位置的項的名称
}
}
Toast.makeText(this, itemsSelected, Toast.LENGTH_LONG).show();
}
@Override
public boolean onCreateOptionsMenu(Menu menu) {
// Inflate the menu; this adds items to the action bar if it is present.
getMenuInflater().inflate(R.menu.main, menu);
return true;
}
}
~~~
6、运行效果如下:

筛选并选中几个项,再按按钮显示选择了那些项:

';
Android常见UI组件之ListView(一)
最后更新于:2022-04-01 20:16:39
**使用ListView显示一个长的项列表**
1、新建一个名为“BasicView5”的Android项目;
2、修改BasicView5.java文件,修改后的程序如下:
~~~
package com.example.basicview5;
import android.os.Bundle;
import android.app.Activity;
import android.app.ListActivity;
import android.view.Menu;
import android.view.View;
import android.widget.ArrayAdapter;
import android.widget.ListView;
import android.widget.Toast;
public class MainActivity extends ListActivity {
String[] presidents = { "Dwight D. Eisenhower", "John F. Kennedy",
"Lyndon B. Johnson", "Richard Nixon", "Gerald Ford",
"Jimmy Carter", "Ronald Reagan", "George H. W. Bush",
"Bill Clinton", "George W. Bush", "Barack Obama" };
@Override
protected void onCreate(Bundle savedInstanceState) {
super.onCreate(savedInstanceState);
// ---no need to call this---//
// setContentView(R.layout.activity_main)
setListAdapter(new ArrayAdapter(this,
android.R.layout.simple_expandable_list_item_1, presidents));
}
public void onListItemClick(ListView parent, View v, int position, long id) {
Toast.makeText(this, "You have selected " + presidents[position],
Toast.LENGTH_SHORT).show();
}
@Override
public boolean onCreateOptionsMenu(Menu menu) {
// Inflate the menu; this adds items to the action bar if it is present.
getMenuInflater().inflate(R.menu.main, menu);
return true;
}
}
~~~
3、运行结果:如下图,为点击“Richard Nixon”后的样子:

详解:
(1)BasicView5类扩展了ListActivity类,ListActivity类扩展了Activity类并通过绑定到一个数据源来显示一个项列表;
(2)无需修改main.xml来包含ListView:ListActivity类本身已经包含了一个ListView,所以在onCreate()方法中,不需要调用setContentView()方法来从main.xml文件中加载用户界面;
(3)在onCreate()方法中,使用setListAdapter()方法来用一个ListView以编程方式填充活动的整个屏幕。ArrayAdapter对象管理将由ListView显示的字符串数组;
(4)单击ListView中的一个列表项时,会触发onListItemClick()方法;
下一篇来实现对ListView定制通用视图~
';
Eclipse启动时提示fail to create the Java Virtual Machine问题的解决
最后更新于:2022-04-01 20:16:37
今天偶然打开Eclipse,发现无法打开,出现如下提示:

后来经过上网查询,发现是eclipse.ini文件的问题,打开eclipse安装目录下的eclipse.ini文件:
~~~
-startup
plugins/org.eclipse.equinox.launcher_1.3.0.v20120522-1813.jar
--launcher.library
plugins/org.eclipse.equinox.launcher.win32.win32.x86_1.1.200.v20120913-144807
-product
com.android.ide.eclipse.adt.package.product
--launcher.XXMaxPermSize
256m
-showsplash
com.android.ide.eclipse.adt.package.product
--launcher.XXMaxPermSize
256m
--launcher.defaultAction
openFile
-vmargs
-Dosgi.requiredJavaVersion=1.6
-Xms40m
-Xmx768m
-Declipse.buildId=v22.3.0-887826
-XX:MaxPermSize=512m
~~~
将其中的256m改为128m,512m改为256m即可~改后如下:
~~~
-startup
plugins/org.eclipse.equinox.launcher_1.3.0.v20120522-1813.jar
--launcher.library
plugins/org.eclipse.equinox.launcher.win32.win32.x86_1.1.200.v20120913-144807
-product
com.android.ide.eclipse.adt.package.product
--launcher.XXMaxPermSize
128m
-showsplash
com.android.ide.eclipse.adt.package.product
--launcher.XXMaxPermSize
128m
--launcher.defaultAction
openFile
-vmargs
-Dosgi.requiredJavaVersion=1.6
-Xms40m
-Xmx768m
-Declipse.buildId=v22.3.0-887826
-XX:MaxPermSize=256m
~~~
经过简单的修改,即可正常启动~

';
adt-bundle-linux-x86_64-20131030下新建工程提示找不到adb和R.java问题的解决
最后更新于:2022-04-01 20:16:35
**adt-bundle-linux-x86_64-20131030下新建工程提示找不到adb和R.java问题的解决**
在ubuntu14.04下,搭建Android开发环境,下载官方的adt-bundle-linux-x86_64-20131030后,启动eclipse,新建一个项目,提示找不到“R”文件,即R文件未成;启动模拟器提示“...Cannot run program "/home/zenail/adt-bundle-linux-x86_64-20131030/sdk//tools/emulator": error=2, 没有那个文件或目录”。
经过反复地检查安装步骤,还是解决不了问题,顿时觉得世界暗淡了许多...后来终于在网上找到了原因:因为我的系统是64位的,而Android sdk只有32位的程序(adb是32位的),必须要安装相应的库才行~有人说要安装ia32-libs,可到我的系统上却提示不可安装,还好又有位大神给出别的答案:
~~~
sudo apt-get install libc6-i386 lib32stdc++6 lib32gcc1 lib32ncurses5 lib32z1。
在安装如上库后,重启eclipse,一切OK!在此感谢那些大侠啦~~
~~~
';
(六)——从Activity返回数据
最后更新于:2022-04-01 20:16:32
1、在实际应用中,我们不仅要向Activity中传数据,也要从Activity中返回数据。虽然传递数据和返回数据类似,也可以采用前面四篇中提到的4种方法,但是一般建议采用Intent对象的方式来返回数据,使用这种方式返回数据,需要使用startActivityForResult方法来显示Activity;
2、新建Android项目“android_intent_forresult”,打开布局文件“activity_main.xml”,添加“LinearLayout”、“TextView”、“EditView”等标签,代码如下:
~~~
~~~
效果:

3、新建布局文件“other.xml”,添加“TextView”、“EditView”、“Button”标签,代码如下:
~~~
~~~
4、新建“OtherActivity.java”文件,并使其继承“Activity”,添加“onCreate”方法,代码如下:
~~~
package com.android.myintent;
import android.app.Activity;
import android.os.Bundle;
public class OtherActivity extends Activity {
@Override
protected void onCreate(Bundle savedInstanceState) {
// TODO Auto-generated method stub
super.onCreate(savedInstanceState);
setContentView(R.layout.other);
}
}
~~~
5、在“AndroidManifest.xml”清单文件中加入“Activity”,加入代码:
~~~
~~~
6、在“Main.java”中添加Button成员和“setOnClickListener”,实现两个Button的跳转,点击第一个Activity后,出现第二个Activity;在此方法内部创建意图,用“startActivityForResult”启动意图,并在Main类里重写“onActivityResult”;添加“EditText”成员,实现数据的输入并传入Intent中。代码如下:
~~~
package com.android.myintent;
import android.R.integer;
import android.os.Bundle;
import android.app.Activity;
import android.content.Intent;
import android.view.Menu;
import android.view.View;
import android.widget.Button;
import android.widget.EditText;
public class Main extends Activity {
private Button button;
private final static int REQUESTCODE = 1;// 表示返回的结果码
private EditText one, two, result; // 数据输入
@Override
protected void onCreate(Bundle savedInstanceState) {
super.onCreate(savedInstanceState);
setContentView(R.layout.activity_main);
one = (EditText) this.findViewById(R.id.one);
two = (EditText) this.findViewById(R.id.two);
result = (EditText) this.findViewById(R.id.result);
button = (Button) this.findViewById(R.id.button);
button.setOnClickListener(new View.OnClickListener() {
@Override
public void onClick(View arg0) {
// TODO Auto-generated method stub
// 点击后获得用户录入的值
int a = Integer.parseInt(one.getText().toString());
int b = Integer.parseInt(two.getText().toString());
// 创建意图
Intent intent = new Intent(Main.this, OtherActivity.class);
// 将值传入意图
intent.putExtra("a", a);
intent.putExtra("b", b);
startActivityForResult(intent, REQUESTCODE);// 表示可以返回结果
}
});
}
// 再重写一个onActivityResult方法,作用是将当前Activity中的数据传递到另一个Activity的意图中后,实现跳转,再回传回来。
@Override
protected void onActivityResult(int requestCode, int resultCode, Intent data) {
// TODO Auto-generated method stub
super.onActivityResult(requestCode, resultCode, data);
}
@Override
public boolean onCreateOptionsMenu(Menu menu) {
// Inflate the menu; this adds items to the action bar if it is present.
getMenuInflater().inflate(R.menu.main, menu);
return true;
}
}
~~~
7、在“OtherActivity.java”文件中添加Button和TextView成员,获取意图中的数据,代码如下:
~~~
package com.android.myintent;
import android.app.Activity;
import android.content.Intent;
import android.os.Bundle;
import android.widget.Button;
import android.widget.TextView;
public class OtherActivity extends Activity {
private Button button;
private TextView textView;
@Override
protected void onCreate(Bundle savedInstanceState) {
// TODO Auto-generated method stub
super.onCreate(savedInstanceState);
setContentView(R.layout.other);
// 实例化button和textview
button = (Button) this.findViewById(R.id.button2);
textView = (TextView) this.findViewById(R.id.msg);
Intent intent = getIntent(); // 获取Intent
// 取出Intent中的值
int a = intent.getIntExtra("a", 0);
int b = intent.getIntExtra("b", 0);
textView.setText(a + " + " + b + " = " + " ? ");
}
}
~~~
运行一下,看下效果:

点击“计算结果”,跳转到第二个Activity:

8、回到“Main.java”文件中,从OtherActivity中获取数据并显示,代码如下:
~~~
package com.android.myintent;
import android.R.integer;
import android.os.Bundle;
import android.app.Activity;
import android.content.Intent;
import android.view.Menu;
import android.view.View;
import android.widget.Button;
import android.widget.EditText;
public class Main extends Activity {
private Button button;
private final static int REQUESTCODE = 1;// 表示返回的结果码
private EditText one, two, result; // 数据输入
@Override
protected void onCreate(Bundle savedInstanceState) {
super.onCreate(savedInstanceState);
setContentView(R.layout.activity_main);
one = (EditText) this.findViewById(R.id.one);
two = (EditText) this.findViewById(R.id.two);
result = (EditText) this.findViewById(R.id.result);
button = (Button) this.findViewById(R.id.button);
button.setOnClickListener(new View.OnClickListener() {
@Override
public void onClick(View arg0) {
// TODO Auto-generated method stub
// 点击后获得用户录入的值
int a = Integer.parseInt(one.getText().toString());
int b = Integer.parseInt(two.getText().toString());
// 创建意图
Intent intent = new Intent(Main.this, OtherActivity.class);
// 将值传入意图
intent.putExtra("a", a);
intent.putExtra("b", b);
startActivityForResult(intent, REQUESTCODE);// 表示可以返回结果
}
});
}
// 再重写一个onActivityResult方法,作用是将当前Activity中的数据传递到另一个Activity的意图中后,实现跳转,再回传回来。
@Override
protected void onActivityResult(int requestCode, int resultCode, Intent data) {
// TODO Auto-generated method stub
super.onActivityResult(requestCode, resultCode, data);
if (resultCode == 2) {// 如果第二个Activity(OtherActivity)正常结束(“2”为返回码resultCode)。
if (requestCode == REQUESTCODE) {// 如果返回状态为1,即成功返回,就在意图的返回值中取出数据。
int three = data.getIntExtra("three", 0);// 从第二个Activity中返回意图中的数据。
result.setText(String.valueOf(three));
}
}
}
@Override
public boolean onCreateOptionsMenu(Menu menu) {
// Inflate the menu; this adds items to the action bar if it is present.
getMenuInflater().inflate(R.menu.main, menu);
return true;
}
}
~~~
9、在“OtherActivity.java”文件中,添加点击Button事件,使数据回传~,代码如下:
~~~
package com.android.myintent;
import android.app.Activity;
import android.content.Intent;
import android.os.Bundle;
import android.view.View;
import android.widget.Button;
import android.widget.EditText;
import android.widget.TextView;
public class OtherActivity extends Activity {
private Button button;
private TextView textView;
private EditText editText;
@Override
protected void onCreate(Bundle savedInstanceState) {
// TODO Auto-generated method stub
super.onCreate(savedInstanceState);
setContentView(R.layout.other);
// 实例化button和textview
button = (Button) this.findViewById(R.id.button2);
textView = (TextView) this.findViewById(R.id.msg);
editText = (EditText) this.findViewById(R.id.three);
Intent intent = getIntent(); // 获取Intent
// 取出Intent中的值
int a = intent.getIntExtra("a", 0);
int b = intent.getIntExtra("b", 0);
textView.setText(a + " + " + b + " = " + " ? ");
// 添加点击事件并回传数据
button.setOnClickListener(new View.OnClickListener() {
@Override
public void onClick(View arg0) {
// TODO Auto-generated method stub
Intent intent = new Intent();// 重新声明一个意图。
int three = Integer.parseInt(editText.getText().toString());// 获取输入的值。
intent.putExtra("three", three); // 将three回传到意图中。
// 通过Intent对象返回结果,调用setResult方法。
setResult(2, intent);// resultCode为大于1的数,随意选取,为2即可。
finish();// 结束当前Activity的生命周期。
}
});
}
}
~~~
10、运行,结果:
(1)输入2和3:

(2)单击“计算结果”,跳转:

(3)输入5,单击“返回结果”,数据回传:

实现要点:
(1)在“Main.java”中,创建Intent并启动Activity,调用“startActivityForResult”,并定义当前请求码;
(2)重写“onActivityResult”方法,并设置条件,若满足返回码值,则将第二个Activity中的数据传回来,赋给当前Activity的“result”编辑框;
(3)在“OtherActivity.java”中,再创建一个意图,将数据填写到意图中,通过意图将结果回传(通过“setResult”方法);
(4)结束当前Activity生命周期;
';
(五)——通过全局变量传递数据
最后更新于:2022-04-01 20:16:30
1、全局对象是Activity之间传递数据的一种比较实用的方式,比如在JavaWeb中有四个作用域,这四个作用域从小到大分别是Page、Request、Session和Application,其中Application域在应用程序的任何地方都可以使用和访问,除非是Web服务器停止。Android中的全局对象非常类似于JavaWeb中的Application域,只要Android应用程序不清除内存,全局对象就可以一直访问~
2、新建一个Android项目:“android_app”,进入“main.xml”添加一个Button,代码如下:
~~~
~~~
3、在当前目录下创建一个“other.xml”,添加一个TextView,代码如下:
~~~
~~~
4、在当前包下新建一个类“OtherActivity”,并使其继承Activity;添加一个“onCreate”方法,代码如下:
~~~
package com.android.app;
import android.app.Activity;
import android.os.Bundle;
public class OtherActivity extends Activity {
@Override
protected void onCreate(Bundle savedInstanceState) {
// TODO Auto-generated method stub
super.onCreate(savedInstanceState);
setContentView(R.layout.other);
}
}
~~~
5、为了能在程序中使用全局变量,需要在当前包下新建一个普通类“MyApp”,使其继承“Application”,随后声明一个“name”成员并提供构造方法和添加“onCreate”代码如下:
~~~
package com.android.app;
import android.app.Application;
public class MyApp extends Application {
private String name;
public String getName() {
return name;
}
public void setName(String name) {
this.name = name;
}
@Override
public void onCreate() {
// TODO Auto-generated method stub
super.onCreate();
setName("张三");
}
}
~~~
6、进入“Main.java”,添加Button和MyApp成员,随后为Button设置一个点击的事件,代码如下:
~~~
package com.android.app;
import android.os.Bundle;
import android.app.Activity;
import android.content.Intent;
import android.view.Menu;
import android.view.View;
import android.widget.Button;
public class Main extends Activity {
private Button button;
private MyApp myApp;
@Override
protected void onCreate(Bundle savedInstanceState) {
super.onCreate(savedInstanceState);
setContentView(R.layout.activity_main);
button = (Button) this.findViewById(R.id.button);
// 为button注册一个点击事件
button.setOnClickListener(new View.OnClickListener() {
@Override
public void onClick(View v) {
// TODO Auto-generated method stub
myApp = (MyApp) getApplication();
myApp.setName("Jack");// 修改之后的名字
Intent intent = new Intent(Main.this, OtherActivity.class);
startActivity(intent);
}
});
}
@Override
public boolean onCreateOptionsMenu(Menu menu) {
// Inflate the menu; this adds items to the action bar if it is present.
getMenuInflater().inflate(R.menu.main, menu);
return true;
}
}
~~~
7、进入“OtherActivity.java”中,声明一个MyApp成员,并获取myApp,代码如下:
~~~
package com.android.app;
import android.app.Activity;
import android.os.Bundle;
import android.widget.TextView;
public class OtherActivity extends Activity {
private MyApp myApp;
private TextView textView;
@Override
protected void onCreate(Bundle savedInstanceState) {
// TODO Auto-generated method stub
super.onCreate(savedInstanceState);
setContentView(R.layout.other);
textView = (TextView) this.findViewById(R.id.msg);
myApp = (MyApp) getApplication();
textView.setText("-appname-->>" + myApp.getName());
}
}
~~~
8、修改清单文件“AndroidManifest.xml”,在“Application”标签中新加入一个属性“name”,再加入一个“Activity”,代码如下:
~~~
//后添加的标签
~~~
9、运行一下,得到结果:


';
(四)——通过剪切板传递数据
最后更新于:2022-04-01 20:16:28
1、在Activity之间传递数据还可以利用一些技巧,无论是Windows还是Linux操作系统,都支持一种叫做剪切板的技术(某一程序将数据复制到剪切板上,其它的任何程序都可以从剪切板中获取数据);
2、新建一个名为“android_intent3”的Android工程;
3、在main.xml文件中添加Button:
~~~
~~~
4、新建布局文件”other.xml“,添加”TextView“,代码:
~~~
~~~
5、声明一个Activity,”OtherActivity“,并继承Activity,在此类中创建”onCreate“方法;
6、回到“Main.java”中,添加成员Button,并向Android系统调用剪切板,构造意图并启动,代码:
~~~
package com.android.myintent;
import android.os.Bundle;
import android.app.Activity;
import android.content.ClipboardManager;
import android.content.Context;
import android.content.Intent;
import android.view.Menu;
import android.view.View;
import android.widget.Button;
import android.widget.TextView;
public class Main extends Activity {
private Button button;
@Override
protected void onCreate(Bundle savedInstanceState) {
super.onCreate(savedInstanceState);
setContentView(R.layout.activity_main);
button = (Button) this.findViewById(R.id.button);
button.setOnClickListener(new View.OnClickListener() {
@Override
public void onClick(View v) {
// TODO Auto-generated method stub
// 从Android系统中调用剪切板的服务
ClipboardManager clipboardManager = (ClipboardManager) getSystemService(Context.CLIPBOARD_SERVICE);
String name = "Jack";
clipboardManager.setText(name);// 向剪切板添加数据
Intent intent = new Intent(Main.this, OtherActivity.class);
startActivity(intent);
}
});
}
@Override
public boolean onCreateOptionsMenu(Menu menu) {
// Inflate the menu; this adds items to the action bar if it is present.
getMenuInflater().inflate(R.menu.main, menu);
return true;
}
}
~~~
9、点击“OtherActivity.java”,添加获取剪切板方法,获取剪切板数据,设置到“textView”上,代码:
~~~
package com.android.myintent;
import android.app.Activity;
import android.content.ClipboardManager;
import android.content.Context;
import android.os.Bundle;
import android.widget.TextView;
public class OtherActivity extends Activity {
private TextView textView;
@Override
protected void onCreate(Bundle savedInstanceState) {
// TODO Auto-generated method stub
super.onCreate(savedInstanceState);
setContentView(R.layout.other);
textView = (TextView) this.findViewById(R.id.msg);
ClipboardManager clipboardManager = (ClipboardManager)getSystemService(Context.CLIPBOARD_SERVICE);
String msgString = clipboardManager.getText().toString();//从剪切板中获取数据
textView.setText(msgString);
}
public OtherActivity() {
// TODO Auto-generated constructor stub
}
}
~~~
10、在“AndroidManifest.xml”上添加“Activity”:
~~~
~~~
11、运行:


12、点击按钮,居然提示无法运行,后来经过查找,发现是因为在Android11版本之后,原来利用剪切板传递数据使用的setText()和getText()方法被弃用了,只能使用ClipData对象来代替了~下面我们来对上面的程序做出一点改动即可~
第8步中橙色部分的程序替换为:
~~~
ClipData clipData = ClipData.newPlainText("Label", "Jack");
clipboardManager.setPrimaryClip(clipData);
~~~
第9步中橙色部分的程序替换为:
~~~
ClipData clipData = clipboardManager.getPrimaryClip();//从剪切板中获取数据
Item item = clipData.getItemAt(0);
textView.setText(item.getText().toString());
~~~
13、如果我们想在剪切板中传递复杂数据,比如一个对象:先建一个类“MyData”,并使其实现“serializable”接口(在Superclass选项里):
14、在新建类中添加成员“name”、“age”并提供构造方法,代码如下:
~~~
import java.io.Serializable;
public class MyData implements Serializable {
private String name;
private int age;
@Override
public String toString() {
return "MyData [name=" + name + ", age=" + age + "]";
}
public MyData(String name, int age) {
super();
this.name = name;
this.age = age;
}
public String getName() {
return name;
}
public void setName(String name) {
this.name = name;
}
public int getAge() {
return age;
}
public void setAge(int age) {
this.age = age;
}
}
~~~
15、进入“Main.java”,将原来添加的代码注释掉,然后实例化一个MyData对象,代码如下(用到了Base64工具类):
~~~
package com.android.myintent;
import java.io.ByteArrayOutputStream;
import java.io.ObjectInputStream;
import java.io.ObjectOutputStream;
import android.os.Bundle;
import android.app.Activity;
import android.content.ClipData;
import android.content.ClipData.Item;
import android.content.ClipboardManager;
import android.content.Context;
import android.content.Intent;
import android.util.Base64;
import android.view.Menu;
import android.view.View;
import android.widget.Button;
import android.widget.TextView;
public class Main extends Activity {
private Button button;
@Override
protected void onCreate(Bundle savedInstanceState) {
super.onCreate(savedInstanceState);
setContentView(R.layout.activity_main);
button = (Button) this.findViewById(R.id.button);
button.setOnClickListener(new View.OnClickListener() {
@Override
public void onClick(View v) {
// TODO Auto-generated method stub
// 从Android系统中调用剪切板的服务
// ClipboardManager clipboardManager = (ClipboardManager)
// getSystemService(Context.CLIPBOARD_SERVICE);
// 向剪切板添加数据
// ClipData clipData = ClipData.newPlainText("label", "Jack");
// clipboardManager.setPrimaryClip(clipData);
// Intent intent = new Intent(Main.this, OtherActivity.class);
// startActivity(intent);
MyData myData = new MyData("Jack", 23);
// 将对象转换为字符串
ByteArrayOutputStream byteArrayOutputStream = new ByteArrayOutputStream();
String base64String = "";
try {// 捕获异常
ObjectOutputStream objectOutputStream = new ObjectOutputStream(
byteArrayOutputStream);
objectOutputStream.writeObject(myData);
base64String = Base64.encodeToString(
byteArrayOutputStream.toByteArray(), Base64.DEFAULT);
objectOutputStream.close();
} catch (Exception e) {
// TODO: handle exception
}
ClipboardManager clipboardManager = (ClipboardManager) getSystemService(Context.CLIPBOARD_SERVICE);
ClipData clipData = ClipData
.newPlainText("label", base64String);
clipboardManager.setPrimaryClip(clipData);
Intent intent = new Intent(Main.this, OtherActivity.class);
startActivity(intent);
}
});
}
@Override
public boolean onCreateOptionsMenu(Menu menu) {
// Inflate the menu; this adds items to the action bar if it is present.
getMenuInflater().inflate(R.menu.main, menu);
return true;
}
}
~~~
16、进入“OtherActivity.java”,修改代码如下:
~~~
package com.android.myintent;
import java.io.ByteArrayInputStream;
import java.io.ByteArrayOutputStream;
import java.io.ObjectInputStream;
import java.io.ObjectOutputStream;
import android.annotation.SuppressLint;
import android.app.Activity;
import android.content.ClipData;
import android.content.ClipboardManager;
import android.content.Context;
import android.content.ClipData.Item;
import android.os.Bundle;
import android.util.Base64;
import android.widget.TextView;
public class OtherActivity extends Activity {
private TextView textView;
@SuppressLint("NewApi")
@Override
protected void onCreate(Bundle savedInstanceState) {
// TODO Auto-generated method stub
super.onCreate(savedInstanceState);
setContentView(R.layout.other);
textView = (TextView) this.findViewById(R.id.msg);
ClipboardManager clipboardManager = (ClipboardManager) getSystemService(Context.CLIPBOARD_SERVICE);
ClipData clipData = clipboardManager.getPrimaryClip();// 从剪切板中获取数据
Item item = clipData.getItemAt(0);
String msgString = item.getText().toString();
byte[] base64_byte = Base64.decode(msgString, Base64.DEFAULT);
ByteArrayInputStream byteArrayInputStream = new ByteArrayInputStream(
base64_byte);
try {
ObjectInputStream objectInputStream = new ObjectInputStream(
byteArrayInputStream);
MyData myData = (MyData) objectInputStream.readObject();
textView.setText(myData.toString());
} catch (Exception e) {
// TODO: handle exception
}
}
public OtherActivity() {
// TODO Auto-generated constructor stub
}
}
~~~
Ps:未完待续~
';
(三)——使用静态变量传递数据
最后更新于:2022-04-01 20:16:26
1、使用Intent可以很方便地在不同的Activity间传递数据,这个也是官方推荐的方式,但是也有一定的局限性,就是Intent无法传递不能序列化的对象,然而这个问题可以用静态变量来解决~
2、下面来具体举个例子,新建一个Android工程,如下图:

3、在布局文件(“res/layout”)中添加按钮“Button”,代码如下:
~~~
~~~
4、在当前目录下再建一个布局文件“other.xml”,在其中添加一个“TextView”标签,代码如下:
~~~
~~~
5、右击“src”下的包,新建类“OtherActivity”并使其继承“Activity”,在这个类中添加“onCreate”方法,并在其中添加成员“textview”、“name”、“age”,最后将其值设置给“textview”,代码如下:
~~~
package com.android.myintent;
import android.app.Activity;
import android.os.Bundle;
import android.widget.TextView;
public class OtherActivity extends Activity {
private TextView textview; // 添加一个静态变量
// 欲传递数据,添加一个public属性的静态变量
public static String name;
public static int age;
@Override
protected void onCreate(Bundle savedInstanceState) {
// TODO Auto-generated method stub
super.onCreate(savedInstanceState);
setContentView(R.layout.other);// 加载布局文件
textview = (TextView) this.findViewById(R.id.msg);// 查找并加载
textview.setText("-name-->>" + name + "\n" + "-age-->>" + age);
}
public OtherActivity() {
// TODO Auto-generated constructor stub
}
}
~~~
6、在“Main.java”里添加一个“Button”类型成员,设置点击事件,并创建意图为OtherActivity中的静态变量赋值,代码如下:
~~~
package com.android.myintent;
import android.os.Bundle;
import android.app.Activity;
import android.content.Intent;
import android.view.Menu;
import android.view.View;
import android.widget.Button;
public class Main extends Activity {
private Button button;
@Override
protected void onCreate(Bundle savedInstanceState) {
super.onCreate(savedInstanceState);
setContentView(R.layout.activity_main);
button = (Button) this.findViewById(R.id.button);
button.setOnClickListener(new View.OnClickListener() {
@Override
public void onClick(View v) {
// TODO Auto-generated method stub
// 声明一个意图
Intent intent = new Intent();// 可以构造一个空意图,在下面传递类
intent.setClass(Main.this, OtherActivity.class);
OtherActivity.age = 23;
OtherActivity.name = "Jack";
startActivity(intent);
}
});
}
@Override
public boolean onCreateOptionsMenu(Menu menu) {
// Inflate the menu; this adds items to the action bar if it is present.
getMenuInflater().inflate(R.menu.main, menu);
return true;
}
}
~~~
7、在“AndroidManifest.xml”中添加一个“activity.xml”设置,“name”为“.OtherActivity”,使系统能找到该类,代码:
~~~
~~~
8、运行程序,结果截图如下:


Ps:My second Android Application~
';