(六)解决分支冲突及分支管理策略
最后更新于:2022-04-01 20:06:45
**解决分支冲突**
通常当Git无法自动合并分支时,就必须首先解决冲突后,再提交。
下面咱们先创建一个分支并切换到b1分支:

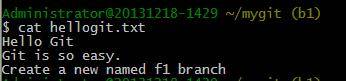
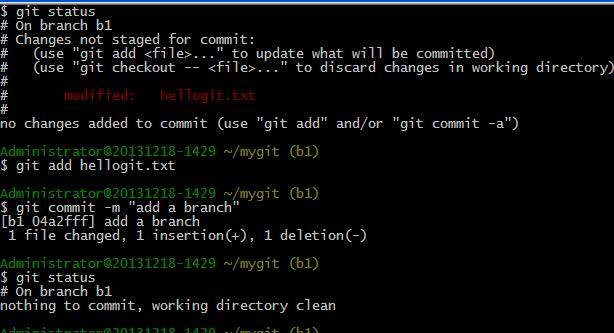
修改咱们之前的hellogit.txt内容,添加一行:Create a new named f1 branch
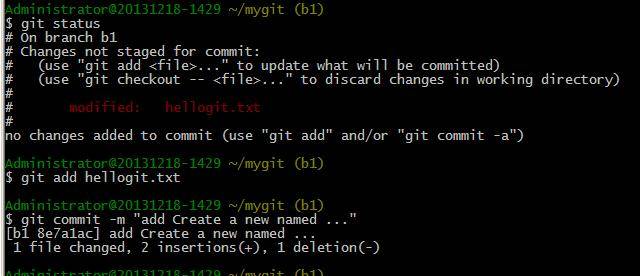
查看该文件的状态,并提交至本地仓库:
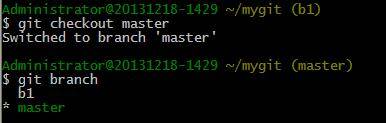
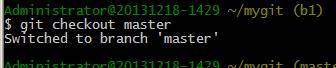
然后切换至master分支:
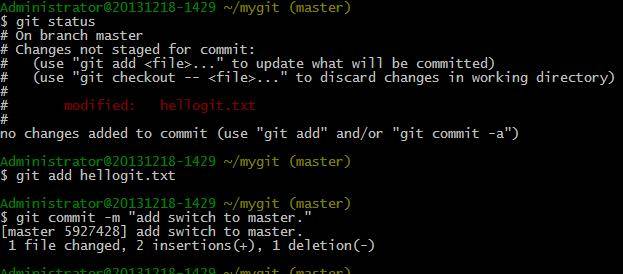
然后在master分支上把hellogit.txt文件的最后一行改为:switch to master.
最后在master分支上提交:
现在,master分支和b1分支各自都有自己新的提交,这种情况下,Git无法执行想上一章一样进行“快速合并”,只能试图把各自的修改合并起来,但这种合并就可能会有冲突。

Git告诉我们,hellogit.txt文件存在冲突,必须手动解决冲突后再提交,通过git status可以告诉我们冲突详情:

可以看到hellogit.txt在两个分支上都没修改且这两个分支没有merge,下面来看看helligit.txt的内容:
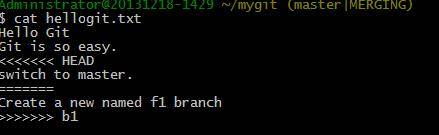
Git用<<<<<<<,=======,>>>>>>>标记出不同分支的内容,我们修改如下后保存:Create a new named f1 branch;再提交:

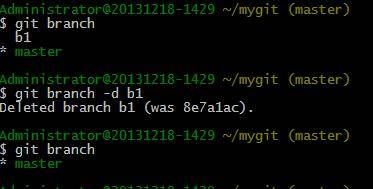
好了冲突已经解决并提交了,那么现在就可以删除b1分支了:
小结: 当Git无法自动合并分支时,就必须首先解决冲突后,再提交。
**分支管理策略:**
现在我们仍然创建并切换至b1分支:

然后修改一下hellogit.txt的内容,再提交:
然后回到master主分支上:
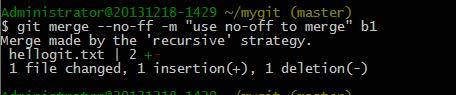
这时,我们merge加上两个参数:--no-ff参数(表示禁用“Fast forward”),-m(和comimt一样,为merge新提交时的信息):
**使用--no-ff好处是**:能看出来哪些分支曾经做过合并。
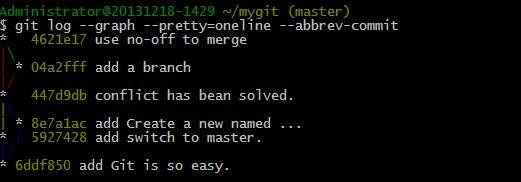
合并后,我们用git log看看分支历史:
**小结**:合并分支时,Git会默认使用“Fast forward”模式,但这种模式下,删除分支后,会丢掉分支信息。
在实际工作中,master分支应该是非常稳定的,也就是仅用来发布新版本,平时不能在上面进行开发,一般都是依赖(你和你的同事)各自的分支去进行新的feature开发或解决新的bug,有需要的时候再merge一下就可以了。
';