(七)Bug和Feature分支管理详解
最后更新于:2022-04-01 20:06:47
当咱们拿到一个新的bug或者feature(功能)时,首先应该想到通过分支来完成咱们的任务。因为在软件开发中,总是会根据客户的需求不断的添加新的feature进来,同时在做移动开发过程中bug也可以说是“常客”。通过前几章的内容,相信咱们很自然会想到创建一个新的branch(分支),在此分支上来修复bug或者实现feature,完成后,然后再merge(合并)到咱们的主分支上。
当咱们接到一个比如说是关于空指针的bug,而咱们手中的活(在b1分支上的bug)还没提交,预计要半天的时间,但新的bug必须在1小时内修完。这时咱们就要用到“储存现场”的功能git stash,这样咱们可以在修护新的bug之后再恢复现场来继续原先还没有提交的操作。下面咱们先修改之前的hellogit.txt文件的,修改内容为:
~~~
Hello Git
Git is so easy.
~~~
然后咱们仍然使用git status来观察一个该文本的状态:

可以看到红色部分提示,该文件已经被修改,同时该文件的状态仍处于工作区中,这是咱们接到一个新的bug,上级要求必须尽快修复,这时咱们先“保存现场”:

用git status查看工作区,就是干净的,除非有没有被Git管理的文件:

因此咱可以放心地创建分支来修复bug,现在假定咱们使用主分支(master)来修复咱们的这个新的bug,就从主分支上创建一个临时分支b2:

现在修复1.txt中的bug:
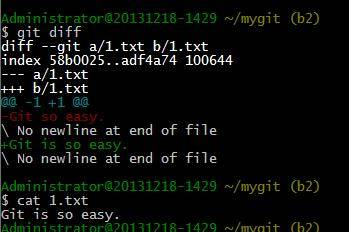
bug修好了,下面提交:
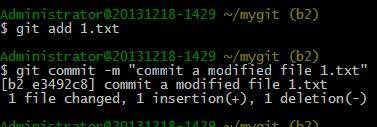
切换到主分支上在merge(合并):
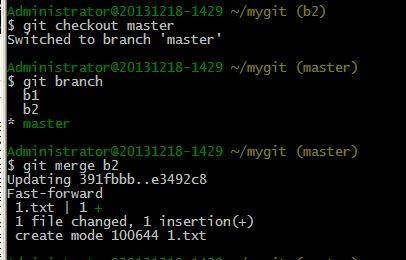
然后删除临时分支b2:
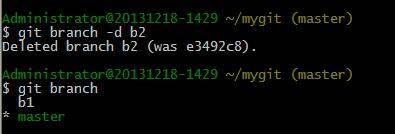
好了,新的bug已经修复完,下面就可以继续回到咱们原来的分支(b1)上继续工作了:
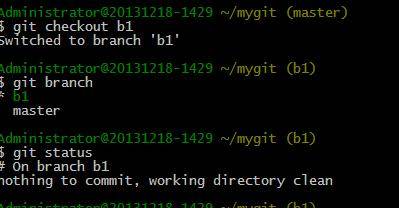
咱们可以看到,工作区是干净的,之前咱们“储存的现场”哪去了呢?咱可以用git stash list来查看:

存储的工作现场还在,Git把stash内容存在某个地方了,但是需要恢复一下,有两个办法:
方法一:先用git stash apply来恢复现场,然后再用git stash drop来删除stash内容;
方法二:直接使用git statch pop来恢复并删除stash内容。
咱们为了方便,就直接用git stash pop了:
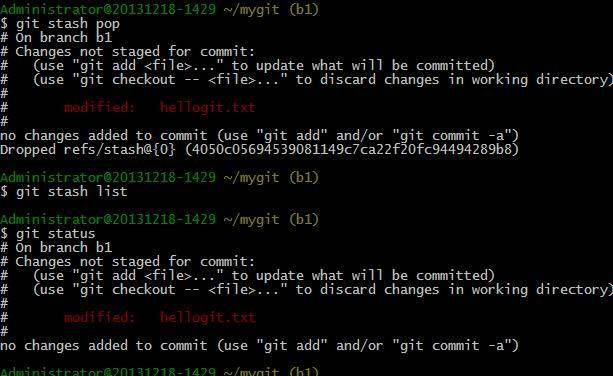
可以看到b1分支上hellogit.txt的状态又回来了,咱又可以继续在b1分支上干活了
。
**总结**:(1)存储现场:git stash
(2)查看工作现场:git stach list
(3)恢复现场有两种:1,使用git stash apply 来恢复,然后再使用git stash drop来删除stash的内容。
2.使用git stash pop,来恢复并删除stash内容。
(4)如果要多次使用stash,恢复的时候先用git stash list查看,然后在指定你要恢复的内容:git stash apply stash@{0}。
( 5) 如果要丢弃一个没有合并的分支,可以使用git branch -D branch-name。
';