制作专属Badge制作
最后更新于:2022-04-01 14:08:08
[TOC]
## 概况
### 背景
前几天,再次看到一些CI的Badge的时候,就想着要做一个自己的Badge:

Badge
接着,我就找了个图形工具简单地先设计了下面的一个Badge:

Demo
生成的格式是SVG,接着我就打开SVG看看里面发现了什么。
~~~
<?xml version="1.0" encoding="UTF-8" standalone="no"?>
<svg width="1006px" height="150px" viewBox="0 0 1006 150" version="1.1" xmlns="http://www.w3.org/2000/svg" xmlns:xlink="http://www.w3.org/1999/xlink">
<!-- Generator: Sketch 3.7 (28169) - http://www.bohemiancoding.com/sketch -->
<title>phodal</title>
<desc>Created with Sketch.</desc>
<defs></defs>
<g id="Page-1" stroke="none" stroke-width="1" fill="none" fill-rule="evenodd">
<rect id="Rectangle-1" fill="#5E6772" style="mix-blend-mode: hue;" x="0" y="0" width="640" height="150"></rect>
<rect id="Rectangle-1" fill="#2196F3" style="mix-blend-mode: hue;" x="640" y="0" width="366" height="150"></rect>
<text id="PHODAL" font-family="Helvetica" font-size="120" font-weight="normal" fill="#FFFFFF">
<tspan x="83" y="119">PHODAL</tspan>
</text>
<text id="idea" font-family="Helvetica" font-size="120" font-weight="normal" fill="#FFFFFF">
<tspan x="704" y="122">idea</tspan>
</text>
</g>
</svg>
~~~
看了看代码很简单,我就想这可以用代码生成——我就可以生成出不同的样子了。
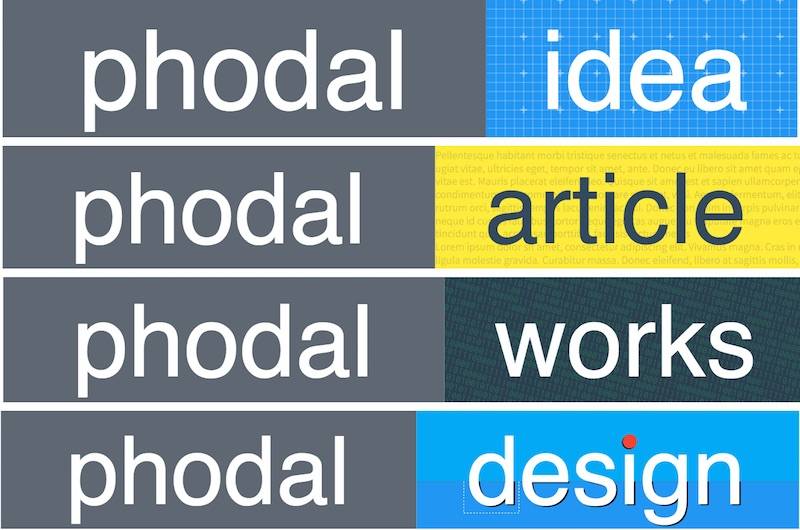
### ShowCase

Finally
代码: GitHub: [https://github.com/phodal/brand](https://github.com/phodal/brand)
### SVG与SVGWrite
SVG就是一个XML
> 可缩放矢量图形(Scalable Vector Graphics,SVG) ,是一种用来描述二维矢量图形的XML 标记语言。
要对这个XML进行修改也是一件很容易的事。只是,先找了PIL发现不支持,就找到了一个名为SVGWrite的工具。
> A Python library to create SVG drawings.
## 步骤
### Step 1: 基本图形
示例代码如下:
~~~
import svgwrite
dwg = svgwrite.Drawing('test.svg', profile='tiny')
dwg.add(dwg.line((0, 0), (10, 0), stroke=svgwrite.rgb(10, 10, 16, '%')))
dwg.add(dwg.text('Test', insert=(0, 0.2)))
dwg.save()
~~~
然后我就照猫画虎地写了一个:
~~~
import svgwrite
dwg = svgwrite.Drawing('idea.svg', profile='full', size=(u'1006', u'150'))
shapes = dwg.add(dwg.g(id='shapes', fill='none'))
shapes.add(dwg.rect((0, 0), (640, 150), fill='#5E6772'))
shapes.add(dwg.rect((640, 0), (366, 150), fill='#2196F3'))
shapes.add(dwg.text('PHODAL', insert=(83, 119), fill='#FFFFFF',font_size=120, font_family='Helvetica'))
shapes.add(dwg.text('idea', insert=(704, 122), fill='#FFFFFF', font_size=120, font_family='Helvetica'))
dwg.save()
~~~
发现和上面的样式几乎是一样的,就顺手做了剩下的几个。然后想了想,我这样做都一样,一点都不好看。
### Step 2: 高级Badge
第一眼看到

Idea Prototype
我就想着要不和这个一样好了,不就是画几条线的事么。
~~~
def draw_for_bg_plus():
for x in range(y_text_split + rect_length, width, rect_length):
shapes.add(dwg.line((x, 0), (x, height), stroke='#EEEEEE', stroke_opacity=0.3))
for y in range(rect_length, height, rect_length):
shapes.add(dwg.line((y_text_split, y), (width, y), stroke='#EEEEEE', stroke_opacity=0.3))
for x in range(y_text_split + max_rect_length, width, max_rect_length):
for y in range(0, height, max_rect_length):
shapes.add(dwg.line((x, y - 4), (x, y + 4), stroke='#EEEEEE', stroke_width='2', stroke_opacity=0.4))
for y in range(0, height, max_rect_length):
for x in range(y_text_split + max_rect_length, width, max_rect_length):
shapes.add(dwg.line((x - 4, y), (x + 4, y), stroke='#EEEEEE', stroke_width='2', stroke_opacity=0.4))
draw_for_bg_plus()
~~~
就有了下面的图,于是我又按照这种感觉来了好几下

Finally