nginx-push-stream-module 模块
最后更新于:2022-04-02 01:43:13
# nginx-push-stream-module 模块
#### 1. 介绍
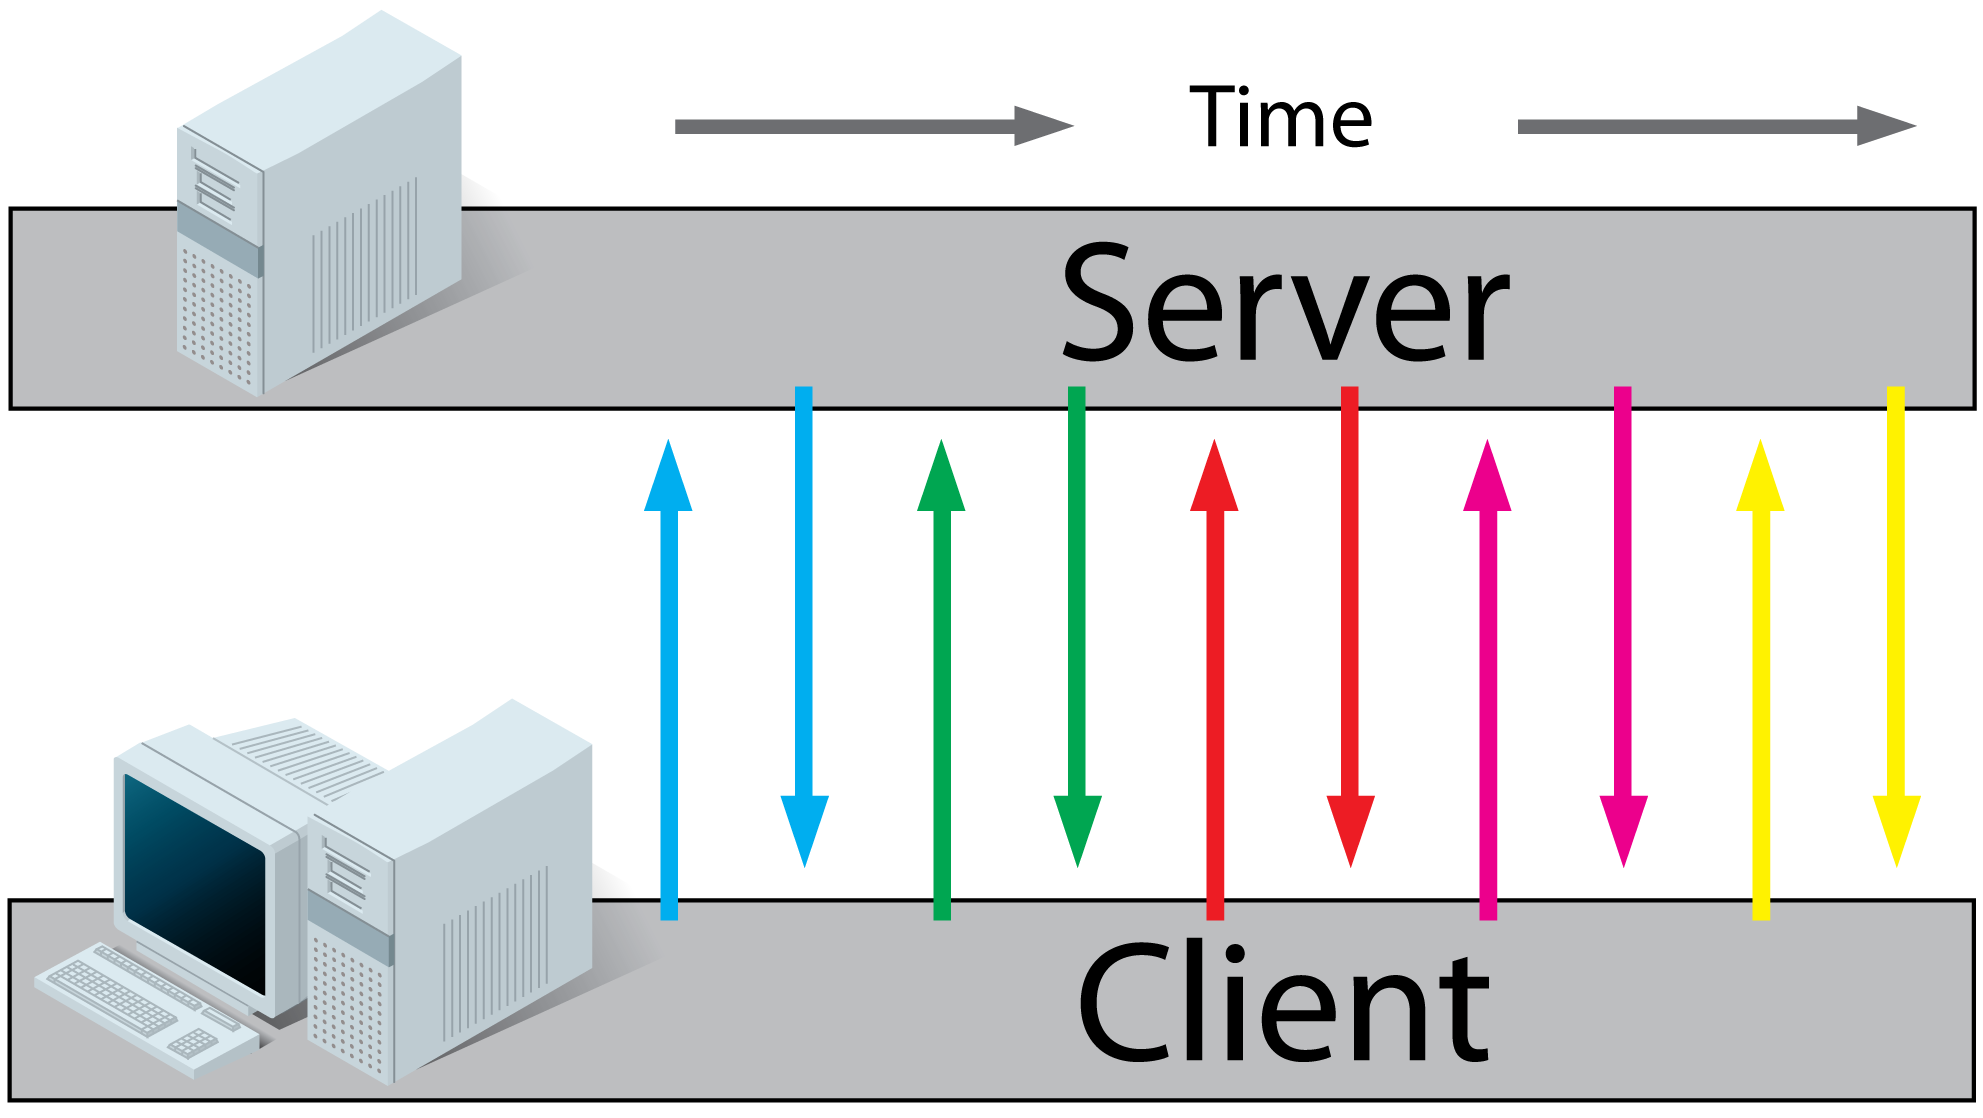
> A pure stream http push technology for your Nginx setup.
>
> Comet made easy and really scalable.
>
> Supports EventSource, WebSocket, Long Polling, and Forever Iframe.
[nginx-push-stream-module](https://github.com/wandenberg/nginx-push-stream-module)是nginx的一个模块,用它可以轻易实现websocket服务器。
以前我们实现websocket的服务器,不外乎两种方式,第一种是嵌入到web进程中,成为web进程的一部分,只是以路由的方式提供服务,还有一种是单独的进程,比如用puma来启动包含actioncable的rails项目。
这两种方式多多少少跟web进程都有些关系,嵌入型的就不用多说,就算是单独的进程这种方式,也是用了另一种服务器去启动。
现在我们来考虑另外一种方式,就是用完全独立于web进程的服务器,比如,之前我们的web是用ruby写的,可能会用puma或unicorn来启动,现在我们可以用c++启动websocket服务器,而web进程是通过http请求等方式来连接websocket服务器。
当然,这一篇文章,我们是用nginx来启动一个websocket的服务器,nginx本身没有这样的功能,需要其中的一个模块,就是本章介绍的`nginx-push-stream-module`。
现在我们先来跑一下流程,再来讲述一下它的原理以及为什么能够这样做。
#### 2. 使用
首先得先安装一下这个模块。
##### 2.1 安装
安装很简单,跟之前的模块安装一模一样的步骤,具体可以查看这篇文章[nginx之编译第三方模块(六)](http://www.rails365.net/articles/nginx-zhi-bian-yi-di-san-fang-mo-kuai-liu)。
现在来列出一下大概的流程。
```
$ git clone https://github.com/wandenberg/nginx-push-stream-module.git
# 进入到nginx源码目录,--add-module后面接nginx-push-stream-module的源码目录
$ ./configure --add-module=../nginx-push-stream-module
# 编译
$ make
# 安装
$ sudo make install
# 结束老的nginx进程
$ sudo nginx -s quit
# 开启新的nginx进程
$ sudo nginx
```
接着我们来使用这个模块。
##### 2.2 配置
在配置文件`nginx.conf`中添加下面这样的内容:
```
http {
push_stream_shared_memory_size 32M;
server {
location /channels-stats {
# activate channels statistics mode for this location
push_stream_channels_statistics;
# query string based channel id
push_stream_channels_path $arg_id;
}
location /pub {
# activate publisher (admin) mode for this location
push_stream_publisher admin;
# query string based channel id
push_stream_channels_path $arg_id;
}
location ~ /ws/(.*) {
# activate websocket mode for this location
push_stream_subscriber websocket;
# positional channel path
push_stream_channels_path $1;
# message template
push_stream_message_template "{\"id\":~id~,\"channel\":\"~channel~\",\"text\":\"~text~\"}";
push_stream_websocket_allow_publish on;
# ping frequency
push_stream_ping_message_interval 10s;
}
}
}
```
##### 2.3 原理
其中`push_stream_shared_memory_size`是添加在`http`下,其他的都在`server`下。
`push_stream_shared_memory_size`我就不详说了,应该设置的是一个内存的容量,我对此细节并不了解,按照默认的就好了。
我们来讲述一下`server`之下的三个`location`。
- /channels-stats
- /pub
- ~ /ws/(.\*)
第一个是关于websocket统计相关的东西,这个稍后再讲。
另外两个是关于发布订阅的。
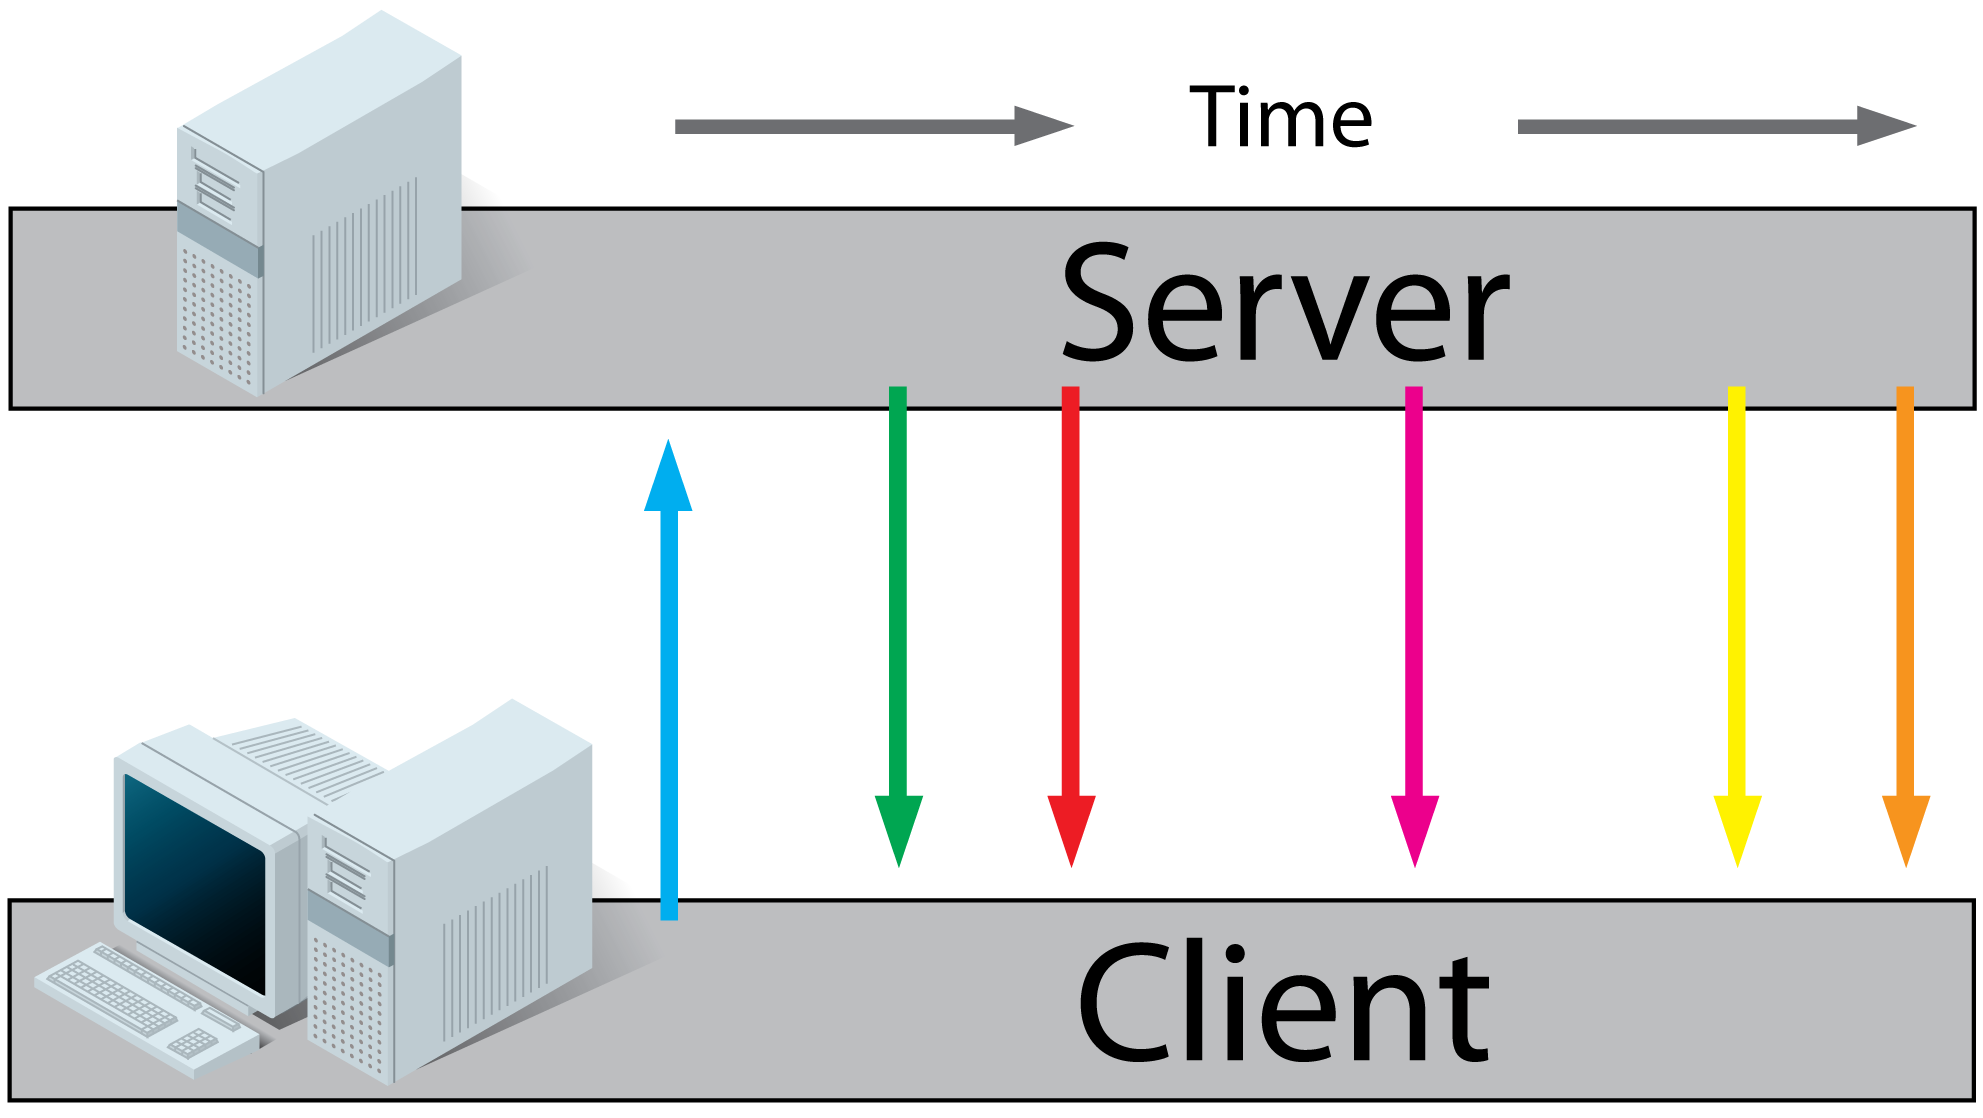
其中客户端连接到服务器使用的是`~ /ws/(.*)`这个`location`,而服务器端向客户端推送消息是使用`/pub`这个`location`。
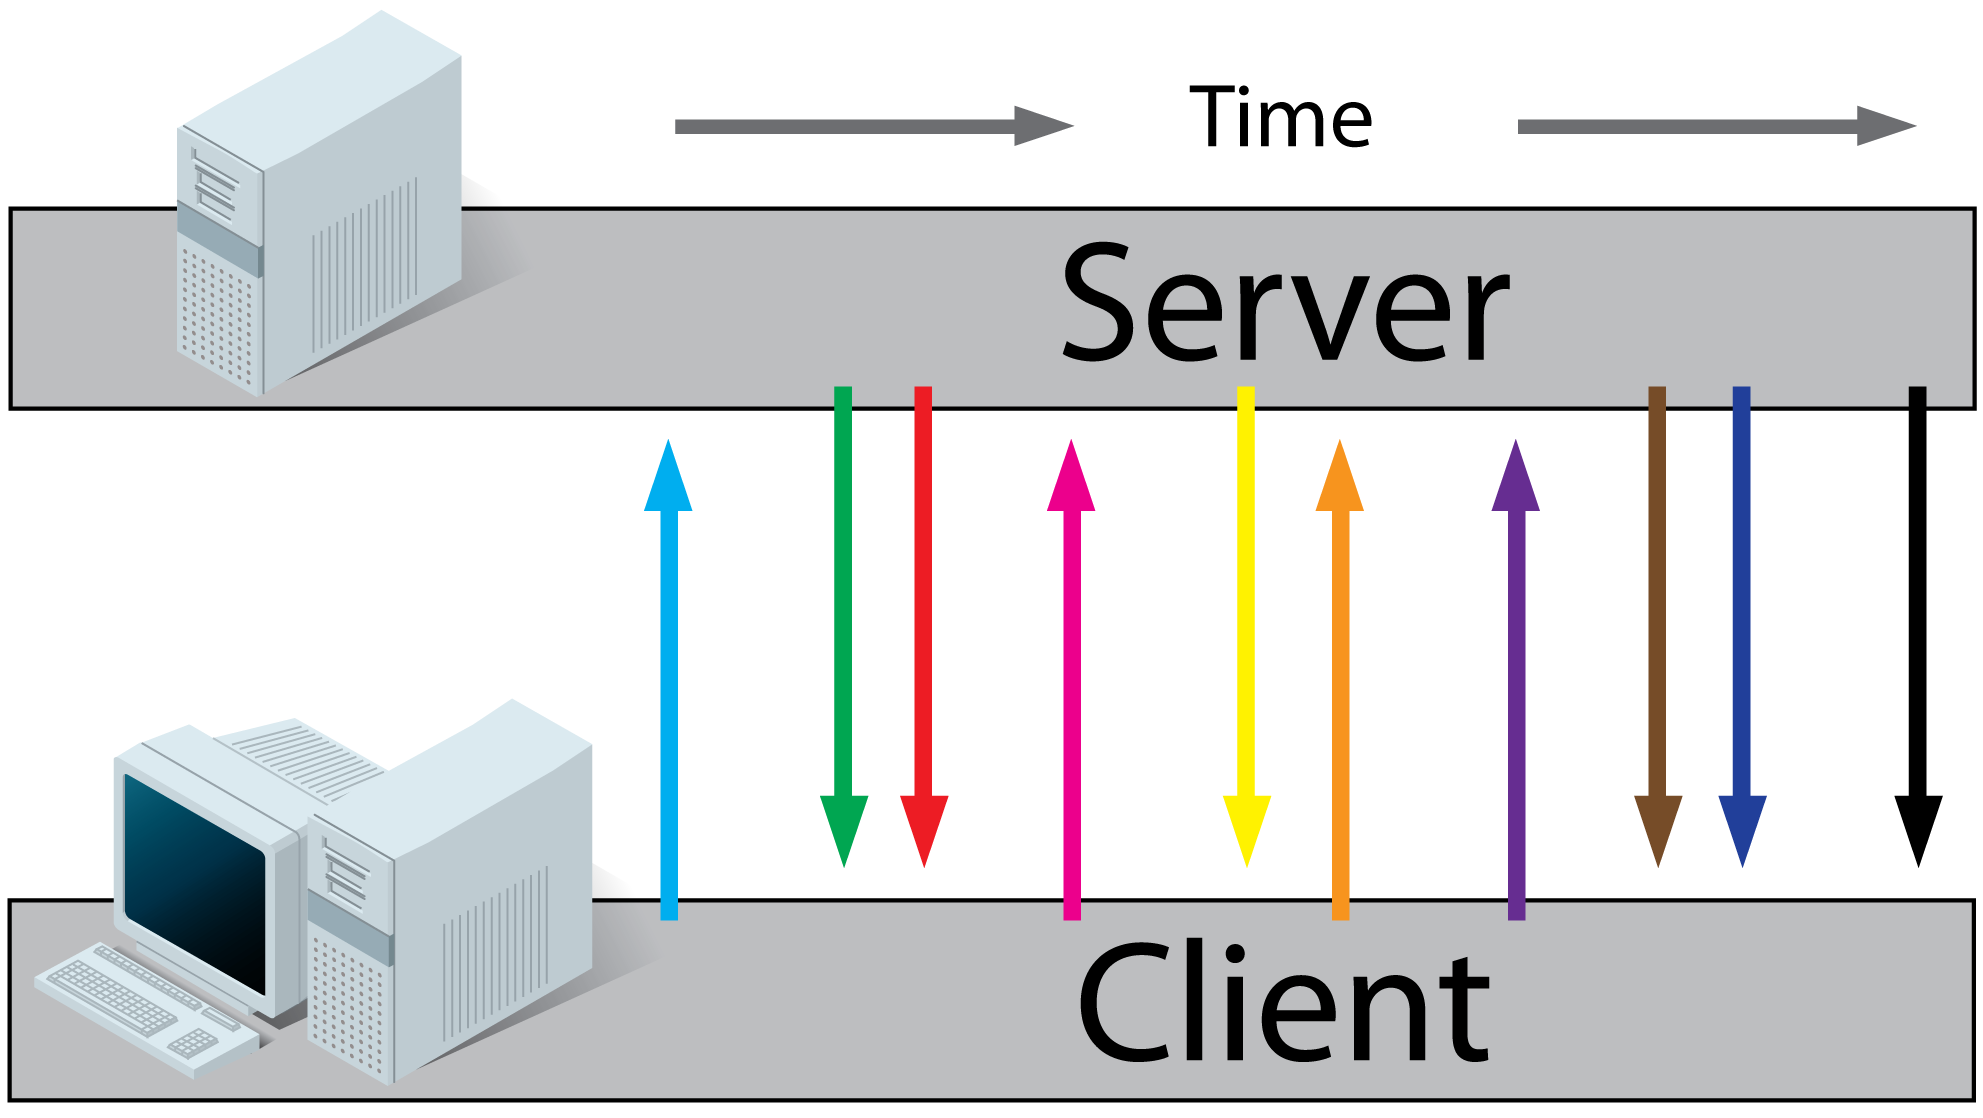
至于客户端与服务器端是如何交互的,我们可以回顾一下。
客户端,比如浏览器,发送`new WebSocket`给websocket服务器,表示要建立websocket请求,这个过程表示的是订阅,一直在等待服务器发送消息过来,一旦有消息过来,就会更改一些状态,比如DOM更新等。这个过程,不止只有一个客户端连接上服务器,可能有好多客户端同时连接。假如现在有了业务变化,服务器需要向所有的客户端推送消息,这个过程就是发布,广播消息。通过什么广播消息呢,这个机制可以自己实现,也可以用redis的pub/sub功能,比如,一旦客户端连接上服务器,就会订阅redis的一个channel,而发布的时候,就是往这个channel里推送消息,这样,所有的客户端都能接收到消息。
`nginx-push-stream-module`不需要redis的pub/sub,它是自己实现的。
##### 2.4 测试
现在我们开始来测试一下这个应用。
还记得之前提到的`/channels-stats`这个`location`吗?它是统计信息用的。
我们先来看下它的结果。
```
$ curl -s -v 'http://localhost/channels-stats'
```
输出的内容主要是下面的json信息:
```
{"hostname": "macintoshdemacbook-air.local", "time": "2016-05-07T12:02:34", "channels": 0, "wildcard_channels": 0, "published_messages": 0, "stored_messages": 0, "messages_in_trash": 0, "channels_in_trash": 0, "subscribers": 0, "uptime": 19755, "by_worker": [
{"pid": "21117", "subscribers": 0, "uptime": 19755}
]}
```
上面的信息包括主机名,时间,通道的个数,消息的个数等,我们先不管。
现在我们用浏览器建立一个连接到websocket服务器,也就是要请求`~ /ws/(.*)`这个`location`。
```
ws = new WebSocket("ws://localhost/ws/ch1");
ws.onmessage = function(evt){console.log(evt.data);};
```
很简单,使用`new WebSocket`建立一个websocket请求,地址为`ws://localhost/ws/ch1`。
`ch1`是通道的名称,`push_stream_channels_path $1;`这一行配置指的就是它。
`onmessage`表示接收服务器端的消息,一旦有消息过来,就用`console.log`输出来。
我们一直在关注着浏览器的输出。
现在我们给客户端推送一条消息,自然是使用`/pub`这个`location`。
```
$ curl http://localhost/pub\?id\=ch1 -d "Some Text"
{"channel": "ch1", "published_messages": 1, "stored_messages": 0, "subscribers": 1}
```
使用的是curl这个命令,`ch1`表示的是通道名,它可以以参数的形式来指定,这样就会灵活很多,不同类型的连接可以用不同的通道名。
果然浏览器输出了信息了:
```
{"id":1,"channel":"ch1","text":"Some Text"}
```
`id`是消息的编号,默认从1开始,这个数字会自增,`channel`表示通道名,`text`是服务器端发送的信息。
输出的内容,跟`push_stream_message_template "{\"id\":~id~,\"channel\":\"~channel~\",\"text\":\"~text~\"}";`这里定义的模版有关。
果然是推送了什么内容就是输出了什么内容。
现在我们来看看统计内容的输出:
```
$ curl -s -v 'http://localhost/channels-stats'
{"hostname": "macintoshdemacbook-air.local", "time": "2016-05-07T12:24:13", "channels": 1, "wildcard_channels": 0, "published_messages": 1, "stored_messages": 0, "messages_in_trash": 0, "channels_in_trash": 0, "subscribers": 1, "uptime": 21054, "by_worker": [
{"pid": "21117", "subscribers": 1, "uptime": 21054}
]}
```
可以看到`"channels": 1`表示有一个通道,之前是没有的,`"published_messages": 1`表示发布的消息也多了一条了。
我们可以发起多个`new WebSocket`或开多个浏览器进行测试,那样可以观看到更多的效果。
之前通过curl工具,向`/pub`这个`location`发送了http请求,这个就间接向客户端发送数据,只是表现方式跟之前的不太一样。
##### 2.5 ruby
在实际的编程中,我们可以会用ruby应用结合nginx的`nginx-push-stream-module`这个模块来做应用,总不至用curl这个工具,这个工具主要用于测试,我们现在试一下用ruby来代替curl。
开启一个ruby的命令终端`irb`。
```
require 'net/http'
uri = URI("http://localhost/pub\?id\=ch1")
http = Net::HTTP.new(uri.host, uri.port)
req = Net::HTTP::Post.new(uri.to_s)
req.body = 'Some Text'
http.request(req)
```
你会发现,效果是一样的。
`nginx-push-stream-module`是个不错的工具,如果灵活运用它,肯定有意想不到的好处。
完结。
';
nginx 的 nchan 模块
最后更新于:2022-04-02 01:43:11
# nginx 的 nchan 模块
#### 1. 介绍

> Nchan is a scalable, flexible pub/sub server for the modern web, built as a module for the Nginx web server. It can be configured as a standalone > server, or as a shim between your application and tens, thousands, or millions of live subscribers. It can buffer messages in memory, on-disk, or > via Redis. All connections are handled asynchronously and distributed among any number of worker processes. It can also scale to many nginx > server instances with Redis.
[nchan](https://github.com/slact/nchan)是nginx的一个模块,它的作用跟[nginx-push-stream-module](http://www.rails365.net/articles/websocket-wai-pian-nginx-push-stream-module-mo)一样,也是结合nginx搭建websocket服务器,不过相比于`nginx-push-stream-module`,它更为强大。
比如,它可以指定redis作为适配器,还有,它具有**消息缓存(buffer messages)**的功能。
#### 2. 使用
下面就来演示一下,它是如何具有消息缓存(buffer messages)的功能的。
##### 2.1 安装
首先来安装。
安装可以跟之前一样,参考这篇文章[nginx之编译第三方模块(六)](http://www.rails365.net/articles/nginx-zhi-bian-yi-di-san-fang-mo-kuai-liu)。
```
./configure --add-module=path/to/nchan ...
```
或者,如果你在mac系统环境下,可以使用brew来安装。
```
$ brew tap homebrew/nginx
$ brew install nginx-full --with-nchan-module
```
##### 2.2 配置
现在我们来配置一下,只要在`server`上放两个`location`即可。
```
http {
server {
listen 80;
location = /sub {
nchan_subscriber;
nchan_channel_id foobar;
}
location = /pub {
nchan_publisher;
nchan_channel_id foobar;
}
}
}
```
##### 2.3 测试
接着,我们开启浏览器发起websocket请求。
上面的配置中,订阅相关的`location`是`/sub`,而发布相关的是`/pub`。
还是跟之前的一样:
```
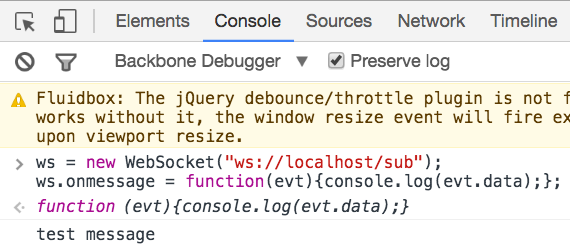
ws = new WebSocket("ws://localhost/sub");
ws.onmessage = function(evt){console.log(evt.data);};
```
然后我们给客户端推送消息。
```
$ curl --request POST --data "test message" http://127.0.0.1:80/pub
queued messages: 1
last requested: 57 sec. ago
active subscribers: 1
last message id: 1462759616:0%
```
上面的命令表示使用post请求`pub`向客户端推送`"test message"`这条消息。
浏览器也输出了相应的信息`"test message"`。
这样就跑通了整个流程。
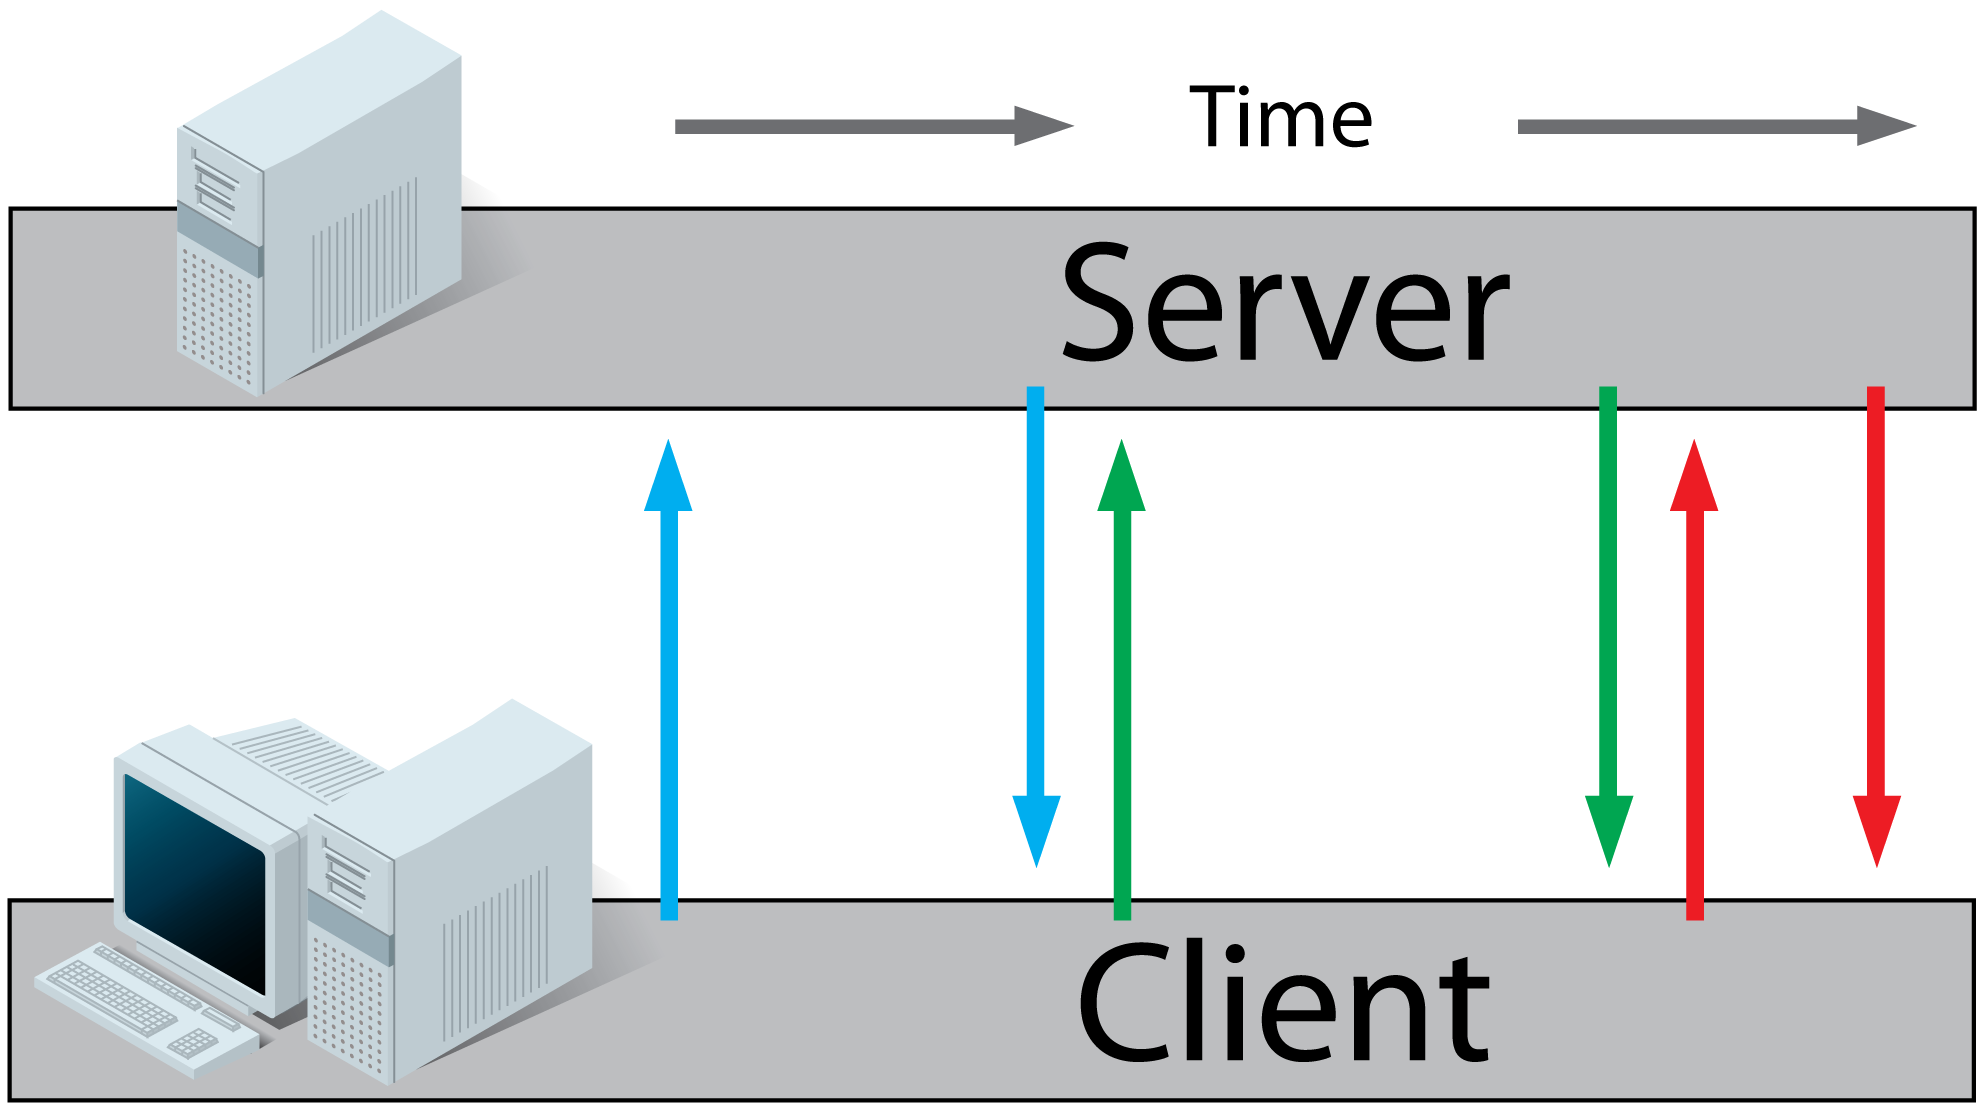
##### 2.4 消息缓存(buffer messages)
然而我们需要来测试一下**消息缓存(buffer messages)**的功能。
先把浏览器关掉,这个时候,就没有任何订阅的客户端了。
再推送一条消息。
```
$ curl --request POST --data "test message" http://127.0.0.1:80/pub
queued messages: 2
last requested: 2464 sec. ago
active subscribers: 0
last message id: 1462762080:0%
```
现在`"queued messages"`等于2,表示,在队列中有两条消息没有推送,之前`"queued messages"`的值是为1的。
现在我们重新打开浏览器,并开启之前的websocket请求。效果如下:
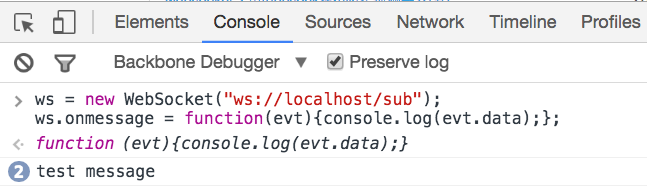
客户端立即收到队列中的两条消息了。
这种模式,演示了,假如客户端不在线,或掉线了之后,消息也能被正常的推送,它一上线,就能立即收到消息了。
如果我们再运行一次上面的curl命令,`"queued messages"`就会变成`"3"`。
默认情况下,这样的消息最多存储10条,当然这是可以配置的。
通过`"nchan_message_buffer_length"`就可以设置存储的消息的个数,除了这些,还有以下配置:
- nchan\_message\_timeout 消息的存活时间
- nchan\_store\_messages 是否存储消息,也就是开关功能
其他的功能可以查看官方的readme文档。
本篇完结。
';
10. 部署
最后更新于:2022-04-02 01:43:08
# 10. 部署
#### 1. 介绍
之前我们说过,有两种方式可以运行在rails应用中运行websocket,一种是以`rack hijack`的方式嵌入到rails应用中,以路由的形式挂载,成为rails应用的一部分,这种方式的话,就不用另开一个进程,因为它是rails应用的一部分,而还有另一种式,就是以`Standalone`的方式,另开一个独立于web进程的websocket进程,这个进程是专门处理websocket连接和请求的,这样的话就把web和websocket进程分开了。
而今天我们要讲的是websocket的部署。
这个部署分为两部分,第一部分是websocket的进程的部署,另一部分是nginx的配置。
如果websocket是以`rack hijack`方式运行,就不用考虑进程的部署,只有当websocket是以`Standalone`方式运行的时候才要把那个进程部署起来,然而,不管是什么方式,nginx的配置都是需要的。
#### 2. 使用
当websocket是以`Standalone`方式运行时,在测试端是以下面的方式运行的。
```
bundle exec puma -p 28080 cable/config.ru
```
也就是说,我们要把这个指令产生的效果和nginx结合搬到服务器主机上。而且我们在每次部署自动控制这个服务器的重启。
首先还是得先部署puma的服务,再来处理nginx。
##### 2.1 mina-puma的改造
刚开始会尝试使用[mina-puma](https://github.com/sandelius/mina-puma)。
你会发现这个过程是失败的。虽说mina-puma也是puma结合pumactl的指令来控制puma的启动,重启等。
但是查看下mina-puma就会知道,它也没像上面那样使用端口,也没有指令配置文件。
所以我们需要结合我们自己的条件来改造。
在`config/deploy.rb`文件中添加下面的内容。
```
set :puma_cmd, -> { "#{bundle_prefix} puma" }
set :puma_pid, -> { "#{deploy_to}/#{shared_path}/pids/puma.pid" }
set :puma_state, -> { "#{deploy_to}/#{shared_path}/pids/puma.state" }
set :pumactl_cmd, -> { "#{bundle_prefix} pumactl" }
set :puma_env, -> { fetch(:rails_env, 'production') }
set :pumactl_socket, -> { "#{deploy_to}/#{shared_path}/tmp/sockets/pumactl.sock" }
set :puma_socket, -> { "#{deploy_to}/#{shared_path}/tmp/sockets/puma.sock" }
desc 'Start puma'
task :puma_start => :environment do
queue! %[
if [ -e '#{pumactl_socket}' ]; then
echo 'Puma is already running!';
else
cd #{deploy_to}/#{current_path} && #{puma_cmd} -q -d -e #{puma_env} -b 'unix://#{puma_socket}' -S #{puma_state} --pidfile #{puma_pid} --control 'unix://#{pumactl_socket}' #{deploy_to}/#{current_path}/cable/config.ru
fi
]
end
desc 'Stop puma'
task :puma_stop => :environment do
queue! %[
if [ -e '#{pumactl_socket}' ]; then
echo 'Puma is stopping!'
cd #{deploy_to}/#{current_path} && #{pumactl_cmd} -S #{puma_state} stop
rm -f '#{pumactl_socket}'
else
echo 'Puma is not running!';
fi
]
end
desc 'Restart puma'
task puma_restart: :environment do
invoke :'puma_stop'
invoke :'puma_start'
end
```
也可以把这些内容封装成文件放到lib目录,再来require,不过这不重要。
在mina部署重启用应的地方引用就好了。
```
desc "Deploys the current version to the server."
task :deploy => :environment do
deploy do
invoke :'sidekiq:quiet'
...
to :launch do
...
invoke :'puma_restart'
...
end
end
end
```
上面的代码显示,还是用unix socket来监听,而不用端口。所以接下来,对nginx的配置还是跟前面部署unicorn差不多,只是多了websocket的部分。
#### 2.2 nginx
nginx中的配置文件是这样的。
```
upstream tt {
server unix:/tmp/unicorn_production.sock fail_timeout=0;
}
upstream ws {
server unix:///home/eason/tt_deploy/shared/tmp/sockets/puma.sock fail_timeout=0;
}
server {
server_name www.rails365.net;
root /home/eason/tt_deploy/current/public;
try_files $uri/index.html $uri @tt;
location @tt {
proxy_set_header X-Forwarded-For $proxy_add_x_forwarded_for;
proxy_set_header Host $http_host;
proxy_redirect off;
proxy_pass http://tt;
}
location /ws/ {
proxy_pass http://ws;
proxy_http_version 1.1;
proxy_set_header Upgrade $http_upgrade;
proxy_set_header Connection "upgrade";
}
...
}
```
不重要的部分被我省略了,最重要的是`location /ws/`这部分。其实就多了三行关于websocket的配置,很简单。
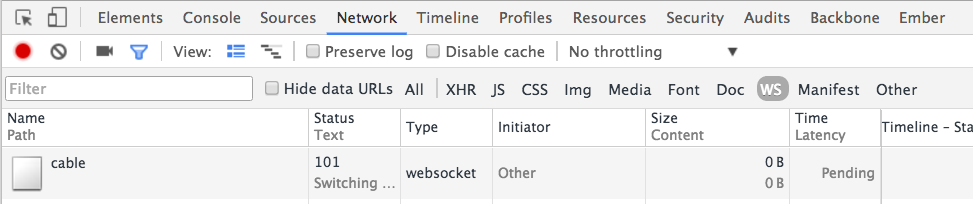
要测试是否配置成功。可以有两种简单的方法。
第一种是用chrome的开发者工具中的network部分查看是否有101状态码的请求。
第二种是在chrome的console里测试,比如`new WebSocket('ws://www.rails365.net/ws');`,如果没报错,返回正常 ,一般就没问题的。有一点需要注意,假如用的是https,ws就得改成wss。
完结。
';
9. actioncable 实现重新连接功能
最后更新于:2022-04-02 01:43:06
# 9. actioncable 实现重新连接功能
#### 1. 介绍
当我们在一个网页聊天室聊天的时候,我们有一个情况,会显示是在线,还是离线状态,还有,有一些网页型的项目管理工具,在离线状态的时候,可能是网络连不上的时候,也能够进行操作,不过它是把数据暂时保存到浏览器本地,等网络通了,就会自动同步到服务器中,这些又是如何办到的呢,这篇文章就来讲这个原理。
#### 2. 使用
其实要实现整个功能,我只是用了几行代码,不过最重要的是理解了actioncable中的javascript部分源码,通过复写其中的方法来实现的。
现在就来看看这部分的源码。
##### 2.1 cable.coffee
我们先从项目中的入口文件`app/assets/javascripts/cable.coffee`看起,其内容大约是这样的:
```
@App ||= {}
App.cable = ActionCable.createConsumer()
```
相关的源码是这样的:
```
# https://github.com/rails/rails/blob/52ce6ece8c8f74064bb64e0a0b1ddd83092718e1/actioncable/app/assets/javascripts/action_cable.coffee.erb#L4
@ActionCable =
INTERNAL: <%= ActionCable::INTERNAL.to_json %>
createConsumer: (url) ->
url ?= @getConfig("url") ? @INTERNAL.default_mount_path
new ActionCable.Consumer @createWebSocketURL(url)
```
##### 2.2 ActionCable.createConsumer
这个`ActionCable.createConsumer`方法我们之前也有讲过,它就是通过一些参数,找到就正确的服务器地址,然后执行`new WebSocket`的。
而且你还在源码文件`action_cable.coffee.erb`中看到下面几行。
```
startDebugging: ->
@debugging = true
stopDebugging: ->
@debugging = null
log: (messages...) ->
if @debugging
messages.push(Date.now())
console.log("[ActionCable]", messages...)
```
`@debugging`变量是开启日志的开关,我们把它设为true。
```
# app/assets/javascripts/cable.coffee
@App ||= {}
App.cable = ActionCable.createConsumer()
ActionCable.startDebugging()
```
现在我们就可以在chrome等浏览器的开发者工具的console标签看到更为详尽的日志内容了。
##### 2.3 ActionCable.Consumer
现在来看一下`new ActionCable.Consumer`的内容:
```
# https://github.com/rails/rails/blob/52ce6ece8c8f74064bb64e0a0b1ddd83092718e1/actioncable/app/assets/javascripts/action_cable/consumer.coffee#L17
class ActionCable.Consumer
constructor: (@url) ->
@subscriptions = new ActionCable.Subscriptions this
@connection = new ActionCable.Connection this
send: (data) ->
@connection.send(data)
ensureActiveConnection: ->
unless @connection.isActive()
@connection.open()
```
很早之前我们就介绍过,如何用javascript给后台发送websocket请求。
首先是使用`new WebSocket`发起连接指令。
然后使用`send`命令发送具体的消息给后台,比如`ws.send("Hello");`。
上面的源码中,`new ActionCable.Connection this`管的就是`new WebSocket`类似的内容。当然它除了有open方法,还有close方法用于关闭连接,reopen方法用于重连。
`new ActionCable.Subscriptions this`的内容主要就是管理如何向服务器端发送具体的消息的,这部分我们先不管。
##### 2.4 ActionCable.Connection
我们来看看`ActionCable.Connection`相关的内容。
关于它的内容主要是下面两个文件:
- connection.coffee
- connection\_monitor.coffee
`connection.coffee`文件主要是记录了open、close,reopen方法,还有连接的活动状态等。最重要的是reopen方法。
```
class ActionCable.Connection
@reopenDelay: 500
constructor: (@consumer) ->
{@subscriptions} = @consumer
@monitor = new ActionCable.ConnectionMonitor this
@disconnected = true
send: (data) ->
if @isOpen()
@webSocket.send(JSON.stringify(data))
true
else
false
open: =>
if @isActive()
ActionCable.log("Attempted to open WebSocket, but existing socket is #{@getState()}")
throw new Error("Existing connection must be closed before opening")
else
ActionCable.log("Opening WebSocket, current state is #{@getState()}, subprotocols: #{protocols}")
@uninstallEventHandlers() if @webSocket?
@webSocket = new WebSocket(@consumer.url, protocols)
@installEventHandlers()
@monitor.start()
true
close: ({allowReconnect} = {allowReconnect: true}) ->
@monitor.stop() unless allowReconnect
@webSocket?.close() if @isActive()
reopen: ->
ActionCable.log("Reopening WebSocket, current state is #{@getState()}")
if @isActive()
try
@close()
catch error
ActionCable.log("Failed to reopen WebSocket", error)
finally
ActionCable.log("Reopening WebSocket in #{@constructor.reopenDelay}ms")
setTimeout(@open, @constructor.reopenDelay)
else
@open()
```
这个文件只是定义了如何reopen的方法,默认reopen的时间延迟是500ms。
假如说,突然服务器挂了,这个时候掉线了,客户端应该重新连接,但重新连接的次数总是有限的吧,不能一直进行下去。
这个就是`connection_monitor.coffee`所发挥的作用。
`ActionCable.Connection`也是会调用这个文件的内容的。
比如`constructor`方法中的`@monitor = new ActionCable.ConnectionMonitor this`,还有`open`方法中的`@monitor.start()`。
##### 2.5 ActionCable.ConnectionMonitor
我们来看看`connection_monitor.coffee`的部分源码:
```
class ActionCable.ConnectionMonitor
@pollInterval:
min: 3
max: 30
@staleThreshold: 6 # Server::Connections::BEAT_INTERVAL * 2 (missed two pings)
constructor: (@connection) ->
@reconnectAttempts = 0
start: ->
unless @isRunning()
@startedAt = now()
delete @stoppedAt
@startPolling()
document.addEventListener("visibilitychange", @visibilityDidChange)
ActionCable.log("ConnectionMonitor started. pollInterval = #{@getPollInterval()} ms")
```
在阅读源码的时候,可以紧密结合日志来一起看的。
##### 2.6 测试
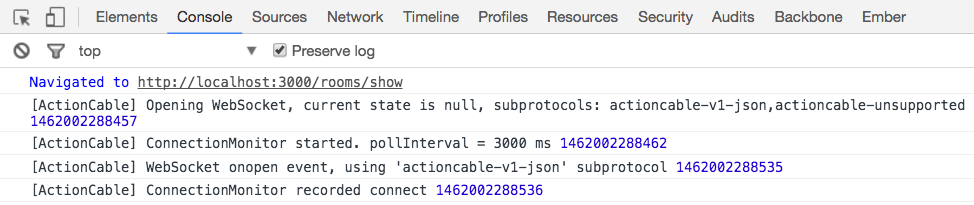
现在我们来做一个实验,把服务器停掉,看看浏览器的日志会输出什么内容。
一关掉服务器,浏览器就马上探测出服务器关闭了,并输出了下面的信息:
```
[ActionCable] WebSocket onclose event 1462006781945
[ActionCable] ConnectionMonitor recorded disconnect 1462006781954
```
除此之外,接着输出类似下面的信息:
```
[ActionCable] ConnectionMonitor detected stale connection. reconnectAttempts = 0, pollInterval = 3000 ms, time disconnected = 5.156 s, stale threshold = 6 s 1462007045080
[ActionCable] ConnectionMonitor detected stale connection. reconnectAttempts = 1, pollInterval = 3466 ms, time disconnected = 8.624 s, stale threshold = 6 s 1462007048548
[ActionCable] ConnectionMonitor detected stale connection. reconnectAttempts = 2, pollInterval = 5493 ms, time disconnected = 14.124 s, stale threshold = 6 s 1462007054048
```
##### 2.7 改写
其实这些输出信息都在`connection_monitor.coffee`文件中可以找到,主要就是`reconnectIfStale`这个方法:
```
reconnectIfStale: ->
if @connectionIsStale()
ActionCable.log("ConnectionMonitor detected stale connection. reconnectAttempts = #{@reconnectAttempts}, pollInterval = #{@getPollInterval()} ms, time disconnected = #{secondsSince(@disconnectedAt)} s, stale threshold = #{@constructor.staleThreshold} s")
@reconnectAttempts++
if @disconnectedRecently()
ActionCable.log("ConnectionMonitor skipping reopening recent disconnect")
else
ActionCable.log("ConnectionMonitor reopening")
@connection.reopen()
```
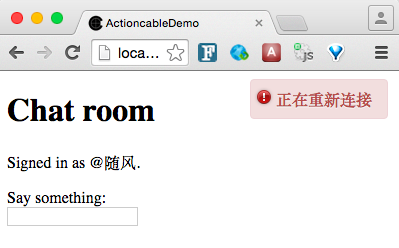
主要改写这个方法,把日志输出的部分效果改成在页面上提示即可。
我是这样改写的:
```
App.cable.connection.monitor.reconnectIfStale = ->
if App.cable.connection.monitor.connectionIsStale()
$.notify("正在重新连接")
App.cable.connection.monitor.reconnectAttempts++
if App.cable.connection.monitor.disconnectedRecently()
else
App.cable.connection.reopen(
```
至于`$.notify`是使用了[notifyjs](https://notifyjs.com/)这个库,你当然可以用你自己喜欢的库,或者干脆自己修改样式。
这样就算完成了,不过为了圆满,当连上服务器的时候,或掉线的时候也总有提示吧。
```
# app/assets/javascripts/channels/room.coffee
App.room = App.cable.subscriptions.create "RoomChannel",
connected: ->
$.notify("已连接到服务器", "success")
disconnected: ->
$.notify("已掉线", "warn")
```


本篇完结。
下一篇:[websocket之部署(十)](http://www.rails365.net/articles/websocket-zhi-bu-shu-shi)
';
8. actioncable 进阶
最后更新于:2022-04-02 01:43:04
# 8. actioncable 进阶
#### 1. 介绍
上一篇讲了actioncable的基本使用,也搭建了一个简易的聊天室。但是只是照着代码敲那是不行的,要知其然并知其所以然,这节来讲讲actioncable进阶方面的内容,对actioncable有一个更高的理解。
#### 2. 使用
下面会分别从几个方面来讲解actioncable,首先从安全领域来说说。
##### 2.1 跨域
之前在本地测试环境,应用都是跑在3000端口上的,现在把它跑在4000端口上,看会是怎样的。
后台会不断地提示下面这行信息。
```
Request origin not allowed: http://localhost:4000
```
其实跑在4000端口的时候,websocket是连不上的。
因为actioncable默认只在3000端口上开放websocket服务,这个可以查看其源码得到:
```
#https://github.com/rails/rails/blob/master/actioncable/lib/action_cable/engine.rb#L25
options.allowed_request_origins ||= "http://localhost:3000" if ::Rails.env.development?
```
actioncable也提供了机制来解决这个问题。
比如在配置文件(比如: application.rb)中添加一行:
```
config.action_cable.allowed_request_origins = ['http://rubyonrails.com', /http:\/\/ruby.*/]
```
或者干脆关闭了跨域的检查
```
config.action_cable.disable_request_forgery_protection = true
```
源码可见于此处:
```
#https://github.com/rails/rails/blob/71657146374595b6b9b04916649922fa4f5f512d/actioncable/lib/action_cable/connection/base.rb#L195
def allow_request_origin?
return true if server.config.disable_request_forgery_protection
if Array(server.config.allowed_request_origins).any? { |allowed_origin| allowed_origin === env['HTTP_ORIGIN'] }
true
else
logger.error("Request origin not allowed: #{env['HTTP_ORIGIN']}")
false
end
end
```
##### 2.2 用户系统
刚才从整个网站的安全出发讲解了websocket的安全问题,现在要从刚细颗粒的地方讲解安全,那就是用户系统,意思就是说,不是每个使用网站的用户都能使用websocket,比如登录的用户才能使用,不登录的用户就过滤掉。
做一切的关键的文件在于`app/channels/application_cable/connection.rb`这个文件。
现在我们把其改写一下:
```
# Be sure to restart your server when you modify this file. Action Cable runs in a loop that does not support auto reloading.
module ApplicationCable
class Connection < ActionCable::Connection::Base
identified_by :current_user
def connect
self.current_user = find_verified_user
end
protected
def find_verified_user
cookies.signed[:username] || reject_unauthorized_connection
end
end
end
```
意思就是说,带有`cookies.signed[:username]`的用户才是被允许的,不然就是拒绝连接`reject_unauthorized_connection`。
现在我们先创建一个登录界面:
```
# app/views/sessions/new.html.erb
<%= form_for :session, url: sessions_path do |f| %>
<%= f.label :username, 'Enter a username' %>
<%= f.text_field :username %>
<%= f.submit 'Start chatting' %> <% end %> ``` ``` # app/controllers/sessions_controller.rb class SessionsController < ApplicationController def create cookies.signed[:username] = params[:session][:username] redirect_to "/rooms/show" end end ``` ``` # config/routes.rb root 'sessions#new' ``` 登录界面是这样的: 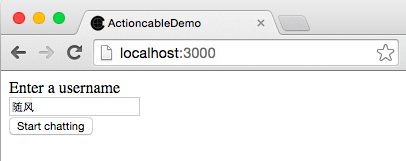 登录之后,后台的日志信息就会多了这行: ``` Registered connection (随风) ``` 如果把cookies信息清掉,也就是没有登录的情况,后台就会提示下面的信息: ``` An unauthorized connection attempt was rejected Failed to upgrade to WebSocket (REQUEST_METHOD: GET, HTTP_CONNECTION: Upgrade, HTTP_UPGRADE: websocket) ``` 表示无法连接到websocket服务。 这个就解决了用户系统登录的问题的。 ##### 2.3 适配器 在actioncable源码里定义了好几种适配器,比如redis的pub/sub,还有postgresql的notify。 源码可见于:[https://github.com/rails/rails/tree/master/actioncable/lib/action\_cable/subscription\_adapter。](https://github.com/rails/rails/tree/master/actioncable/lib/action_cable/subscription_adapter%E3%80%82) 先不管什么是适配器,我们先用redis来试试。 改变`config/cable.yml`文件,内容如下: ``` # Action Cable uses Redis by default to administer connections, channels, and sending/receiving messages over the WebSocket. production: adapter: redis url: redis://localhost:6379/1 development: adapter: redis url: redis://localhost:6379/1 # adapter: async test: adapter: async ``` 在`Gemfile`文件里添加下面这行: ``` gem 'redis' ``` 执行`bundle`并重启服务器。 再用`redis-cli monitor`命令进入redis的终端界面,并监控redis的运行情况。 当我登录聊天室的时候,`monitor`监控界面会出现下面一行: ``` 1461656197.311821 [1 127.0.0.1:58177] "subscribe" "room_channel" ``` 表示在订阅`room_channel`这个通道。 因为我们之前`app/channels/room_channel.rb`文件的内容是这样的: ``` class RoomChannel < ApplicationCable::Channel def subscribed stream_from "room_channel" end ... end ``` 我们也定义了一个叫`room_channel`的通道,所以跟之前redis的数据对应起来。 现在我们键入聊天信息,并回车。 `monitor`界面会出现类似下面的信息: ``` 1461656387.284232 [1 127.0.0.1:58179] "publish" "room_channel" "{\"message\":\"\\u003cdiv class=\xe2\x80\x9cmessage\xe2\x80\x9d\\u003e\\n \\u003cp\\u003e11111\\u003c/p\\u003e\\n\\u003c/div\\u003e\\n\"}" ``` 表示正在`room_channel`通道上广播消息。 redis的pub/sub机制就是一种广播机制,它能够把一个消息向多个客户端传递,我们实现聊天室正是需要这样的功能,所以actioncable就可以利用它来当适配器,类似的机制也可以使用postgresql的notify机制,也是一样的道理,就是多个客户端订阅一个通道,能够同时接收通道的信息。 不像actioncable自己封装了redis的pub/sub机制,在[websocket之用tubesock在rails实现聊天室(五)](http://www.rails365.net/articles/websocket-zhi-yong-tubesock-zai-rails-shi-xian-liao-tian-shi-wu)这篇文章有介绍过直接用redis的pub/sub机制。 比如下面的代码: ``` def chat hijack do |tubesock| redis_thread = Thread.new do Redis.new.subscribe "chat" do |on| on.message do |channel, message| tubesock.send_data message end end end tubesock.onmessage do |m| Redis.new.publish "chat", m end tubesock.onclose do redis_thread.kill end end end ``` 也可以自己实现最简单的适配器,其实就是用一个数组。比如默认的async适配器,就是用类似的方法实现的。原理是这样的,比如一个websocket连接进到服务器来了,就把这个socket存进数组中,每个数组的内容都是socket的连接,比如要广播消息的话,就是直接循环这个数据,分别往里面发送信息即可,比如,socket.write("hello")。 ##### 2.4 服务器运行 可以有两种方式来运行actioncable提供的websocket服务。第一种是以`Rack socket hijacking API`的方式来运行,这个跟之前[tubesock](http://www.rails365.net/articles/websocket-zhi-yong-tubesock-zai-rails-shi-xian-liao-tian-shi-wu)这个gem是一样的,它跟web进程集成在一起,以挂载的方式挂载到一个路径中。 正如上文所说的,可以在路由中挂载,比如: ``` # config/routes.rb Rails.application.routes.draw do mount ActionCable.server => '/cable' end ``` 还有另外一种是在配置文件中修改。 ``` # config/application.rb class Application < Rails::Application config.action_cable.mount_path = '/websocket' end ``` 另一种运行websocket的方式是`Standalone`。它的意思是把websocket服务运行在另一个进程中,因为它仍然是一个rack应用程序,只要支持`Rack socket hijacking API`的应用程序都可以运行,比如puma,unicorn等。 新建`cable/config.ru`文件,内容如下: ``` require ::File.expand_path('../../config/environment', __FILE__) Rails.application.eager_load! run ActionCable.server ``` 然后再新建`bin/cable`可执行文件,内容如下: ``` #!/bin/bash bundle exec puma -p 28080 cable/config.ru ``` 使用`bin/cable`命令可运行。 关于websocket的服务器部署后续有另外的章节介绍。 ##### 2.5 js客户端 浏览器要与客户端保持链接,必须像之前那样主动发送websocket请求。 `rails 5`中默认生成了一个文件,叫`app/assets/javascripts/cable.coffee`,把下面两行注释拿掉: ``` @App ||= {} App.cable = ActionCable.createConsumer() ``` 默认情况下,websocket服务器的地址是`/cable`。 可以从源码上看到这个实现。 ``` # https://github.com/rails/rails/blob/52ce6ece8c8f74064bb64e0a0b1ddd83092718e1/actioncable/app/assets/javascripts/action_cable.coffee.erb#L8 @ActionCable = INTERNAL: <%= ActionCable::INTERNAL.to_json %> createConsumer: (url) -> url ?= @getConfig("url") ? @INTERNAL.default_mount_path new ActionCable.Consumer @createWebSocketURL(url) ``` 其中,`@INTERNAL.default_mount_path`就是`/cable`。 ``` # https://github.com/rails/rails/blob/7f043ffb427c1beda16cc97a991599be808fffc3/actioncable/lib/action_cable.rb#L38 INTERNAL = { message_types: { welcome: 'welcome'.freeze, ping: 'ping'.freeze, confirmation: 'confirm_subscription'.freeze, rejection: 'reject_subscription'.freeze }, default_mount_path: '/cable'.freeze, protocols: ["actioncable-v1-json".freeze, "actioncable-unsupported".freeze].freeze } ``` 按照前文所说,可以把服务器部署到另外一台主机上,或者说,我不想用默认的`/cable`路径,有时候,开发环境和生产环境的情况根本就是两码事,本地可以随意,但线上也许是另外的服务器,或者说,本地可以是ws协议,线上是wss协议。 actioncable也提供了一个简单的配置参数。 ``` config.action_cable.url = "ws://example.com:28080" ``` 不过,这个需要在layout上加上这行: ``` <%= action_cable_meta_tag %> ``` 它的源码是这样的: ``` def action_cable_meta_tag tag "meta", name: "action-cable-url", content: ( ActionCable.server.config.url || ActionCable.server.config.mount_path || raise("No Action Cable URL configured -- please configure this at config.action_cable.url") ) end ``` 就只是生成一个html的标签,被js的`createConsumer`利用,具体可以看`createConsumer`的方法。 本篇完结。 下一篇:[websocket之actioncable实现重新连接功能(九)](http://www.rails365.net/articles/websocket-zhi-actioncable-shi-xian-chong-xin-lian-jie-gong-neng-jiu)
';
<%= f.text_field :username %>
<%= f.submit 'Start chatting' %> <% end %> ``` ``` # app/controllers/sessions_controller.rb class SessionsController < ApplicationController def create cookies.signed[:username] = params[:session][:username] redirect_to "/rooms/show" end end ``` ``` # config/routes.rb root 'sessions#new' ``` 登录界面是这样的:  登录之后,后台的日志信息就会多了这行: ``` Registered connection (随风) ``` 如果把cookies信息清掉,也就是没有登录的情况,后台就会提示下面的信息: ``` An unauthorized connection attempt was rejected Failed to upgrade to WebSocket (REQUEST_METHOD: GET, HTTP_CONNECTION: Upgrade, HTTP_UPGRADE: websocket) ``` 表示无法连接到websocket服务。 这个就解决了用户系统登录的问题的。 ##### 2.3 适配器 在actioncable源码里定义了好几种适配器,比如redis的pub/sub,还有postgresql的notify。 源码可见于:[https://github.com/rails/rails/tree/master/actioncable/lib/action\_cable/subscription\_adapter。](https://github.com/rails/rails/tree/master/actioncable/lib/action_cable/subscription_adapter%E3%80%82) 先不管什么是适配器,我们先用redis来试试。 改变`config/cable.yml`文件,内容如下: ``` # Action Cable uses Redis by default to administer connections, channels, and sending/receiving messages over the WebSocket. production: adapter: redis url: redis://localhost:6379/1 development: adapter: redis url: redis://localhost:6379/1 # adapter: async test: adapter: async ``` 在`Gemfile`文件里添加下面这行: ``` gem 'redis' ``` 执行`bundle`并重启服务器。 再用`redis-cli monitor`命令进入redis的终端界面,并监控redis的运行情况。 当我登录聊天室的时候,`monitor`监控界面会出现下面一行: ``` 1461656197.311821 [1 127.0.0.1:58177] "subscribe" "room_channel" ``` 表示在订阅`room_channel`这个通道。 因为我们之前`app/channels/room_channel.rb`文件的内容是这样的: ``` class RoomChannel < ApplicationCable::Channel def subscribed stream_from "room_channel" end ... end ``` 我们也定义了一个叫`room_channel`的通道,所以跟之前redis的数据对应起来。 现在我们键入聊天信息,并回车。 `monitor`界面会出现类似下面的信息: ``` 1461656387.284232 [1 127.0.0.1:58179] "publish" "room_channel" "{\"message\":\"\\u003cdiv class=\xe2\x80\x9cmessage\xe2\x80\x9d\\u003e\\n \\u003cp\\u003e11111\\u003c/p\\u003e\\n\\u003c/div\\u003e\\n\"}" ``` 表示正在`room_channel`通道上广播消息。 redis的pub/sub机制就是一种广播机制,它能够把一个消息向多个客户端传递,我们实现聊天室正是需要这样的功能,所以actioncable就可以利用它来当适配器,类似的机制也可以使用postgresql的notify机制,也是一样的道理,就是多个客户端订阅一个通道,能够同时接收通道的信息。 不像actioncable自己封装了redis的pub/sub机制,在[websocket之用tubesock在rails实现聊天室(五)](http://www.rails365.net/articles/websocket-zhi-yong-tubesock-zai-rails-shi-xian-liao-tian-shi-wu)这篇文章有介绍过直接用redis的pub/sub机制。 比如下面的代码: ``` def chat hijack do |tubesock| redis_thread = Thread.new do Redis.new.subscribe "chat" do |on| on.message do |channel, message| tubesock.send_data message end end end tubesock.onmessage do |m| Redis.new.publish "chat", m end tubesock.onclose do redis_thread.kill end end end ``` 也可以自己实现最简单的适配器,其实就是用一个数组。比如默认的async适配器,就是用类似的方法实现的。原理是这样的,比如一个websocket连接进到服务器来了,就把这个socket存进数组中,每个数组的内容都是socket的连接,比如要广播消息的话,就是直接循环这个数据,分别往里面发送信息即可,比如,socket.write("hello")。 ##### 2.4 服务器运行 可以有两种方式来运行actioncable提供的websocket服务。第一种是以`Rack socket hijacking API`的方式来运行,这个跟之前[tubesock](http://www.rails365.net/articles/websocket-zhi-yong-tubesock-zai-rails-shi-xian-liao-tian-shi-wu)这个gem是一样的,它跟web进程集成在一起,以挂载的方式挂载到一个路径中。 正如上文所说的,可以在路由中挂载,比如: ``` # config/routes.rb Rails.application.routes.draw do mount ActionCable.server => '/cable' end ``` 还有另外一种是在配置文件中修改。 ``` # config/application.rb class Application < Rails::Application config.action_cable.mount_path = '/websocket' end ``` 另一种运行websocket的方式是`Standalone`。它的意思是把websocket服务运行在另一个进程中,因为它仍然是一个rack应用程序,只要支持`Rack socket hijacking API`的应用程序都可以运行,比如puma,unicorn等。 新建`cable/config.ru`文件,内容如下: ``` require ::File.expand_path('../../config/environment', __FILE__) Rails.application.eager_load! run ActionCable.server ``` 然后再新建`bin/cable`可执行文件,内容如下: ``` #!/bin/bash bundle exec puma -p 28080 cable/config.ru ``` 使用`bin/cable`命令可运行。 关于websocket的服务器部署后续有另外的章节介绍。 ##### 2.5 js客户端 浏览器要与客户端保持链接,必须像之前那样主动发送websocket请求。 `rails 5`中默认生成了一个文件,叫`app/assets/javascripts/cable.coffee`,把下面两行注释拿掉: ``` @App ||= {} App.cable = ActionCable.createConsumer() ``` 默认情况下,websocket服务器的地址是`/cable`。 可以从源码上看到这个实现。 ``` # https://github.com/rails/rails/blob/52ce6ece8c8f74064bb64e0a0b1ddd83092718e1/actioncable/app/assets/javascripts/action_cable.coffee.erb#L8 @ActionCable = INTERNAL: <%= ActionCable::INTERNAL.to_json %> createConsumer: (url) -> url ?= @getConfig("url") ? @INTERNAL.default_mount_path new ActionCable.Consumer @createWebSocketURL(url) ``` 其中,`@INTERNAL.default_mount_path`就是`/cable`。 ``` # https://github.com/rails/rails/blob/7f043ffb427c1beda16cc97a991599be808fffc3/actioncable/lib/action_cable.rb#L38 INTERNAL = { message_types: { welcome: 'welcome'.freeze, ping: 'ping'.freeze, confirmation: 'confirm_subscription'.freeze, rejection: 'reject_subscription'.freeze }, default_mount_path: '/cable'.freeze, protocols: ["actioncable-v1-json".freeze, "actioncable-unsupported".freeze].freeze } ``` 按照前文所说,可以把服务器部署到另外一台主机上,或者说,我不想用默认的`/cable`路径,有时候,开发环境和生产环境的情况根本就是两码事,本地可以随意,但线上也许是另外的服务器,或者说,本地可以是ws协议,线上是wss协议。 actioncable也提供了一个简单的配置参数。 ``` config.action_cable.url = "ws://example.com:28080" ``` 不过,这个需要在layout上加上这行: ``` <%= action_cable_meta_tag %> ``` 它的源码是这样的: ``` def action_cable_meta_tag tag "meta", name: "action-cable-url", content: ( ActionCable.server.config.url || ActionCable.server.config.mount_path || raise("No Action Cable URL configured -- please configure this at config.action_cable.url") ) end ``` 就只是生成一个html的标签,被js的`createConsumer`利用,具体可以看`createConsumer`的方法。 本篇完结。 下一篇:[websocket之actioncable实现重新连接功能(九)](http://www.rails365.net/articles/websocket-zhi-actioncable-shi-xian-chong-xin-lian-jie-gong-neng-jiu)
7. actioncable 入门
最后更新于:2022-04-02 01:43:02
# 7. actioncable 入门
#### 1. 介绍
websocket的序列文章重点要讲的就是[actioncable](https://github.com/rails/rails/tree/master/actioncable),之前也讲了好多关于各种方式实现聊天室的文章,相信从中,也能学到好多关于websocket实践的知识和经验,这节要来讲讲actioncable。
actioncable是集成在rails 5中的一个功能,它能够轻易的在rails中使用websocket。现在先把actioncable用起来,再慢慢研究其原理和特性。
#### 2. 使用
还是跟先前的例子一样,建立一个聊天室。
##### 2.1 聊天室界面
首先,rails的版本必须得是5以上,写这篇文章的时候,rails 5正式版还没有出来,目前的版本是5.0.0.beta4。
```
$ rails new actioncable_demo
$ cd actioncable_demo
```
这样就生成了一个新项目。
接着创建message这个model,存储聊天记录。
```
$ rails g model message content:text
$ rails db:migrate
```
创建聊天室的界面。
在config/routes.rb中添加路由。
```
Rails.application.routes.draw do
get 'rooms/show'
end
```
创建controller,添加`app/controllers/rooms_controller.rb`文件,内容如下:
```
class RoomsController < ApplicationController
def show
@messages = Message.all
end
end
```
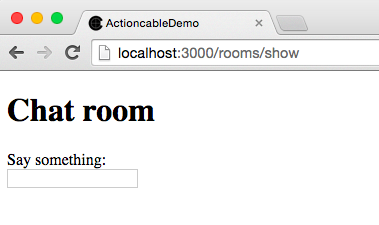
添加view,添加`app/views/rooms/show.html.erb`文件,内容如下:
```
';
Chat room
<%= render @messages %>
```
还有`app/views/messages/_message.html.erb`文件,内容如下:
```
```
到目前为止,按照之前的经验,界面都建立好了,如下图所示:
##### 2.2 开启websocket
接下来,就是要来处理websocket部分。
先在客户端浏览器中开启websocket请求。
actioncable默认提供了一个文件`app/assets/javascripts/cable.coffee`,把几行注释打开,就可以开启websocket,内容如下:
```
#
#= require action_cable
#= require_self
#= require_tree ./channels
#
@App ||= {}
App.cable = ActionCable.createConsumer()
```
其实这些js的内容很简单,它做的主要的事情就是前面几篇文章所讲的在客户端浏览器执行`new WebSocket`,具体的内容可以查看其源码。
还要在路由中添加下面这行,把websocket服务以engine的方式挂载起来。
```
mount ActionCable.server => '/cable'
```
至此,websocket已经开启了,可以通过chrome浏览器的开发者工具查看链接的信息,只要有101协议的信息,表示就是成功的。
##### 2.3 channel
现在要让客户端和服务器端连接起来。
actioncable提供了一个叫做`channel`的技术,中文名可以称为`"通道"`。actioncable是一种`pub/sub`的架构,服务器通过channel发布消息,多个客户端通过对应的channel订阅消息,服务器能够广播消息给客户端,从而实现客户端和服务器端的交互。
先新建一个channel。
```
$ rails g channel room speak
```
修改`app/channels/room_channel.rb`文件,内容如下:
```
class RoomChannel < ApplicationCable::Channel
def subscribed
stream_from "room_channel"
end
def unsubscribed
# Any cleanup needed when channel is unsubscribed
end
def speak(data)
# ActionCable.server.broadcast "room_channel", message: data['message']
Message.create! content: data['message']
end
end
```
其中定义了三个方法,分别是`subscribed`,`unsubscribed`,`speak`。
`subscribed`和`unsubscribed`方法是默认就生成的,而`speak`是我们自己定义的。
`subscribed`表示的是当客户端连接上来的时候使用的方法。
`unsubscribed`表示的是当客户端与服务器失去连接的时候使用的方法。
还有,`app/assets/javascripts/channels/room.coffee`文件,内容如下:
```
App.room = App.cable.subscriptions.create "RoomChannel",
connected: ->
# Called when the subscription is ready for use on the server
disconnected: ->
# Called when the subscription has been terminated by the server
received: (data) ->
$('#messages').append data['message']
# Called when there's incoming data on the websocket for this channel
speak: (message) ->
@perform 'speak', message: message
$(document).on 'keypress', '[data-behavior~=room_speaker]', (event) ->
if event.keyCode is 13 # return = send
App.room.speak event.target.value
event.target.value = ""
event.preventDefault()
```
`App.room`里定义了四个方法,除了`speak`,`connected`、`disconnected`、`received`都是actioncable定义的。
这几个方法可以和`RoomChannel`里的方法对应起来,比如:
`connected`和`subscribed`对应,表示客户端和服务器端连接之后的情况。
`disconnected`和`unsubscribed`对应,表示客户端和服务器端失去连接之后的情况。
`received`表示从服务器接收到信息之后的情况。因为服务器总是要向客户端推送信息的,接收完信息之后,就可以在这里进行一些页面上的操作,比如DOM更新等。
`room.coffee`文件中有重要的一行`App.room.speak event.target.value`,当键入聊天信息,一按回车键后,就会通过这行代码,把聊天信息,发送到后端服务器,并且会被`room_channel.rb`中的`speak`接收,执行`Message.create! content: data['message']`命令。
##### 2.4 activejob
现在还没真正完成,还差一部分。
`room.coffee`文件中有一个`received`方法,它有一行指令`$('#messages').append data['message']`。
这个表示当聊天信息发出时,会在聊天信息展示界面上添加聊天的内容。
现在来处理这个,我们通过activejob来处理,还记得之前的`app/views/messages/_message.html.erb`文件吗,现在要发挥它的作用。
先建立一个job。
```
$ rails g job message_broadcast
```
修改`app/jobs/message_broadcast_job.rb`文件,内容如下:
```
class MessageBroadcastJob < ApplicationJob
queue_as :default
def perform(message)
ActionCable.server.broadcast 'room_channel', message: render_message(message)
end
private
def render_message(message)
ApplicationController.renderer.render(partial: 'messages/message', locals: { message: message })
end
end
```
还要在一个地方执行这个job,是当创建完message的时候。
修改`app/models/message.rb`文件,内容如下:
```
class Message < ApplicationRecord
after_create_commit { MessageBroadcastJob.perform_later self }
end
```
做完这一切,重启一下服务器。
现在来看下效果:
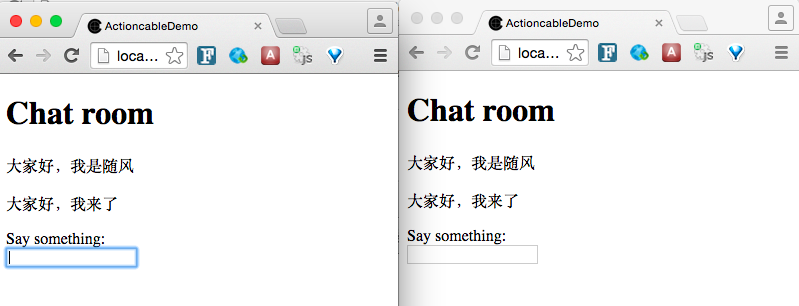
本篇完结。
下一篇: [websocket之actioncable进阶(八)](http://www.rails365.net/articles/websocket-zhi-actioncable-jin-jie-ba)
6. message_bus
最后更新于:2022-04-02 01:42:59
# 6. message\_bus
#### 1. 介绍
本来是要先写`ActionCable`的,不过在写`ActionCable`之前,先来写写[message\_bus](https://github.com/SamSaffron/message_bus)。它不是websocket的内容,但它在ActionCable出现之前用得蛮多,以后可能会少用了,但它还是一个优秀的gem。
`message_bus`的机制是轮循,长循环,或者EventSource相关的,它在前后端都进行了整合,很方便使用。如果在以前要自己手动使用轮循机制,可能得手动写一些js代码,然而`message_bus`不仅在js端进行了封装,在后端也提供了一种叫pub/sub的机制,理解了`message_bus`,也能更好的理解`ActionCable`,因为很概念是互通的。
#### 2. 使用
我们还是来实现之前的聊天室来例子,来玩一下message\_bus。
安装。
```
gem 'message_bus'
gem 'puma'
```
添加app/controllers/chat\_controller.rb文件,内容如下:
```
class ChatController < ApplicationController
def chat
MessageBus.publish "/channel", params[:text]
head 200, content_type: "text/html"
end
end
```
主要是`MessageBus.publish "/channel", params[:text]`这一行,表示向`/channel`这个通道推送`params[:text]`参数中的数据。
在config/routes.rb中添加路由。
```
Rails.application.routes.draw do
post "/chat", to: "chat#chat"
end
```
分别添加view和js。
```
h1 Tubesock Chat
pre id="output"
= form_tag "/chat", class: "chat", remote: true
input placeholder="hello world" autofocus=true name="text"
```
```
MessageBus.start()
MessageBus.callbackInterval = 500
MessageBus.subscribe "/channel", (data) ->
$("#output").append "#{data}
" ``` `MessageBus.subscribe "/channel"`表示订阅服务器端推送过来的通道的数据,还有,`callbackInterval`表示的是轮循的时间。 最后的效果如下:  本篇完结。 下一篇:[websocket之actioncable入门(七)](http://www.rails365.net/articles/websocket-zhi-actioncable-ru-men-qi)
';
" ``` `MessageBus.subscribe "/channel"`表示订阅服务器端推送过来的通道的数据,还有,`callbackInterval`表示的是轮循的时间。 最后的效果如下:  本篇完结。 下一篇:[websocket之actioncable入门(七)](http://www.rails365.net/articles/websocket-zhi-actioncable-ru-men-qi)
5. 用 tubesock 在 Rails 实现聊天室
最后更新于:2022-04-02 01:42:57
# 5. 用 tubesock 在 Rails 实现聊天室
#### 1. 介绍
前篇文章介绍了如何实现一个简易的聊天室,有时候,我们在rails应用中也是需要使用websocket的功能,比如,消息的通知,一些数据状态的通知等,所以这篇来介绍下如何简单地实现这个功能。
#### 2. rack hijack
这篇文章主要介绍的是一个比较重要的概念,它是rack hijack。hijack是rack在1.5.0之后才支持,它出现的目的是为了能在rack层次对socket连接进行操作。能对底层的socket进行操作,也就能使用websocket。puma,unicorn等服务器都有它的实现。
新建一个文件叫hijack.ru,内容如下:
```
use Rack::Lint
use Rack::ContentLength
use Rack::ContentType, "text/plain"
class DieIfUsed
def each
abort "body.each called after response hijack\n"
end
def close
abort "body.close called after response hijack\n"
end
end
run lambda { |env|
case env["PATH_INFO"]
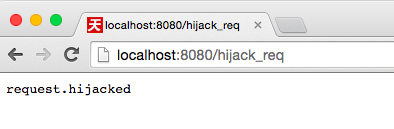
when "/hijack_req"
if env["rack.hijack?"]
io = env["rack.hijack"].call
if io.respond_to?(:read_nonblock) &&
env["rack.hijack_io"].respond_to?(:read_nonblock)
# exercise both, since we Rack::Lint may use different objects
env["rack.hijack_io"].write("HTTP/1.0 200 OK\r\n\r\n")
io.write("request.hijacked")
io.close
return [ 500, {}, DieIfUsed.new ]
end
end
[ 500, {}, [ "hijack BAD\n" ] ]
when "/hijack_res"
r = "response.hijacked"
[ 200,
{
"Content-Length" => r.bytesize.to_s,
"rack.hijack" => proc do |io|
io.write(r)
io.close
end
},
DieIfUsed.new
]
end
}
```
其中`env['rack.hijack'].call`就是返回socket的文件描述符的对象,之后可以对这个对象进行像socket那样的操作,比如`io.write("request.hijacked")`,就是返回“request.hijacked”。
使用下面的指令运行这段代码:
```
$ unicorn hijack
I, [2016-04-12T15:44:53.197379 #18197] INFO -- : listening on addr=0.0.0.0:8080 fd=9
I, [2016-04-12T15:44:53.197564 #18197] INFO -- : worker=0 spawning...
I, [2016-04-12T15:44:53.201453 #18197] INFO -- : master process ready
I, [2016-04-12T15:44:53.203755 #18226] INFO -- : worker=0 spawned pid=18226
I, [2016-04-12T15:44:53.204682 #18226] INFO -- : Refreshing Gem list
I, [2016-04-12T15:44:53.315295 #18226] INFO -- : worker=0 ready
```
监听在8080端口,可以用浏览器访问。
puma,unicorn等服务器对hijack的实现是很简单的,本来他们就是对socket的操作,现在只不过是提供了一个接口,把它放到请求的全局变量中罢了,还增加了一些状态判断。主要是这三个变量`env['rack.hijack']`,`env['rack.hijack?']`,`env['rack.hijack_io']`。
#### 3. Tubesock
[tubesock](https://github.com/ngauthier/tubesock)是一个gem,它就是对上面的`rack hijack`进行封装,从而能实现websocket功能,它不仅能在rack中实现,也能在rails中的controller使用。
现在我们来在rails中结合redis的pub/sub功能实现一个聊天室功能。
首先安装,我们使用puma作为服务器。
在Gemfile中添加下面几行。
```
gem 'puma'
gem 'redis-rails'
gem 'tubesock'
```
添加`app/controllers/chat_controller.rb`文件,内容如下:
```
class ChatController < ApplicationController
include Tubesock::Hijack
def chat
hijack do |tubesock|
redis_thread = Thread.new do
Redis.new.subscribe "chat" do |on|
on.message do |channel, message|
tubesock.send_data message
end
end
end
tubesock.onmessage do |m|
Redis.new.publish "chat", m
end
tubesock.onclose do
redis_thread.kill
end
end
end
end
```
在`config/routes.rb`中添加路由。
```
Rails.application.routes.draw do
get "/chat", to: "chat#chat"
end
```
分别添加view和js。
```
" $("body").on "submit", "form.chat", (event) -> event.preventDefault() $input = $(this).find("input") socket.send $input.val() $input.val(null) ``` 对上面的代码进行解析: 假如有一个浏览器客户端打开了,就会运行`new WebSocket "ws://#{window.location.host}/chat"`。 这样就到了`ChatController`中的`chat`方法。 执行了下面的语句: ``` redis_thread = Thread.new do Redis.new.subscribe "chat" do |on| on.message do |channel, message| tubesock.send_data message end end end ``` 将会开启一个新的线程,并会用Redis去订阅一个新的频道`chat`,进入到`subscribe`方法中,`tubesock.send_data message`表示一旦有消息过来就立即用tubesock这个socket把数据返回给客户端浏览器。 ``` tubesock.onmessage do |m| Redis.new.publish "chat", m end ``` 上面的代码表示一旦服务器接收到客户端浏览器的消息之后的动作,比如说,在聊天界面输入消息内容。接收到消息之后就立即发送到上面所说的`chat`通道,上面Redis中的`subscribe`动作就会被触发。因为所有的客户端一连上服务器就会执行Redis的`subscribe`功能,也就是说所有浏览器客户端都会触发`subscribe`里的动作,就会接收到服务器端的推送消息,这也正是聊天界面的效果。 效果如下:  本篇完结。 下一篇:[websocket之message\_bus(六)](http://www.rails365.net/articles/websocket-message-bus-liu)
';
Tubesock Chat
``` ``` $ -> socket = new WebSocket "ws://#{window.location.host}/chat" socket.onmessage = (event) -> if event.data.length $("#output").append "#{event.data}" $("body").on "submit", "form.chat", (event) -> event.preventDefault() $input = $(this).find("input") socket.send $input.val() $input.val(null) ``` 对上面的代码进行解析: 假如有一个浏览器客户端打开了,就会运行`new WebSocket "ws://#{window.location.host}/chat"`。 这样就到了`ChatController`中的`chat`方法。 执行了下面的语句: ``` redis_thread = Thread.new do Redis.new.subscribe "chat" do |on| on.message do |channel, message| tubesock.send_data message end end end ``` 将会开启一个新的线程,并会用Redis去订阅一个新的频道`chat`,进入到`subscribe`方法中,`tubesock.send_data message`表示一旦有消息过来就立即用tubesock这个socket把数据返回给客户端浏览器。 ``` tubesock.onmessage do |m| Redis.new.publish "chat", m end ``` 上面的代码表示一旦服务器接收到客户端浏览器的消息之后的动作,比如说,在聊天界面输入消息内容。接收到消息之后就立即发送到上面所说的`chat`通道,上面Redis中的`subscribe`动作就会被触发。因为所有的客户端一连上服务器就会执行Redis的`subscribe`功能,也就是说所有浏览器客户端都会触发`subscribe`里的动作,就会接收到服务器端的推送消息,这也正是聊天界面的效果。 效果如下:  本篇完结。 下一篇:[websocket之message\_bus(六)](http://www.rails365.net/articles/websocket-message-bus-liu)
4. 实现简易聊天室
最后更新于:2022-04-02 01:42:55
# 4. 实现简易聊天室
#### 1. 介绍
这篇文章介绍一下如何实现一个简易的聊天室。
#### 2. 客户端
首先是界面。
新建一个index.html文件,内容如下:
```
websocket chat
").text("[log] "+msg));
};
var print = function(msg){
$("#chat").prepend($(" ").text(msg));
};
```
post函数中有一句`ws.send(name+" : "+mes);`发送到服务器端,这个是发送聊天语句的。
#### 3. 服务器端
现在添加服务器端代码。
新建echo\_server.rb文件,内容如下:
```
#!/usr/bin/env ruby
require 'eventmachine'
require 'websocket-eventmachine-server'
PORT = (ARGV.shift || 8080).to_i
EM::run do
@channel = EM::Channel.new
puts "start websocket server - port:#{PORT}"
WebSocket::EventMachine::Server.start(:host => "0.0.0.0", :port => PORT) do |ws|
ws.onopen do
sid = @channel.subscribe do |mes|
ws.send mes
end
puts "<#{sid}> connect"
@channel.push "hello new client <#{sid}>"
ws.onmessage do |msg|
puts "<#{sid}> #{msg}"
@channel.push "<#{sid}> #{msg}"
end
ws.onclose do
puts "<#{sid}> disconnected"
@channel.unsubscribe sid
@channel.push "<#{sid}> disconnected"
end
end
end
end
```
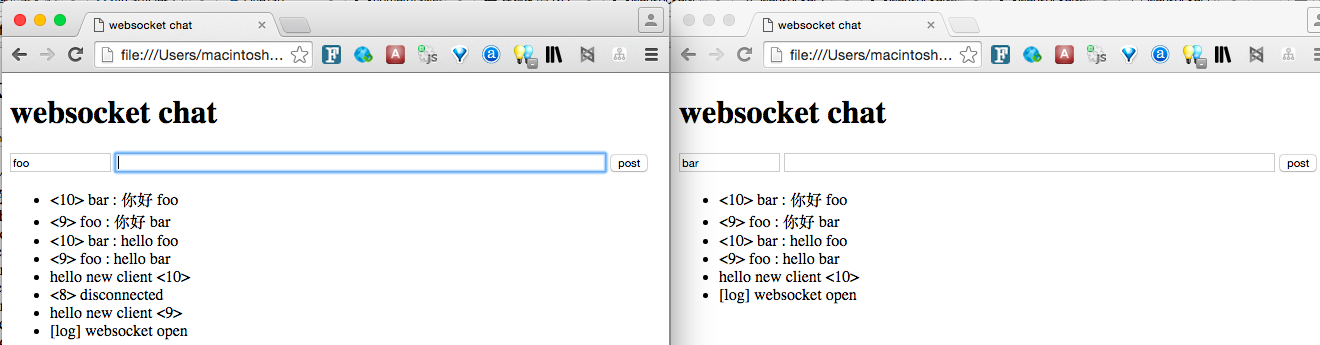
浏览器和服务器端一直会维持链接,`ws.send mes`表示发送信息给浏览器,只要浏览器与服务器端维持着链接,就会收到信息,相当于广播了。
运行服务器。
```
$ ruby echo_server.rb
```
接着打开两个浏览器,都分别运行index.html文件,就可以看到效果了。
本篇完结。
下一篇:[websocket之rack hijack的原理及tubesock(五)](http://www.rails365.net/articles/websocket-zhi-rack-hijack-de-yuan-li-ji-tubesock-wu)
';
websocket chat
3. 客户端详解
最后更新于:2022-04-02 01:42:53
# 3. 客户端详解
#### 1. 介绍
上一篇文章[websocket之简单的服务器端(二)](http://www.rails365.net/articles/websocket-zhi-jian-dan-de-fu-wu-qi-duan-er)介绍了两个简单的websocket服务器,并且介绍了如何用javascript连接上websocket服务器。除了能用浏览器的javascript连接上,还可以用任何编程语言,因为websocket协议是基于TCP协议请求的,只要能发送TCP socket请求,就可以发送websocket请求,这篇文章来讲述如何用ruby来发送websocket请求,并讲讲其原理。
#### 2. websocket-ruby
[websocket-ruby](https://github.com/imanel/websocket-ruby)是一个纯ruby实现websocket请求的gem,它支持很多版本的websocket。比如官方列出的:
- [hixie-75](http://tools.ietf.org/html/draft-hixie-thewebsocketprotocol-75)
- [hixie-76](http://tools.ietf.org/html/draft-hixie-thewebsocketprotocol-76)
- [all hybi drafts (00-13)](http://tools.ietf.org/html/draft-ietf-hybi-thewebsocketprotocol-17)
- [RFC 6455](http://datatracker.ietf.org/doc/rfc6455/)
学习它,可以让我们对websocket协议的客户端和服务器的实现更为了解。
首先安装它。
```
$ gem install "websocket"
```
来看一个最简单的例子,客户端请求websocket请求。
```
@handshake = WebSocket::Handshake::Server.new
# Parse client request
@handshake << <
';
2. 客户端与服务器端的交互
最后更新于:2022-04-02 01:42:50
# 2. 客户端与服务器端的交互
在我们测试和使用websocket之前,我们必须要有一个现成的websocket服务器,最好能够快速搭建一个,所以现在必须快速搭建一个websocket服务器,在这里,分别介绍一个c++和go语言写的websocket server的库,还有,还会介绍如何用JavaScript来测试websocket server,方便我们了解整个websocket的工作流程。
#### 1. Simple-WebSocket-Server
[Simple-WebSocket-Server](https://github.com/eidheim/Simple-WebSocket-Server)是用c++语言写的工具。只需几行命令,就可以轻易地搭建websocket服务器。
```
git clone https://github.com/eidheim/Simple-WebSocket-Server
cd Simple-WebSocket-Server
cmake .
make
```
编译完成之后会产生两个可执行文件,其实是两个demo程序,也是服务器端程序,分别是`ws_examples`和`wss_examples`,其中`wss_examples`是对应SSL加密的,需要证书,我们这里只需要`ws_examples`,先不管`wss_examples`。
运行`ws_examples`。
```
$ ./ws_examples
Server: Opened connection 140361834957120
Client: Opened connection
Client: Sending message: "Hello"
Server: Message received: "Hello" from 140361834957120
Server: Sending message "Hello" to 140361834957120
Client: Message received: "Hello"
Client: Sending close connection
Server: Closed connection 140361834957120 with status code 1000
Client: Closed connection with status code 1000
```
这个程序演示了websocket连接的整个过程,它先是在服务器端开启websocket服务,然后客户端连接上来,并发送"hello"给服务器端,服务器端接收后,又把"hello"这条信息发给客户端,客户端接收了"hello"之后,客户端请求关闭连接,服务器端接收到客户端发送的关闭连接的请求后,就关闭了连接,最后,客户端也关闭了连接,整个流程就结束了。
#### 2. JavaScript访问websocket服务
现在服务器也搭起来,要让客户端能够连接上去,只需要使用JavaScript就可以了。也是几行代码就能搞定。
打开chrome浏览器的开发者工具,切换到`console`标签。
输入下面的指令。
```
new WebSocket("ws://localhost:8080/echo")
```
如下图所示:
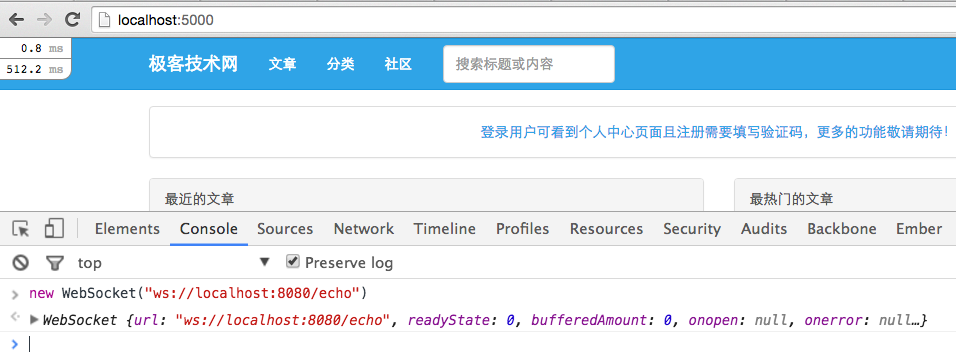
`Simple-WebSocket-Server`默认是监听在8080端口的,且路径是`/echo`。
有一个地方值得注意,你需要在localhost域名下访问WebSocket服务。
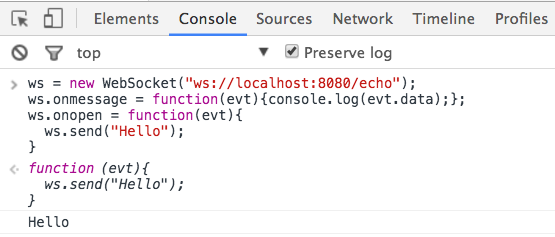
现在来给WebSocket服务器发送一条字符串"hello"。
```
ws = new WebSocket("ws://localhost:8080/echo");
ws.onmessage = function(evt){console.log(evt.data);};
ws.onopen = function(evt){
ws.send("Hello");
}
```
其实就是利用`onmessage`和`onopen`这两个回调函数,`ws.send("Hello");`表示向服务器发送"hello"。`onmessage`这个回调会把服务器的输出用`console.log`打印出来。效果如下:
最后,客户端要发送关闭连接的指令。
```
ws.close();
```
整个过程的代码可以是这样子的。
```
var ws;
window.onload = function(){
ws = new WebSocket("ws://localhost:8080/echo");
ws.onmessage = function(evt){console.log(evt.data);};
ws.onopen = function(evt){
ws.send("Hello");
}
}
window.onclose = function(){
ws.close();
}
```
#### 3. websocketd
> Turn any program that uses STDIN/STDOUT into a WebSocket server. Like inetd, but for WebSockets.
[websocketd](https://github.com/joewalnes/websocketd)是一个用go语言写的工具,它可以让你的程序跑在websocket中。
我们来演示一下就清楚了。首先是安装。
如果是mac系统,可以这样。
```
$ brew install websocketd
```
如果是其他平台,可以找到相应的安装包,地址为: [https://github.com/joewalnes/websocketd/releases。](https://github.com/joewalnes/websocketd/releases%E3%80%82)
接下来我们创建一个文件,叫`count.sh`,内容如下:
```
#!/bin/bash
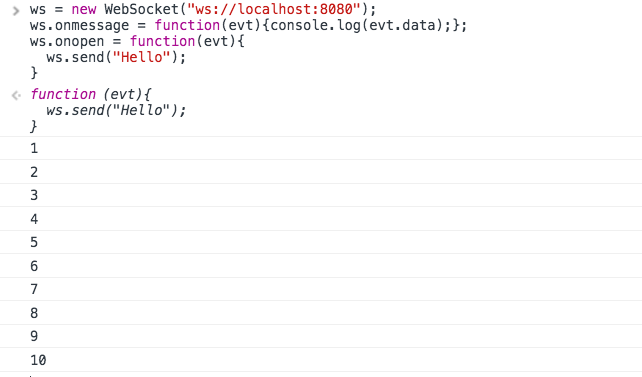
for ((COUNT = 1; COUNT <= 10; COUNT++)); do
echo $COUNT
sleep 1
done
```
这个shell脚本是每隔一秒就输出一个数字,数字从1到10。
然后执行下面的指令,给这个文件加上可执行的权限。
```
$ chmod +x count.sh
```
最后运行这个websocket服务器。
```
$ websocketd --port=8080 ./count.sh
Thu, 07 Apr 2016 14:54:06 +0800 | INFO | server | | Serving using application : ./count.sh
Thu, 07 Apr 2016 14:54:06 +0800 | INFO | server | | Starting WebSocket server : ws://MacintoshdeMacBook-Air.local:8080/
```
测试方法跟上文所讲的一样,服务器仍然监听在8080端口,只不过路径是`/`。
本篇完结。
下一篇:[websocket之客户端详解(三)](http://www.rails365.net/articles/websocket-zhi-ke-hu-duan-xiang-jie-san)
';
1. 入门
最后更新于:2022-04-02 01:42:48
# 1. 入门
#### 1. 长链接技术介绍
说到[websocket](https://tools.ietf.org/id/draft-ietf-hybi-thewebsocketprotocol-17.txt),必须讲到在它之前的各种长链接技术,比如轮循,长轮循,sse等。长链接顾名思义,就是让客户端浏览器与服务器端保持长久的连接,并能持续通讯,它还有一个特点,就是反向ajax,或叫服务器推技术。也就是说,服务器端也能通过这些手段实现向客户端推送的技术,比如,在现实应用中,看到的股票数据实时更新,这是通过这种技术来实现的。因为服务器端无法主动的向客户端推送数据,只能通过客户端连接上服务器端,然后被动地推送数据,这些连接到服务器端或者服务器端向客户端发送数据的方法就可以分成很多种,比如最简单的就是通过ajax隔一段时间发送http请求。
像轮循,长轮循等技术并不能实现真正意义上的实时,它是模拟型的实时,它发送的是完整的http请求。下面来具体说一下每个技术的特点。
##### 1.1 轮循
轮循,也叫短轮循,英文名也叫Polling。它很简单,只是用ajax隔一段时间,可能是1秒,2秒,时间自己设定,向服务器发送请求。这种方案会频繁地与服务器通讯,每次通讯都是发送完整的http请求,如果服务器经常有数据变动,有回应还好,有时候发送的请求都是没有意义,都是在等服务器端的回应,而服务器又没有任何改变,所以这种方式很消耗网络资源,很低效。
##### 1.2 长轮循
长轮循是对定时轮询的改进和提高,目地是为了降低无效的网络传输。这种方式也是通过ajax请求发送数据到服务器端,服务器端一直hold住这个连接,直到有数据到达,通过这种机制来减少无效的客户端和服务器间的交互,比如可以通过这种方式实现简易型的聊天室,但是,如果服务端的数据变更非常频繁的话,或者说访问的人非常多的时候,这种机制和定时轮询比较起来没有本质上的性能的提高。
##### 1.3 HTML5 服务器推送事件
英文名也叫HTML5 Server Sent Events (SSE) / EventSource。SSE是html5规范的一部分,它是一种流技术,它的规范由两部分组成,第一个部分是服务器端与浏览器端之间的通讯协议,第二部分则是在浏览器端提供 JavaScript 使用的 EventSource 对象。服务器端的响应的内容类型是“text/event-stream”,响应文本的内容可以看成是一个事件流,它能够持续不断地向服务器端推送数据。不过这种技术很难跨域,且对IE的支持并不好,但也不能代表这种技术是没用或过时的,用它结合PostgreSQL的notify,或者Redis的pub/sub可以轻易构建聊天室。
#### 2. websocket
上述的几种方法不代表就是过时没用的,相反,在某一程度上,它们还在应用中,只是,现在我们要来介绍一种更为好,更实时的技术,它叫websocket。它也是一种协议,它是基于tcp协议的,它跟http协议同级,它在浏览器层次发挥作用,可以由http协议升级为ws协议,就像是http加个安全通道升级为https协议一样。它的原理是这样的,由于它是一个协议,它不用发送跟http同样多的头信息,它比较轻量,速度快。为了建立一个 WebSocket 连接,客户端浏览器首先要向服务器发起一个 HTTP 请求,这个请求和通常的 HTTP 请求不同,包含了一些附加头信息,其中附加头信息”Upgrade: WebSocket”表明这是一个申请协议升级的 HTTP 请求,服务器端解析这些附加的头信息然后产生应答信息返回给客户端,客户端和服务器端的 WebSocket 连接就建立起来了,双方就可以通过这个连接通道自由的传递信息,并且这个连接会持续存在直到客户端或者服务器端的某一方主动的关闭连接。
在github.com或trello.com等应用就可以看到websocket的使用。比如,github上的:
```
请求
Request URL:wss://live.github.com/_sockets/NzQwNjQzOjA4NmI3MGI3ODE2N2JmNGI2OTkwNTI1MzA3NjVjNjYxOjgxYTFjMzVlYTE0NDBkYTUxYjllNTc2NmNjYmE1MDg0ZWY2M2ZiZDQ1NWFmOTM5MWIwMmNlYTMzOGZlYWIwMzY=--46b941101badcb9affe775bd52bf902d4b57468c
Request Method:GET
Status Code:101 Switching Protocols
响应头信息
Response Headers
Connection:Upgrade
Sec-WebSocket-Accept:ihEYOEOsteVV84Y2koOeMRELVT8=
Server:GitHub.com
Upgrade:websocket
请求头信息
Request Headers
Connection:Upgrade
Sec-WebSocket-Extensions:permessage-deflate; client_max_window_bits
Sec-WebSocket-Key:+wcmQ7sbHbIF7K/sGpkOKw==
Sec-WebSocket-Version:13
Upgrade:websocket
```
本篇完结。
下一篇:[websocket之客户端与服务器端的交互(二)](http://www.rails365.net/articles/websocket-zhi-ke-hu-duan-yu-fu-wu-qi-duan-di-jiao-hu-er)
';
0. 介绍
最后更新于:2022-04-02 01:42:46
# 0. 介绍
# websocket教程
从websocket的介绍开始,带你由浅入深地学习websocket,慢慢地精通websocket
后面几章比较适用于ruby程序员。
原文发布于我的个人博客:
源码位于:[https://github.com/yinsigan/ruby\_websocket\_tutorial](https://github.com/yinsigan/ruby_websocket_tutorial)
电子版: [PDF](https://www.gitbook.com/download/pdf/book/yinsigan/websocket) [Mobi](https://www.gitbook.com/download/mobi/book/yinsigan/websocket) [ePbu](https://www.gitbook.com/download/epub/book/yinsigan/websocket)
### 联系我:
email: hfpp2012@gmail.com
qq: 903279182
';