nginx 的 nchan 模块
最后更新于:2022-04-02 01:43:11
# nginx 的 nchan 模块
#### 1. 介绍

> Nchan is a scalable, flexible pub/sub server for the modern web, built as a module for the Nginx web server. It can be configured as a standalone > server, or as a shim between your application and tens, thousands, or millions of live subscribers. It can buffer messages in memory, on-disk, or > via Redis. All connections are handled asynchronously and distributed among any number of worker processes. It can also scale to many nginx > server instances with Redis.
[nchan](https://github.com/slact/nchan)是nginx的一个模块,它的作用跟[nginx-push-stream-module](http://www.rails365.net/articles/websocket-wai-pian-nginx-push-stream-module-mo)一样,也是结合nginx搭建websocket服务器,不过相比于`nginx-push-stream-module`,它更为强大。
比如,它可以指定redis作为适配器,还有,它具有**消息缓存(buffer messages)**的功能。
#### 2. 使用
下面就来演示一下,它是如何具有消息缓存(buffer messages)的功能的。
##### 2.1 安装
首先来安装。
安装可以跟之前一样,参考这篇文章[nginx之编译第三方模块(六)](http://www.rails365.net/articles/nginx-zhi-bian-yi-di-san-fang-mo-kuai-liu)。
```
./configure --add-module=path/to/nchan ...
```
或者,如果你在mac系统环境下,可以使用brew来安装。
```
$ brew tap homebrew/nginx
$ brew install nginx-full --with-nchan-module
```
##### 2.2 配置
现在我们来配置一下,只要在`server`上放两个`location`即可。
```
http {
server {
listen 80;
location = /sub {
nchan_subscriber;
nchan_channel_id foobar;
}
location = /pub {
nchan_publisher;
nchan_channel_id foobar;
}
}
}
```
##### 2.3 测试
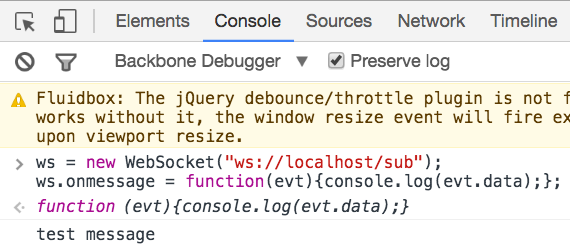
接着,我们开启浏览器发起websocket请求。
上面的配置中,订阅相关的`location`是`/sub`,而发布相关的是`/pub`。
还是跟之前的一样:
```
ws = new WebSocket("ws://localhost/sub");
ws.onmessage = function(evt){console.log(evt.data);};
```
然后我们给客户端推送消息。
```
$ curl --request POST --data "test message" http://127.0.0.1:80/pub
queued messages: 1
last requested: 57 sec. ago
active subscribers: 1
last message id: 1462759616:0%
```
上面的命令表示使用post请求`pub`向客户端推送`"test message"`这条消息。
浏览器也输出了相应的信息`"test message"`。

这样就跑通了整个流程。
##### 2.4 消息缓存(buffer messages)
然而我们需要来测试一下**消息缓存(buffer messages)**的功能。
先把浏览器关掉,这个时候,就没有任何订阅的客户端了。
再推送一条消息。
```
$ curl --request POST --data "test message" http://127.0.0.1:80/pub
queued messages: 2
last requested: 2464 sec. ago
active subscribers: 0
last message id: 1462762080:0%
```
现在`"queued messages"`等于2,表示,在队列中有两条消息没有推送,之前`"queued messages"`的值是为1的。
现在我们重新打开浏览器,并开启之前的websocket请求。效果如下:

客户端立即收到队列中的两条消息了。
这种模式,演示了,假如客户端不在线,或掉线了之后,消息也能被正常的推送,它一上线,就能立即收到消息了。
如果我们再运行一次上面的curl命令,`"queued messages"`就会变成`"3"`。
默认情况下,这样的消息最多存储10条,当然这是可以配置的。
通过`"nchan_message_buffer_length"`就可以设置存储的消息的个数,除了这些,还有以下配置:
- nchan\_message\_timeout 消息的存活时间
- nchan\_store\_messages 是否存储消息,也就是开关功能
其他的功能可以查看官方的readme文档。
本篇完结。
';