MFC 在静态文本控件和picture控件上显示位图
最后更新于:2022-04-01 09:38:46
### 1.在静态文本控件上显示位图
首先把图片添加到资源管理器中,ID:IDB_BITMAP_LOGIN_PIC
在对话框中放一个静态文本控件,ID:IDC_STATIC1 ,然后再OnInitDialog()函数中添加如下代码:
~~~
HBITMAP hBitmap;
//关联图片ID
hBitmap =(HBITMAP)LoadImage(AfxGetInstanceHandle(),
MAKEINTRESOURCE(IDB_BITMAP_LOGIN_PIC),
IMAGE_BITMAP,0,0,
LR_LOADMAP3DCOLORS);
//获得指向静态控件的指针
CStatic *pStatic=(CStatic *)GetDlgItem(IDC_STATIC1);//控件ID
//设置静态控件的样式,使其可以使用位图,并试位标显示使居中
pStatic->ModifyStyle(0xF,SS_BITMAP|SS_CENTERIMAGE);
//设置静态控件显示位图
pStatic->SetBitmap(hBitmap);
~~~
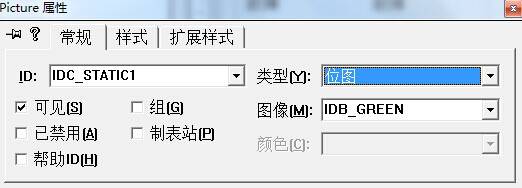
### 2.在picture控件上显示位图
在picture上显示位图与静态文本控件上显示位图,做法差不多。
(1)在对话框里放置一个picture控件,并修改picture控件的属性,把类型改为位图,图像选择要加载的位图,此时就可以看到picture控件中显示位图的效果了
(2)代码实现在picture控件显示位图
首先用LoadImage()函数装载位图资源,然后显示;代码如下
~~~
hBitmap =(HBITMAP)LoadImage(AfxGetInstanceHandle(),
MAKEINTRESOURCE(RED_Bitmap),
IMAGE_BITMAP,0,0,
LR_LOADMAP3DCOLORS);
CStatic *pStatic=(CStatic *)GetDlgItem(IDC_STATIC1);//控件ID
pStatic->SetBitmap(RED_Bitmap);
~~~
其中RED_Bitmap是位图资源的ID号,IDC_STATIC1为picture控件的ID号
Visual C++编译器常用选项设置总结
最后更新于:2022-04-01 09:38:44
**【文章摘要】**
Microsoft Visual C++是微软公司推出的、在Windows下的可视化集成编程系统,也是广大软件工程师使用得比较多的一款编程软件。本文主要讲述Visual C++编译器常用的选项设置,为大家全面掌握该软件以进行软件开发工作提供了有益的参考。
**【关键词】**
Visual C++ 选项设置 编译 调试
### 一、前言
Microsoft Visual C++是Microsoft公司推出的开发Win32环境程序,面向对象的可视化集成编程系统。它不但具有程序框架自动生成、灵活方便的类管理、代码编写和界面设计集成交互操作、可开发多种程序等优点,而且通过简单的设置就可使其生成的程序框架支持数据库接口、OLE2、WinSock网络和3D控制界面等。
但是,大多数编程人员只是使用了其基本功能,没有对之进行深入的了解,如不知道Visual C++编译器常用选项的设置就是一例。通过阅读相关资料,作者对Visual C++编译器常用选项设置进行了总结,希望能够对大家所从事的研发工作有所帮助。
### 二、 编译参数的设置
这主要是通过IDE的菜单项“Project->Settings->C/C++”来完成的。如图1所示。
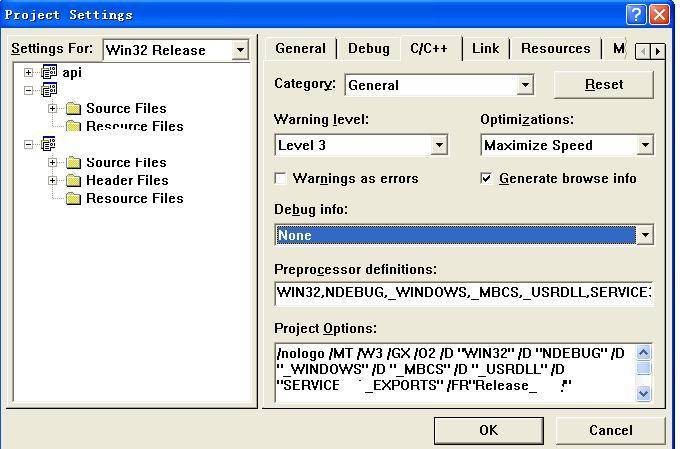
图1 “Project Settings”的示意图1
我们一般通过修改这一页上的“Category”中的各项来完成编译参数的设置。“Category”中共有8个选项,包括:General、C++ Language、Code Generation、Customize、Listing Files、Optimizations、Precompiled Headers和Preprocessor。以下分别介绍在每个参数下的配置情况。
1. General
当“Category”一栏选择“General”时,界面如图1所示。其它各栏的介绍如表1所示。
表1 “General”下的配置介绍
<table border="1" cellspacing="0" cellpadding="0"><tbody><tr><td valign="top" style="background-color:rgb(204,204,204)"><p align="center" style="margin-top:0px; margin-bottom:0px; padding-top:0px; padding-bottom:0px"><strong><span style="font-size:18px">名称</span></strong></p></td><td valign="top" style="background-color:rgb(204,204,204)"><p align="center" style="margin-top:0px; margin-bottom:0px; padding-top:0px; padding-bottom:0px"><strong><span style="font-size:18px">功能简介</span></strong></p></td></tr><tr><td valign="top"><p align="center" style="margin-top:0px; margin-bottom:0px; padding-top:0px; padding-bottom:0px"><span style="font-family:'Times New Roman'; font-size:18px">Warning level</span></p></td><td valign="top"><p align="left" style="margin-top:0px; margin-bottom:0px; padding-top:0px; padding-bottom:0px"><span style="font-size:18px">用来控制警告信息,其中<span style="font-family:'Times New Roman'">Level 1</span>是最严重的级别。</span></p></td></tr><tr><td valign="top"><p align="center" style="margin-top:0px; margin-bottom:0px; padding-top:0px; padding-bottom:0px"><span style="font-family:'Times New Roman'; font-size:18px">Optimizations</span></p></td><td valign="top"><p align="left" style="margin-top:0px; margin-bottom:0px; padding-top:0px; padding-bottom:0px"><span style="font-size:18px">是代码优化,可以在<span style="font-family:'Times New Roman'">Category</span>的<span style="font-family:'Times New Roman'">Optimizations</span>项中进行更细的设置。</span></p></td></tr><tr><td valign="top"><p align="center" style="margin-top:0px; margin-bottom:0px; padding-top:0px; padding-bottom:0px"><span style="font-family:'Times New Roman'; font-size:18px">Warnings as errors</span></p></td><td valign="top"><p align="left" style="margin-top:0px; margin-bottom:0px; padding-top:0px; padding-bottom:0px"><span style="font-size:18px">将警告信息当作错误处理。</span></p></td></tr><tr><td valign="top"><p align="center" style="margin-top:0px; margin-bottom:0px; padding-top:0px; padding-bottom:0px"><span style="font-family:'Times New Roman'; font-size:18px">Generate browse info</span></p></td><td valign="top"><p align="left" style="margin-top:0px; margin-bottom:0px; padding-top:0px; padding-bottom:0px"><span style="font-size:18px">用以生成<span style="font-family:'Times New Roman'">.sbr</span>文件,记录类、变量等符号信息,可以在<span style="font-family:'Times New Roman'">Category</span>的<span style="font-family:'Times New Roman'">Listing Files</span>项中进行更多的设置。</span></p></td></tr><tr><td valign="top"><p align="center" style="margin-top:0px; margin-bottom:0px; padding-top:0px; padding-bottom:0px"><span style="font-family:'Times New Roman'; font-size:18px"> </span></p><p align="center" style="margin-top:0px; margin-bottom:0px; padding-top:0px; padding-bottom:0px"><span style="font-family:'Times New Roman'; font-size:18px"> </span></p><p align="center" style="margin-top:0px; margin-bottom:0px; padding-top:0px; padding-bottom:0px"><span style="font-family:'Times New Roman'; font-size:18px"> </span></p><p align="center" style="margin-top:0px; margin-bottom:0px; padding-top:0px; padding-bottom:0px"><span style="font-family:'Times New Roman'; font-size:18px">Debug info </span></p></td><td valign="top"><p align="left" style="margin-top:0px; margin-bottom:0px; padding-top:0px; padding-bottom:0px"><span style="font-size:18px">生成调试信息,包括:</span></p><p align="left" style="margin-top:0px; margin-bottom:0px; padding-top:0px; padding-bottom:0px"><span style="font-size:18px"><span style="font-family:'Times New Roman'">1)</span> None:不产生任何调试信息<span style="font-family:'Times New Roman'">(</span>编译比较快<span style="font-family:'Times New Roman'">)</span>。</span></p><p align="left" style="margin-top:0px; margin-bottom:0px; padding-top:0px; padding-bottom:0px"><span style="font-size:18px"><span style="font-family:'Times New Roman'">2)</span> Line Numbers Only:仅生成全局的和外部符号的调试信息到<span style="font-family:'Times New Roman'">.OBJ</span>文件或<span style="font-family:'Times New Roman'">.EXE</span>文件,减小目标文件的尺寸。</span></p><p align="left" style="margin-top:0px; margin-bottom:0px; padding-top:0px; padding-bottom:0px"><span style="font-size:18px"><span style="font-family:'Times New Roman'">3)</span> C7 Compatible:记录调试器用到的所有符号信息到<span style="font-family:'Times New Roman'">.OBJ</span>文件和<span style="font-family:'Times New Roman'">.EXE</span>文件。</span></p><p align="left" style="margin-top:0px; margin-bottom:0px; padding-top:0px; padding-bottom:0px"><span style="font-size:18px"><span style="font-family:'Times New Roman'">4)</span> Program Database:创建<span style="font-family:'Times New Roman'">.PDB</span>文件记录所有调试信息。</span></p><p align="left" style="margin-top:0px; margin-bottom:0px; padding-top:0px; padding-bottom:0px"><span style="font-size:18px"><span style="font-family:'Times New Roman'">5)</span> Program Database for "Edit & Continue:创建<span style="font-family:'Times New Roman'">.PDB</span>文件记录所有调试信息,并且支持调试时编辑。</span></p></td></tr></tbody></table>
2.C++ Language
当“Category”一栏选择“C++ Language”时,界面如图2所示。其它各栏的介绍如表2所示。
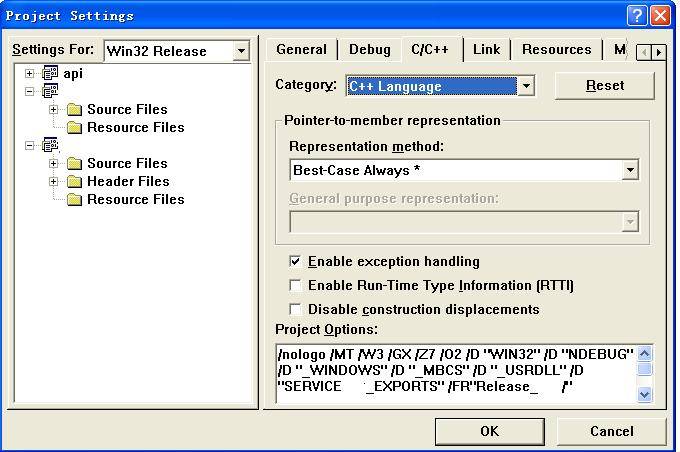
图2 “Project Settings”的示意图2
表2 “C++ Language”下的配置介绍
<table border="1" cellspacing="0" cellpadding="0"><tbody><tr><td valign="top" style="background-color:rgb(204,204,204)"><p align="center" style="margin-top:0px; margin-bottom:0px; padding-top:0px; padding-bottom:0px"><strong><span style="font-size:18px">名称</span></strong></p></td><td valign="top" style="background-color:rgb(204,204,204)"><p align="center" style="margin-top:0px; margin-bottom:0px; padding-top:0px; padding-bottom:0px"><strong><span style="font-size:18px">功能简介</span></strong></p></td></tr><tr><td valign="top"><p align="center" style="margin-top:0px; margin-bottom:0px; padding-top:0px; padding-bottom:0px"><span style="font-family:'Times New Roman'; font-size:18px">Pointer-to-member representation</span></p></td><td valign="top"><p align="left" style="margin-top:0px; margin-bottom:0px; padding-top:0px; padding-bottom:0px"><span style="font-size:18px">用来设置类定义<span style="font-family:'Times New Roman'">/</span>引用的先后关系,一般为<span style="font-family:'Times New Roman'">Best-Case Always</span>表示在引用类之前该类肯定已经定义了。</span></p></td></tr><tr><td valign="top"><p align="center" style="margin-top:0px; margin-bottom:0px; padding-top:0px; padding-bottom:0px"><span style="font-family:'Times New Roman'; font-size:18px">Enable Exception Handling</span></p></td><td valign="top"><p align="left" style="margin-top:0px; margin-bottom:0px; padding-top:0px; padding-bottom:0px"><span style="font-size:18px">进行同步的异常处理。</span></p></td></tr><tr><td valign="top"><p align="center" style="margin-top:0px; margin-bottom:0px; padding-top:0px; padding-bottom:0px"><span style="font-family:'Times New Roman'; font-size:18px">Enable Run-Time Type Information</span></p></td><td valign="top"><p align="left" style="margin-top:0px; margin-bottom:0px; padding-top:0px; padding-bottom:0px"><span style="font-size:18px">迫使编译器增加代码在运行时进行对象类型检查。</span></p></td></tr><tr><td valign="top"><p align="center" style="margin-top:0px; margin-bottom:0px; padding-top:0px; padding-bottom:0px"><span style="font-family:'Times New Roman'; font-size:18px">Disable Construction Displacements</span></p></td><td valign="top"><p align="left" style="margin-top:0px; margin-bottom:0px; padding-top:0px; padding-bottom:0px"><span style="font-size:18px">设置类构造<span style="font-family:'Times New Roman'">/</span>析构函数调用虚函数问题。</span></p></td></tr></tbody></table>
3.Code Generation
当“Category”一栏选择“Code Generation”时,界面如图3所示。其它各栏的介绍如表3所示。
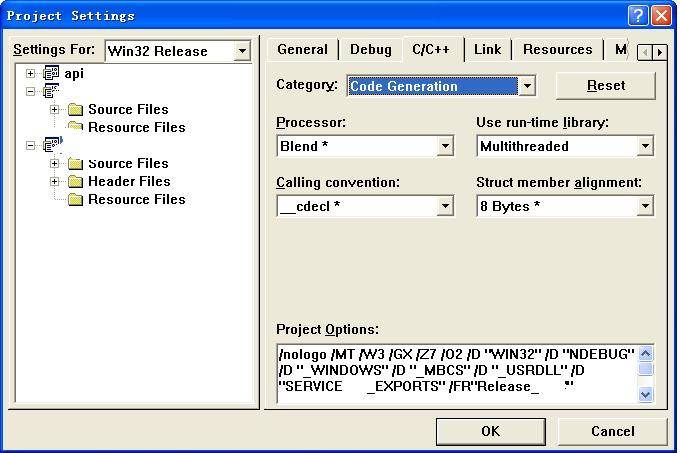
图3 “Project Settings”的示意图3
表3 “Code Generation”下的配置介绍
<table border="1" cellspacing="0" cellpadding="0"><tbody><tr><td valign="top" style="background-color:rgb(204,204,204)"><p align="center" style="margin-top:0px; margin-bottom:0px; padding-top:0px; padding-bottom:0px"><strong><span style="font-size:18px">名称</span></strong></p></td><td valign="top" style="background-color:rgb(204,204,204)"><p align="center" style="margin-top:0px; margin-bottom:0px; padding-top:0px; padding-bottom:0px"><strong><span style="font-size:18px">功能简介</span></strong></p></td></tr><tr><td valign="top"><p align="center" style="margin-top:0px; margin-bottom:0px; padding-top:0px; padding-bottom:0px"><span style="font-family:'Times New Roman'; font-size:18px">Processor</span></p></td><td valign="top"><p align="left" style="margin-top:0px; margin-bottom:0px; padding-top:0px; padding-bottom:0px"><span style="font-size:18px">表示代码指令优化,可以为<span style="font-family:'Times New Roman'">80386</span>、<span style="font-family:'Times New Roman'">80486</span>、<span style="font-family:'Times New Roman'">Pentium</span>、<span style="font-family:'Times New Roman'">Pentium Pro</span>,或者<span style="font-family:'Times New Roman'">Blend</span>表示混合以上各种优化。</span></p></td></tr><tr><td valign="top"><p align="center" style="margin-top:0px; margin-bottom:0px; padding-top:0px; padding-bottom:0px"><span style="font-family:'Times New Roman'; font-size:18px"> </span></p><p align="center" style="margin-top:0px; margin-bottom:0px; padding-top:0px; padding-bottom:0px"><span style="font-family:'Times New Roman'; font-size:18px"> </span></p><p align="center" style="margin-top:0px; margin-bottom:0px; padding-top:0px; padding-bottom:0px"><span style="font-family:'Times New Roman'; font-size:18px"> </span></p><p align="center" style="margin-top:0px; margin-bottom:0px; padding-top:0px; padding-bottom:0px"><span style="font-family:'Times New Roman'; font-size:18px"> </span></p><p align="center" style="margin-top:0px; margin-bottom:0px; padding-top:0px; padding-bottom:0px"><span style="font-family:'Times New Roman'; font-size:18px"> </span></p><p align="center" style="margin-top:0px; margin-bottom:0px; padding-top:0px; padding-bottom:0px"><span style="font-family:'Times New Roman'; font-size:18px">Use run-time library</span></p></td><td valign="top"><p align="left" style="margin-top:0px; margin-bottom:0px; padding-top:0px; padding-bottom:0px"><span style="font-size:18px">用以指定程序运行时使用的运行时库<span style="font-family:'Times New Roman'">(</span>单线程或多线程,<span style="font-family:'Times New Roman'">Debug</span>版本或<span style="font-family:'Times New Roman'">Release</span>版本<span style="font-family:'Times New Roman'">)</span>,有一个原则就是,一个进程不要同时使用几个版本的运行时库。具体包括:</span></p><p align="left" style="margin-top:0px; margin-bottom:0px; padding-top:0px; padding-bottom:0px"><span style="font-size:18px"><span style="font-family:'Times New Roman'">1)</span> Single-Threaded:静态连接<span style="font-family:'Times New Roman'">LIBC.LIB</span>库。</span></p><p align="left" style="margin-top:0px; margin-bottom:0px; padding-top:0px; padding-bottom:0px"><span style="font-size:18px"><span style="font-family:'Times New Roman'">2)</span> Multithreaded:静态连接<span style="font-family:'Times New Roman'">LIBCMT.LIB</span>库。</span></p><p align="left" style="margin-top:0px; margin-bottom:0px; padding-top:0px; padding-bottom:0px"><span style="font-size:18px"><span style="font-family:'Times New Roman'">3)</span> Multithreaded DLL:动态连接<span style="font-family:'Times New Roman'">MSVCRT.DLL</span>库。</span></p><p align="left" style="margin-top:0px; margin-bottom:0px; padding-top:0px; padding-bottom:0px"><span style="font-size:18px"><span style="font-family:'Times New Roman'">4)</span> Debug Single-Threaded:静态连接<span style="font-family:'Times New Roman'">LIBCD.LIB</span>库。</span></p><p align="left" style="margin-top:0px; margin-bottom:0px; padding-top:0px; padding-bottom:0px"><span style="font-size:18px"><span style="font-family:'Times New Roman'">5)</span> Debug Multithreaded:静态连接<span style="font-family:'Times New Roman'">LIBCMTD.LIB</span>库。</span></p><p align="left" style="margin-top:0px; margin-bottom:0px; padding-top:0px; padding-bottom:0px"><span style="font-size:18px"><span style="font-family:'Times New Roman'">6)</span> Debug Multithreaded DLL:动态连接<span style="font-family:'Times New Roman'">MSVCRTD.DLL</span>库。连接了单线程库就不支持多线程调用,连接了多线程库就要求创建多线程的应用程序。</span></p></td></tr><tr><td valign="top"><p align="center" style="margin-top:0px; margin-bottom:0px; padding-top:0px; padding-bottom:0px"><span style="font-family:'Times New Roman'; font-size:18px"> </span></p><p align="center" style="margin-top:0px; margin-bottom:0px; padding-top:0px; padding-bottom:0px"><span style="font-family:'Times New Roman'; font-size:18px"> </span></p><p align="center" style="margin-top:0px; margin-bottom:0px; padding-top:0px; padding-bottom:0px"><span style="font-family:'Times New Roman'; font-size:18px">Calling convention</span></p></td><td valign="top"><p align="left" style="margin-top:0px; margin-bottom:0px; padding-top:0px; padding-bottom:0px"><span style="font-size:18px">可以用来设定调用约定,有三种:<span style="font-family:'Times New Roman'">__cdecl</span>、<span style="font-family:'Times New Roman'">__fastcall</span>和<span style="font-family:'Times New Roman'">__stdcall</span>。各种调用约定的主要区别在于,函数调用时,函数的参数是从左到右压入堆栈还是从右到左压入堆栈;在函数返回时,由函数的调用者来清理压入堆栈的参数还是由函数本身来清理;以及在编译时对函数名进行的命名修饰<span style="font-family:'Times New Roman'">(</span>可以通过<span style="font-family:'Times New Roman'">Listing Files</span>看到各种命名修饰方式<span style="font-family:'Times New Roman'">)</span>。</span></p></td></tr><tr><td valign="top"><p align="center" style="margin-top:0px; margin-bottom:0px; padding-top:0px; padding-bottom:0px"><span style="font-family:'Times New Roman'; font-size:18px"> </span></p><p align="center" style="margin-top:0px; margin-bottom:0px; padding-top:0px; padding-bottom:0px"><span style="font-family:'Times New Roman'; font-size:18px">Struct member alignment</span></p></td><td valign="top"><p align="left" style="margin-top:0px; margin-bottom:0px; padding-top:0px; padding-bottom:0px"><span style="font-size:18px">用以指定数据结构中的成员变量在内存中是按几字节对齐的,根据计算机数据总线的位数,不同的对齐方式存取数据的速度不一样。这个参数对数据包网络传输等应用尤为重要,不是存取速度问题,而是数据位的精确定义问题,一般在程序中使用<span style="font-family:'Times New Roman'">#pragma pack</span>来指定。</span></p></td></tr></tbody></table>
4. Customize
当“Category”一栏选择“Customize”时,界面如图4所示。其它各栏的介绍如表4所示。

图4 “Project Settings”的示意图4
表4 “Customize”下的配置介绍
<table border="1" cellspacing="0" cellpadding="0"><tbody><tr><td valign="top" style="background-color:rgb(204,204,204)"><p align="center" style="margin-top:0px; margin-bottom:0px; padding-top:0px; padding-bottom:0px"><strong><span style="font-size:18px">名称</span></strong></p></td><td valign="top" style="background-color:rgb(204,204,204)"><p align="center" style="margin-top:0px; margin-bottom:0px; padding-top:0px; padding-bottom:0px"><strong><span style="font-size:18px">功能简介</span></strong></p></td></tr><tr><td valign="top"><p align="center" style="margin-top:0px; margin-bottom:0px; padding-top:0px; padding-bottom:0px"><span style="font-family:'Times New Roman'; font-size:18px">Disable Language Extensions</span></p></td><td valign="top"><p align="left" style="margin-top:0px; margin-bottom:0px; padding-top:0px; padding-bottom:0px"><span style="font-size:18px">表示不使用微软为标准<span style="font-family:'Times New Roman'">C</span>做的语言扩展。</span></p></td></tr><tr><td valign="top"><p align="center" style="margin-top:0px; margin-bottom:0px; padding-top:0px; padding-bottom:0px"><span style="font-family:'Times New Roman'; font-size:18px">Enable Function-Level Linking</span></p></td><td valign="top"><p align="left" style="margin-top:0px; margin-bottom:0px; padding-top:0px; padding-bottom:0px"><span style="font-size:18px">告诉编译器将各个函数按打包格式编译。</span></p></td></tr><tr><td valign="top"><p align="center" style="margin-top:0px; margin-bottom:0px; padding-top:0px; padding-bottom:0px"><span style="font-family:'Times New Roman'; font-size:18px"> </span></p><p align="center" style="margin-top:0px; margin-bottom:0px; padding-top:0px; padding-bottom:0px"><span style="font-family:'Times New Roman'; font-size:18px">Eliminate Duplicate Strings</span></p></td><td valign="top"><p align="left" style="margin-top:0px; margin-bottom:0px; padding-top:0px; padding-bottom:0px"><span style="font-size:18px">主要用于字符串优化<span style="font-family:'Times New Roman'">(</span>将字符串放到缓充池里以节省空间<span style="font-family:'Times New Roman'">)</span>,使用这个参数,使得:</span></p><p align="left" style="margin-top:0px; margin-bottom:0px; padding-top:0px; padding-bottom:0px"><span style="font-family:'Times New Roman'; font-size:18px">char *sBuffer = "This is a character buffer";</span></p><p align="left" style="margin-top:0px; margin-bottom:0px; padding-top:0px; padding-bottom:0px"><span style="font-family:'Times New Roman'; font-size:18px">char *tBuffer = "This is a character buffer";</span></p><p align="left" style="margin-top:0px; margin-bottom:0px; padding-top:0px; padding-bottom:0px"><span style="font-size:18px"><span style="font-family:'Times New Roman'">sBuffer</span>和<span style="font-family:'Times New Roman'">tBuffer</span>指向的是同一块内存空间。</span></p></td></tr><tr><td valign="top"><p align="center" style="margin-top:0px; margin-bottom:0px; padding-top:0px; padding-bottom:0px"><span style="font-family:'Times New Roman'; font-size:18px">Enables minimal rebuild</span></p></td><td valign="top"><p align="left" style="margin-top:0px; margin-bottom:0px; padding-top:0px; padding-bottom:0px"><span style="font-size:18px">通过保存关联信息到<span style="font-family:'Times New Roman'">.IDB</span>文件,使编译器只对最新类定义改动过的源文件进行重编译,提高编译速度。</span></p></td></tr><tr><td valign="top"><p align="center" style="margin-top:0px; margin-bottom:0px; padding-top:0px; padding-bottom:0px"><span style="font-family:'Times New Roman'; font-size:18px">Enable Incremental Compilation</span></p></td><td valign="top"><p align="left" style="margin-top:0px; margin-bottom:0px; padding-top:0px; padding-bottom:0px"><span style="font-size:18px">同样通过<span style="font-family:'Times New Roman'">.IDB</span>文件保存的信息,只重编译最新改动过的函数。</span></p></td></tr><tr><td valign="top"><p align="center" style="margin-top:0px; margin-bottom:0px; padding-top:0px; padding-bottom:0px"><span style="font-family:'Times New Roman'; font-size:18px">Suppress Startup Banner and Information Messages</span></p></td><td valign="top"><p align="left" style="margin-top:0px; margin-bottom:0px; padding-top:0px; padding-bottom:0px"><span style="font-size:18px">用以控制参数是否在<span style="font-family:'Times New Roman'">output</span>窗口输出。</span></p></td></tr></tbody></table>
5. Listing Files
当“Category”一栏选择“Listing Files”时,界面如图5所示。其它各栏的介绍如表5所示。
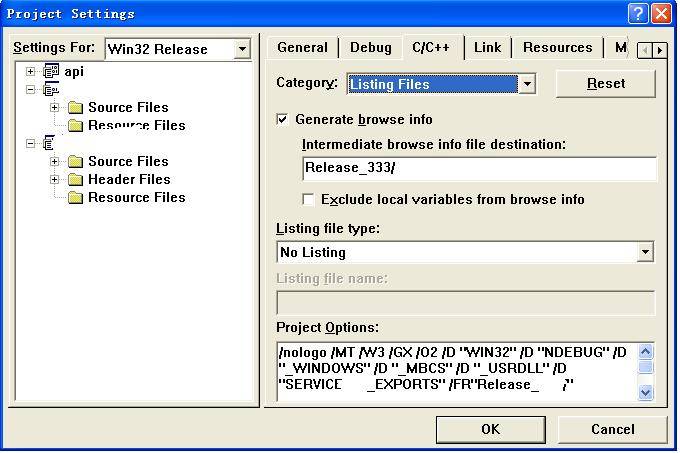
图5 “Project Settings”的示意图5
表5 “Listing Files”下的配置介绍
<table border="1" cellspacing="0" cellpadding="0"><tbody><tr><td valign="top" style="background-color:rgb(204,204,204)"><p align="center" style="margin-top:0px; margin-bottom:0px; padding-top:0px; padding-bottom:0px"><strong><span style="font-size:18px">名称</span></strong></p></td><td valign="top" style="background-color:rgb(204,204,204)"><p align="center" style="margin-top:0px; margin-bottom:0px; padding-top:0px; padding-bottom:0px"><strong><span style="font-size:18px">功能简介</span></strong></p></td></tr><tr><td valign="top"><p align="center" style="margin-top:0px; margin-bottom:0px; padding-top:0px; padding-bottom:0px"><span style="font-family:'Times New Roman'; font-size:18px">Generate browse info</span></p></td><td valign="top"><p align="left" style="margin-top:0px; margin-bottom:0px; padding-top:0px; padding-bottom:0px"><span style="font-size:18px">其功能上面已经提到过,这里可以进行更多的设置。</span></p></td></tr><tr><td valign="top"><p align="center" style="margin-top:0px; margin-bottom:0px; padding-top:0px; padding-bottom:0px"><span style="font-family:'Times New Roman'; font-size:18px">Exclude Local Variables from Browse Info</span></p></td><td valign="top"><p align="left" style="margin-top:0px; margin-bottom:0px; padding-top:0px; padding-bottom:0px"><span style="font-size:18px">表示是否将局部变量的信息放到<span style="font-family:'Times New Roman'">.SBR</span>文件中。</span></p></td></tr><tr><td valign="top"><p align="center" style="margin-top:0px; margin-bottom:0px; padding-top:0px; padding-bottom:0px"><span style="font-family:'Times New Roman'; font-size:18px">Listing file type</span></p></td><td valign="top"><p style="margin-top:0px; margin-bottom:0px; padding-top:0px; padding-bottom:0px"><span style="font-size:18px">可以设置生成的列表信息文件的内容:<span style="font-family:'Times New Roman'">Assembly-Only Listing</span>仅生成汇编代码文件<span style="font-family:'Times New Roman'">(.ASM</span>扩展名<span style="font-family:'Times New Roman'">)</span>,<span style="font-family:'Times New Roman'">Assembly With Machine Code</span>生成机器代码和汇编代码文件<span style="font-family:'Times New Roman'">(.COD</span>扩展名<span style="font-family:'Times New Roman'">)</span>,<span style="font-family:'Times New Roman'">Assembly With Source Code</span>生成源代码和汇编代码文件<span style="font-family:'Times New Roman'">(.ASM</span>扩展名<span style="font-family:'Times New Roman'">)</span>,<span style="font-family:'Times New Roman'">Assembly, Machine Code,and Source</span>生成机器码、源代码和汇编代码文件<span style="font-family:'Times New Roman'">(.COD</span>扩展名<span style="font-family:'Times New Roman'">)</span>。</span></p></td></tr><tr><td valign="top"><p align="center" style="margin-top:0px; margin-bottom:0px; padding-top:0px; padding-bottom:0px"><span style="font-family:'Times New Roman'; font-size:18px">Listing file name</span></p></td><td valign="top"><p align="left" style="margin-top:0px; margin-bottom:0px; padding-top:0px; padding-bottom:0px"><span style="font-size:18px">为生成的信息文件的路径,一般为<span style="font-family:'Times New Roman'">Debug</span>或<span style="font-family:'Times New Roman'">Release</span>目录下,生成的文件名自动取源文件的文件名。</span></p></td></tr></tbody></table>
6.Optimizations
当“Category”一栏选择“Optimizations”时,界面如图6所示。其它各栏的介绍如表6所示。
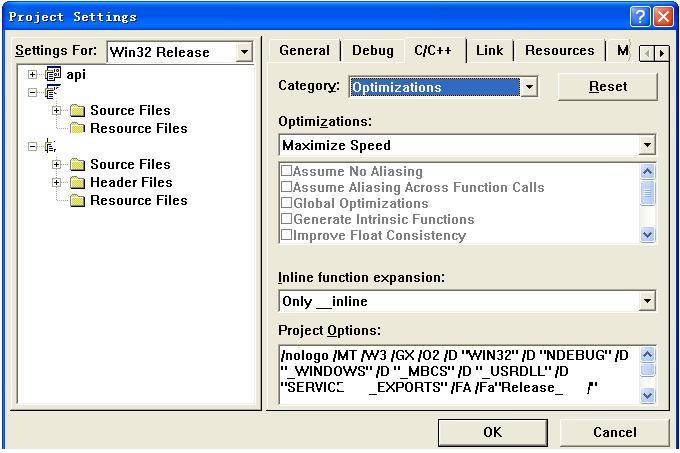
图6 “Project Settings”的示意图6
表6 “Optimizations”下的配置介绍
<table border="1" cellspacing="0" cellpadding="0"><tbody><tr><td valign="top" style="background-color:rgb(204,204,204)"><p align="center" style="margin-top:0px; margin-bottom:0px; padding-top:0px; padding-bottom:0px"><span style="font-size:18px">名称</span></p></td><td valign="top" style="background-color:rgb(204,204,204)"><p align="center" style="margin-top:0px; margin-bottom:0px; padding-top:0px; padding-bottom:0px"><span style="font-size:18px">功能简介</span></p></td></tr><tr><td valign="top"><p align="center" style="margin-top:0px; margin-bottom:0px; padding-top:0px; padding-bottom:0px"><span style="font-family:'Times New Roman'; font-size:18px">Maximize Speed</span></p></td><td valign="top"><p align="left" style="margin-top:0px; margin-bottom:0px; padding-top:0px; padding-bottom:0px"><span style="font-size:18px">生成最快速的代码。</span></p></td></tr><tr><td valign="top"><p align="center" style="margin-top:0px; margin-bottom:0px; padding-top:0px; padding-bottom:0px"><span style="font-family:'Times New Roman'; font-size:18px">Minimize Size</span></p></td><td valign="top"><p align="left" style="margin-top:0px; margin-bottom:0px; padding-top:0px; padding-bottom:0px"><span style="font-size:18px">生成最小尺寸的程序。</span></p></td></tr><tr><td valign="top"><p align="center" style="margin-top:0px; margin-bottom:0px; padding-top:0px; padding-bottom:0px"><span style="font-family:'Times New Roman'; font-size:18px"> </span></p><p align="center" style="margin-top:0px; margin-bottom:0px; padding-top:0px; padding-bottom:0px"><span style="font-family:'Times New Roman'; font-size:18px"> </span></p><p align="center" style="margin-top:0px; margin-bottom:0px; padding-top:0px; padding-bottom:0px"><span style="font-family:'Times New Roman'; font-size:18px"> </span></p><p align="center" style="margin-top:0px; margin-bottom:0px; padding-top:0px; padding-bottom:0px"><span style="font-family:'Times New Roman'; font-size:18px">Customize</span></p></td><td valign="top"><p style="margin-top:0px; margin-bottom:0px; padding-top:0px; padding-bottom:0px"><span style="font-size:18px"><span style="font-family:'Times New Roman'">Assume No Aliasing </span>不使用别名<span style="font-family:'Times New Roman'">(</span>提高速度<span style="font-family:'Times New Roman'">)</span>;</span></p><p style="margin-top:0px; margin-bottom:0px; padding-top:0px; padding-bottom:0px"><span style="font-size:18px"><span style="font-family:'Times New Roman'">Assume Aliasing Across Function Calls </span>仅函数内部不使用别名;</span></p><p style="margin-top:0px; margin-bottom:0px; padding-top:0px; padding-bottom:0px"><span style="font-size:18px"><span style="font-family:'Times New Roman'">Global Optimizations </span>全局优化;</span></p><p style="margin-top:0px; margin-bottom:0px; padding-top:0px; padding-bottom:0px"><span style="font-size:18px"><span style="font-family:'Times New Roman'">Generate Intrinsic Functions </span>使用内部函数替换一些函数调用<span style="font-family:'Times New Roman'">(</span>提高速度<span style="font-family:'Times New Roman'">)</span>;</span></p><p style="margin-top:0px; margin-bottom:0px; padding-top:0px; padding-bottom:0px"><span style="font-size:18px"><span style="font-family:'Times New Roman'">Improve Float Consistency </span>浮点运算方面的优化;</span></p><p style="margin-top:0px; margin-bottom:0px; padding-top:0px; padding-bottom:0px"><span style="font-size:18px"><span style="font-family:'Times New Roman'">Favor Small Code </span>程序<span style="font-family:'Times New Roman'">(exe</span>或<span style="font-family:'Times New Roman'">dll)</span>尺寸优化优先于代码速度优化;</span></p><p style="margin-top:0px; margin-bottom:0px; padding-top:0px; padding-bottom:0px"><span style="font-size:18px"><span style="font-family:'Times New Roman'">Frame-Pointer Omission </span>不使用帧指针,以提高函数调用速度;</span></p><p style="margin-top:0px; margin-bottom:0px; padding-top:0px; padding-bottom:0px"><span style="font-size:18px"><span style="font-family:'Times New Roman'">Full Optimization </span>组合了几种参数,以生成最快的程序代码。</span></p></td></tr><tr><td valign="top"><p align="center" style="margin-top:0px; margin-bottom:0px; padding-top:0px; padding-bottom:0px"><span style="font-family:'Times New Roman'; font-size:18px"> </span></p><p align="center" style="margin-top:0px; margin-bottom:0px; padding-top:0px; padding-bottom:0px"><span style="font-family:'Times New Roman'; font-size:18px"> </span></p><p align="center" style="margin-top:0px; margin-bottom:0px; padding-top:0px; padding-bottom:0px"><span style="font-family:'Times New Roman'; font-size:18px">Inline function expansion</span></p></td><td valign="top"><p align="left" style="margin-top:0px; margin-bottom:0px; padding-top:0px; padding-bottom:0px"><span style="font-size:18px">内联函数扩展的三种优化<span style="font-family:'Times New Roman'">(</span>使用内联可以节省函数调用的开销,加快程序速度<span style="font-family:'Times New Roman'">)</span>:</span></p><p align="left" style="margin-top:0px; margin-bottom:0px; padding-top:0px; padding-bottom:0px"><span style="font-size:18px"><span style="font-family:'Times New Roman'">Disable</span>不使用内联;</span></p><p align="left" style="margin-top:0px; margin-bottom:0px; padding-top:0px; padding-bottom:0px"><span style="font-size:18px"><span style="font-family:'Times New Roman'">Only __inline</span>,仅函数定义前有<span style="font-family:'Times New Roman'">inline</span>或<span style="font-family:'Times New Roman'">__inline</span>标记使用内联;</span></p><p align="left" style="margin-top:0px; margin-bottom:0px; padding-top:0px; padding-bottom:0px"><span style="font-size:18px"><span style="font-family:'Times New Roman'">Any Suitable</span>,除了<span style="font-family:'Times New Roman'">inline</span>或<span style="font-family:'Times New Roman'">__inline</span>标记的函数外,编译器“觉得”应该使用内联的函数,都使用内联。</span></p></td></tr></tbody></table>
7.Precompiled Headers
当“Category”一栏选择“Precompiled Headers”时,界面如图7所示。
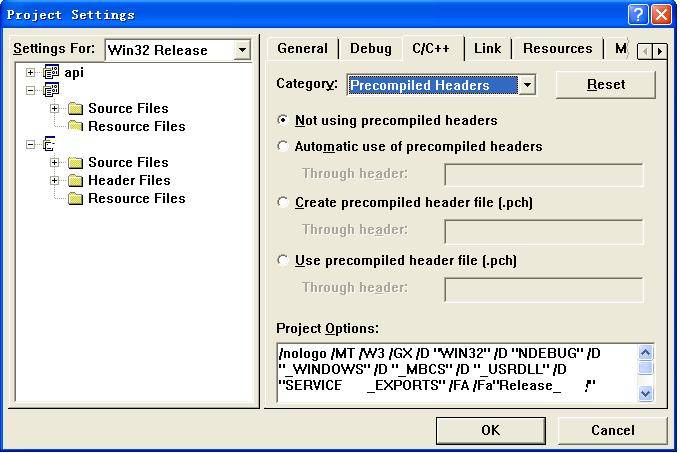
图7 “Project Settings”的示意图7
预编译头文件的设置。使用预编译可以提高重复编译的速度。IDE一般将一些公共的、不大变动的头文件(比如afxwin.h等)集中放到stdafx.h中,这一部分代码就不必每次都重新编译(除非是Rebuild All)。
8.Preprocessor
当“Category”一栏选择“Preprocessor”时,界面如图8所示。
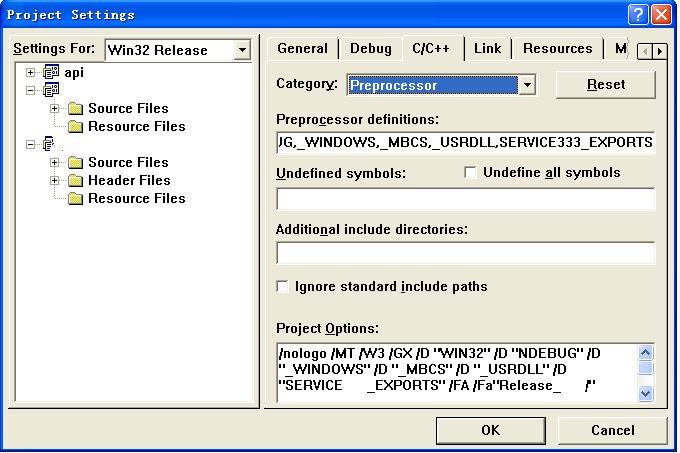
图8 “Project Settings”的示意图8
可以定义/解除定义一些常量。Additional include directories,可以指定额外的包含目录,一般是相对于本项目的目录,如……\\Include。
### 三、 连接参数的设置
这主要是通过IDE的菜单项“Project->Settings->Link”来完成。
1.General
当“Category”一栏选择“General”时,界面如图9所示。
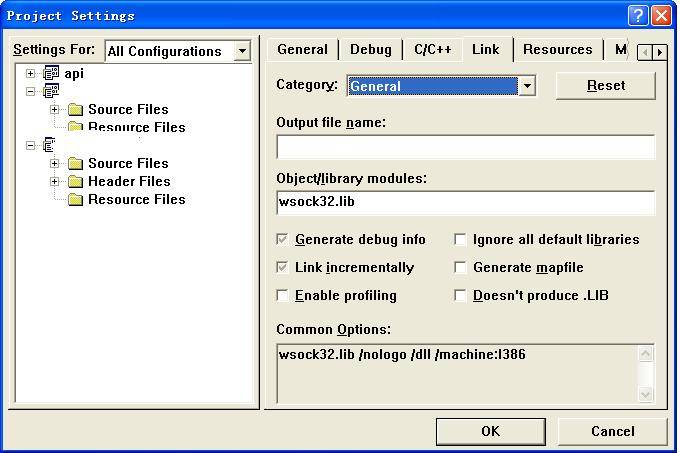
图9 “Project Settings”的示意图9
可以设置生成的文件路径、文件名,连接的库文件等。
Generate debug info:生成Debug信息到.PDB文件(具体格式可以在Category->Debug中设置)。
Ignore All Default Libraries:放弃所有默认的库连接。
Link Incrementally:通过生成. ILK文件实现递增式连接以提高后续连接速度,但一般这种方式下生成的文件(EXE或DLL)较大。
Generate Mapfile:生成.MAP文件记录模块相关信息。
Enable Profiling:这个参数通常与Generate Mapfile参数同时使用,而且如果产生Debug信息的话,不能用.PDB文件,而且必须用Microsoft Format。
2.Customize
当“Category”一栏选择“Customize”时,界面如图10所示。
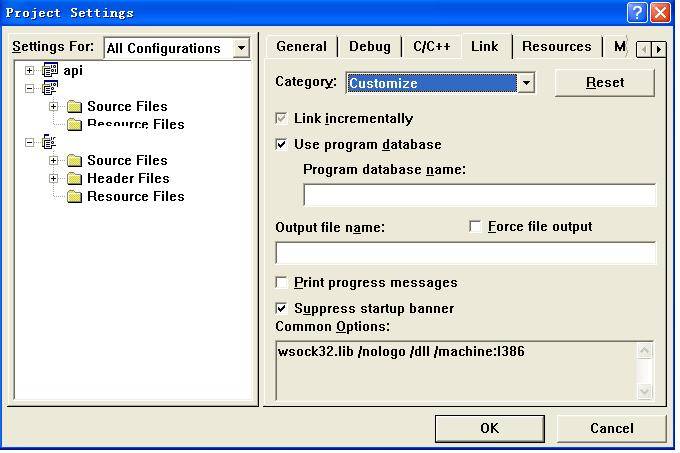
图10 “Project Settings”的示意图10
在这里可以进行使用程序数据库文件的设置。
Force File Output:强制产生输出文件(EXE或DLL)。
Print Progress Messages:可以将连接过程中的进度信息输出到Output窗口。
3. Debug
当“Category”一栏选择“Debug”时,界面如图11所示。
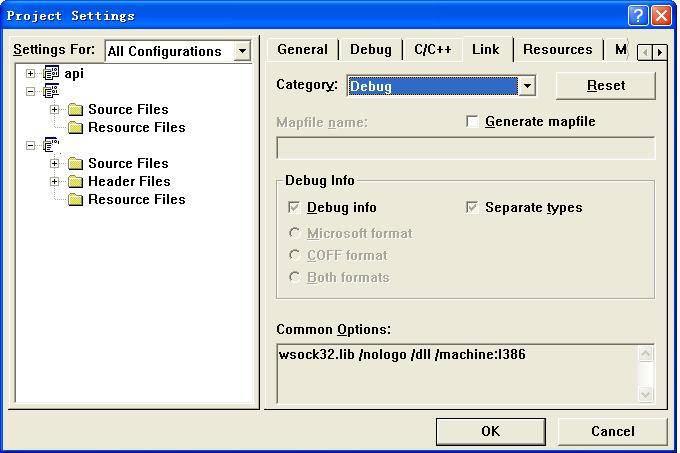
图11 “Project Settings”的示意图11
在这里设置是否生成调试信息,以及调试信息的格式。
格式可以有Microsoft Format、COFF Format(Common Object File Format)和Both Formats三种选择。
Separate Types表示将Debug格式信息以独立的.PDB文件存放,还是直接放在各个源文件的.PDB文件中。选中的话,表示采用后者的方式,这种方式调试启动比较快。
4.Input
当“Category”一栏选择“Input”时,界面如图12所示。

图12 “Project Settings”的示意图12
这里可以指定要连接的库文件和放弃连接的库文件等。
还可以增加额外的库文件目录,一般是相对于本项目的目录,如..\Lib。
Force Symbol References可以指定连接特定符号定义的库。
5.Output
当“Category”一栏选择“Output”时,界面如图13所示。
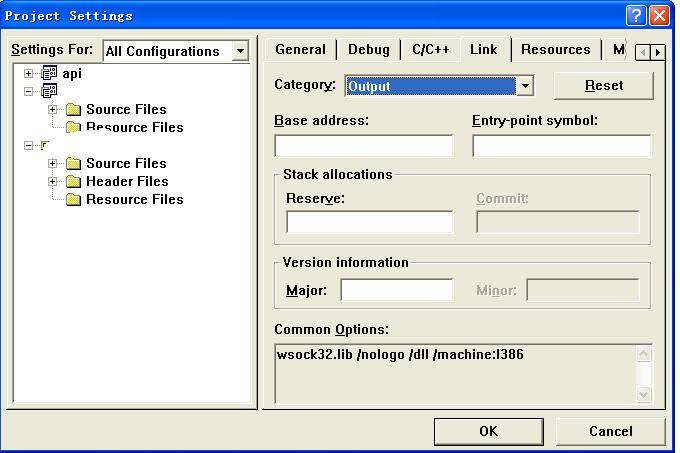
图13 “Project Settings”的示意图13
Base Address可以改变程序默认的基地址(EXE文件默认为0x400000,DLL默认为x10000000),操作系统装载一个程序时总是试着先从这个基地址开始。
Entry-Point Symbol可以指定程序的入口地址,一般为一个函数名(且必须采用__stdcall调用约定)。一般Win32的程序,EXE的入口为WinMain,DLL的入口为DllEntryPoint;最好让连接器自动设置程序的入口点。默认情况下,通过一个C的运行时库函数来实现:控制台程序采用mainCRTStartup(或wmainCRTStartup)去调用程序的main(或wmain)函数;Windows程序采用WinMainCRTStartup(或 wWinMainCRTStartup)调用程序的WinMain(或wWinMain,必须采用__stdcall调用约定);DLL采用_DllMainCRTStartup调用DllMain函数(必须采用__stdcall调用约定)。
Stack allocations,用以设置程序使用的堆栈大小(请使用十进制),默认为1兆字节。
Version Information告诉连接器在EXE或DLL文件的开始部分放上版本号。
值得注意的是,上面各个参数是大小写敏感的;在参数后加上“-”表示该参数无效;各个参数值选项有“*”的表示为该参数的默认值;可以使用页右上角的“Reset”按钮来恢复该页的所有默认设置。
### 四、其它一些参数设置
1.Project->Settings->General
界面如图14所示。
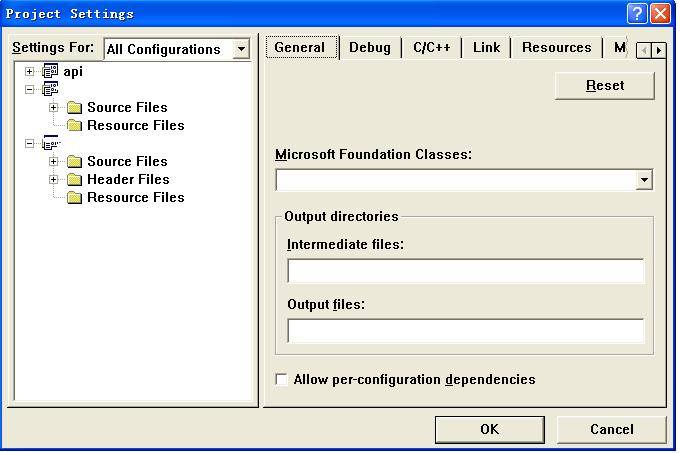
图14 “Project Settings”的示意图14
可以设置连接MFC库的方式(静态或动态)。如果是动态连接,在软件发布时不要忘了带上MFC的DLL。
2.Project->Settings->Debug
界面如图15所示。
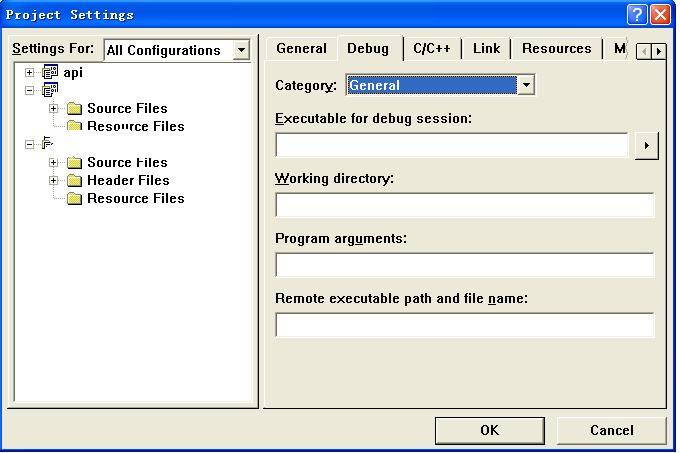
图15 “Project Settings”的示意图15
可以设置调试时运行的可执行文件,以及命令行参数等。
3.Project->Settings->Custom Build
界面如图16所示。

图16 “Project Settings”的示意图16
可以设置编译/连接成功后自动执行一些操作。比较有用的是,写COM时希望IDE对编译通过的COM文件自动注册,可以如下设置:
Description: Register COM
Commands: regsvr32 /s /c $(TargetPath)
echo regsvr32 exe.time > $(TargetDir)\$(TargetName).trg
Outputs: $(TargetDir)\$(TargetName).trg
4.Tools->Options->Directories
界面如图17所示。

图17 “Options”的示意图
设置系统的Include、Library路径。
### 五、一些小窍门(针对Visual C++)
1.有时候,可能在编译的时候,计算机突然非法关机了(可能是某人不小心碰了电源或你的内存不稳定等原因所致)。当重启机器后打开刚才的项目,重新进行编译,发现IDE会崩掉。你或许以为你的编译器坏了,其实不然(你试试编译其它项目,还是好的!),这时只要将项目的.ncb、.opt、.aps、.clw文件以及Debug、Release目录下的所有文件都删掉,然后重新编译就行了。
2.如果你想与别人共享你的源代码项目,但是把整个项目做拷贝又太大。你完全可以删掉以下文件:.dsw、.ncb、.opt、.aps、.clw、. plg文件以及Debug、Release目录下的所有文件。
3.当你的Workspace中包含多个Project的时候,你可能不能直观地、一眼看出来哪个是当前项目。可以如下设置:Tools->Options->Format,然后在Category中选择Workspace window,改变其默认的字体(比如设成Fixedsys)就行了。
4.如何给已有的Project改名字?将该Project关掉,然后以文本格式打开.dsp文件,替换原来的Project名字即可。
5.VC6对类成员的智能提示功能很有用,但有时候会失灵。你可以先关掉项目,将.clw和.ncb删掉,然后重新打开项目,点击菜单项View->ClassWizard,在弹出的对话框中按一下“Add All”按钮,重新Rebuild All。
### 六、总结
“工欲善其事,必先利其器”,熟练掌握工具的用法是对软件工程师的基本要求。在本人刚接手项目的时候,对于Visual C++不是很熟悉,导致被一位老工程师问得摸不着头脑。后来,我上网查了一点资料,发现自己以前对于Visual C++知之甚少。虽然现在很多开发工程师不用该软件编程,但了解其用法对于开发工程师还是很有好处的。
希望该文能够对大家有所裨益。
### 七、参考资料
1.Visual C++编译器常用选项设置,[http://developer.51cto.com/art/200901/106017.htm](http://developer.51cto.com/art/200901/106017.htm)。
2.Microsoft Visual C++,[http://baike.baidu.com/view/100377.htm](http://baike.baidu.com/view/100377.htm)。
WinMain函数参数介绍
最后更新于:2022-04-01 09:38:41
WinMain函数的定义
WinMain函数的原型声明如下:
~~~
int WINAPI WinMain(
HINSTANCE hInstance, // handle to current instance
HINSTANCE hPrevInstance, // handle to previous instance
LPSTR lpCmdLine, // command line
int nCmdShow // show state
);
~~~
WinMain函数接收4个参数,这些参数都是在系统调用WinMain函数时,传递给应用程序的。
第一个参数hInstance表示该程序当前运行的实例的句柄,这是一个数值。当程序在Windows下运行时,它唯一标识运行中的实例(注意,只有运行中的程序实例,才有实例句柄)。一个应用程序可以运行多个实例,每运行一个实例,系统都会给该实例分配一个句柄值,并通过hInstance参数传递给WinMain函数。
第二个参数hPrevInstance表示当前实例的前一个实例的句柄。通过查看MSDN我们可以知道,在Win32环境下,这个参数总是NULL,即在Win32环境下,这个参数不再起作用。
第三个参数lpCmdLine是一个以空终止的字符串,指定传递给应用程序的命令行参数。例如:在D盘下有一个sunxin.txt文件,当我们用鼠标双击这个文件时将启动记事本程序(notepad.exe),此时系统会将D:\sunxin.txt作为命令行参数传递给记事本程序的WinMain函数,记事本程序在得到这个文件的全路径名后,就在窗口中显示该文件的内容。要在VC++开发环境中向应用程序传递参数,可以单击菜单【Project】→【Settings】,选择“Debug”选项卡,在“Program arguments”编辑框中输入你想传递给应用程序的参数。
第四个参数nCmdShow指定程序的窗口应该如何显示,例如最大化、最小化、隐藏等。这个参数的值由该程序的调用者所指定,应用程序通常不需要去理会这个参数的值。
关于WinMain函数前的修饰符WINAPI,请参看下面关于__stdcall的介绍。读者可以利用goto definition功能查看WINAPI的定义,可以看到WINAPI其实就是__stdcall
MFC使用picture控件实现指示灯的历程
最后更新于:2022-04-01 09:38:39
1、首先应引入两个图标,一个代表灯亮(属性为 ICON_ON ) , 一个代表灯灭(属性为 ICON_NOT)。(图标属性默认为 IDI_ICON1 、 IDI_ICON2 等,可自行修改)
2、添加图标句柄变量
例如:
~~~
HICON m_hIcon_close;
HICON m_hIcon_open;
~~~
利用 LoadIcon 函数加载图标资源(单文档程序在 CMainFrame 类中的 OnCreate 函数中添加;对话框程序在 OnInitDialog 函数中添加)
~~~
m_hIcon_open=LoadIcon(AfxGetInstanceHandle(),MAKEINTRESOURCE(**ICON_ON**));
m_hIcon_close=LoadIcon(AfxGetInstanceHandle(),MAKEINTRESOURCE(**ICON_NOT**));
~~~
3、 给控件添加变量,类型为 CStatic 类型的。变量暂定义为 m_icon_open
然后就可以对图标显示进行控制了
例如 m_icon_open.SetIcon(m_hIcon_not);
即可使图标显示为 not 状态
同理 m_icon_open.SetIcon(m_hIcon_on);
使其显示为 on 状态
VC基于MSCOMM控件串口通讯
最后更新于:2022-04-01 09:38:37
在mfc中进行串口通讯最简单的方法莫过于在对话框中使用MSCOMM控件了,MSComm通信控件提供了一系列标准通信命令的接口,它允许建立串口连接,可以连接到其他通信设备(如Modem).还可以发送命令、进行数据交换以及监视和响应在通信过程中可能发生的各种错误和事件,从而可以用它创建全双工 、事件驱动的、高效实用的通信程序。
## 一、用MSComm控件通信
1.串口通信基础知识
一般悦来,计算机都有一个或多个串行端口,它们依次为com1、Com2、…,这些串口还提供了外部设备与pC进行数据传输和通信的通道。这些串口在CPU和外设之间充当解释器的角色。当字符数据从CPU发送给外设时,这些字符数据将被转换成串行比特流数据;当接收数据时,比特流数据被转换为字符数据传递给CPU,再进一步说,在操作系统方面,Windows用通信驱动程序(COMM.DRV)调用API函数发送和接收数据,当用通信控件或声明调用API函数时,它门由COMM. DRV解释并传递给设备驱动程序,作为一个程序员,要编写通信程序.只需知道通信控件提供给Windows通信AP1函数的接口即可.换句话说,只需设定和监视通信控件的属性和事件即可。
2.使用Mscomm控件
**在开始使用MSComm控件之前。需要先了解其属性、事件或错误**
属性 描述
CommPort 设置或返回通信端口号
Settings 以字符串的形式设置或返回波特率、奇偶校验、数据位和停止位
PortOpen 设置或返回通信端口的状态。也可以打开和关闭端口
Input 返回和删除接收缓冲区中的字符
Output 将字符串写入发送缓冲区
**CommEvent属性为通信事件或错误返回下列值之一。在该控件的对象库中也可以找到这些常量。**
常量 值 描述
ComEventBreak 1001 收到了断开信号
ComEventCTSTO 1002 Clear To Send Timeout。在发送字符时,在系统指定的事1件内,CTS(Clear To end)线是低电平
ComEventDSRTO 1003 Data Set Ready Timeout。在发送字符时,在系统指定的事件内,DSR(Data Set Ready)线是低电平
ComEventFrame 1004 数据帧错误。硬件检测到一个数据帧错误
ComEventOverrun 1006 端口溢出。硬件中的字符尚未读,下一个字符又到达,并且丢失
ComEventCDTO 1007 Carrier Detect Time。在发送字符时,在系统指定的事件内,CD(Carrier Detect)线是低电平。CD 也称为RLSD(Receive Line Singal Detect,接收线信号检测)
ComEventRxOver 1008 接收缓冲区溢出。在接收缓冲区中没有空间
ComEventRxParity 1009 奇偶校验错。硬件检测到奇偶校验错误7
ComEventTxFull 1010 发送缓冲区满。在对发送字符排队时,发送缓冲区满
ComEventDCB 1011 检取端口DCB(Device Control Blick)时发生了没有预料到的错误
**通信事件包含了下面的设置:**
常量 值 描述
ComEvSend 1 发送缓冲区中的字符数比Sthreshold值低
ComEvReceive 2 接收到了Rthreshold个字符。持续产生该事件,直到使用了Input属性删除了接收缓冲区中的数据
ComEvCTS 3 CTS(Clear To Send)线改变
ComEvDSR 4 DSR(Data Set Ready)线改变。当DSR从1到0改变时,该事件发生
ComEvCD 5 CD(Carrier Detect)线改变ComEvRing6检测到响铃信号。一些URAT(Universal AsynchronousReciver–Transmitters,通用异步收发器)不支持该事件
ComEvEOF 7 收到了EOF字符(ASCII字符26)
**Error消息(MSComm控件)下表列出了MSComm控件可捕获的错误消息:**
常量 值 描述
ComInvalidPropertyValue 380 无效的属性值
ComSetNotSupported 383 属性只读
ComGetNotSupported 394 属性只读
ComPortOpen 8000 端口打开时该存在无效
8001 超时设置必须比0值大
ComPortInvalid 8002 无效的端口号
8003 属性只在运行时有效
8004 属性在运行时是只读的
ComPortAleadyOpen 8005 端口已经打开
8006 设备标识符无效或不支持
8007 不支持设备的波特率
8008 指定的字节大小无效
8009 缺省参数错误
8010 硬件不可用(被其他设备锁住)
8011 函数不能分配队列
ComNoOpen 8012 设备没有打开
8013 设备已经打开
8014 不能使用通信通知
ComSetCommStateFailed 8015 不能设置通信状态
8016 不能设置通信事件屏蔽
ComPortNotOpen 8018 该存在只在端口打开是有效
8019 设备忙
ComReadError 8020 通信设备读错误
ComDCBError 8021 检取端口设备控制块时出现内部错误
注意在使用的时候一定要保证两个通讯串口的设置是相同的,否则受到的信息将会产生错误!
由于取值位数的不同,有可能发送的信息要读很多次才能组合成需要的信息!
1。建立mfc工程。
将控件加进来:打开“Project->Add To Project->Components and Controls->Registered Activex Controls”,然后选择控件:Microsoft Communication Control,version 6.0插入到当前的工程中。这样就将类 CMSComm 的相关文件 mscomm.cpp 和 mscomm.h 一并加入到了工程中。编程时只需将控件对话中的 MSComm 控件拖至你的应用对话框中就OK了
2。定义串口对象:
`CMSComm m_MSComm;`
3。串口初始化:
~~~
DWORD style=WS_VISIBLE;
m_MSComm.Create(NULL,style,CRect(0,0,0,0),this,IDC_MSCOMM);
if(m_MSComm.GetPortOpen()) //如果串口是打开的,则行关闭串口
{
m_MSComm.SetPortOpen(FALSE);
}
m_MSComm.SetCommPort(1); //选择COM1
m_MSComm.SetInBufferSize(1024); //接收缓冲区
m_MSComm.SetOutBufferSize(1024);//发送缓冲区
m_MSComm.SetInputLen(0);//设置当前接收区数据长度为0,表示全部读取
m_MSComm.SetInputMode(1);//以二进制方式读写数据
m_MSComm.SetRThreshold(1);//接收缓冲区有1个及1个以上字符时,将引发接收数据的OnComm事件
m_MSComm.SetSettings(“9600,n,8,1″);//波特率9600无检验位,8个数据位,1个停止位
if(!m_MSComm.GetPortOpen())//如果串口没有打开则打开
m_MSComm.SetPortOpen(TRUE);//打开串口
else
{
m_MSComm.SetOutBufferCount(0);
AfxMessageBox(“Open The Serial Port 1 Failurre!”);
}
~~~
4。串口数据读写:
MSComm 类的读写函数比较简单:GetInput()和SetOutput()。函数原形分别为VARIANT GetInput()和void SetOutput(const VARIANT newValue),均使用VARIANT类型。但PC机发送和接收数据时习惯用字符串形式。MSDN中查阅VARIANT类型,可以用BSTR表示字符串,但所有的BSTR都包含宽字符,而只有Windows NT支持宽字符,Windows 9X并不支持。所以要完成一个适应各平台的串口应用程序必须解决这个问题。这里使用CbyteArray即可解决之。
发数据:在对话框对加入 按钮 控件并给你添加消息
~~~
void CTest_mscommDlg::OnSend()
{
// TODO: Add your control notification handler code here
int i,Count;
CString m_SendData;
m_SendData=”Hello!”;
Count=m_SendData.GetLength();
CByteArray m_Array;
m_Array.RemoveAll();
m_Array.SetSize(Count);
for(i=0;i m_Array.SetAt(i,m_SendData[i]);
m_MSComm.SetOutput(COleVariant(m_Array));
}
~~~
收数据:给串口控件添加消息
~~~
void CTest_mscommDlg::OnOnCommMscomm()
{
VARIANT m_input;
char *str,*str1;
int k,nEvent,i;
CString str2,m_RcvData;
nEvent=m_MSComm.GetCommEvent();
switch(nEvent)
{
case 2:
k=m_MSComm.GetInBufferCount(); //接收缓冲区的字符数目
if(k>0)
{
m_input=m_MSComm.GetInput();
str=(char*)(unsigned char*)m_input.parray->pvData;
}
i=0;
str1=str;
while(i {
i++;
str1++;
}
*str1=’{post.content}’;
str2=(const char*)str; //清除字符串中的不必要字符
m_RcvData=(const char *)str;
}
//数据显示处理
m_disp+=m_RcvData;
UpdateData(false);
}
~~~
VC防止窗口和控件闪烁的方法
最后更新于:2022-04-01 09:38:34
1、将Invalidate()替换为InvalidateRect()
Invalidate()会导致整个窗口的图象重画,需要的时间比较长,而InvalidateRect()仅仅重画Rect区域内的内容,所以所需时间会少一些。虫虫以前很懒,经常为一小块区域的重画就调用Invalidate(),不愿意自己去计算需要重画的Rect,但是事实是,如果你确实需要改善闪烁的情况,计算一个Rect所用的时间比起重画那些不需要重画的内容所需要的时间要少得多。
2、禁止系统搽除你的窗口
系统在需要重画窗口的时候会帮你用指定的背景色来搽除窗口。可是,也许需要重画的区域也许非常小。或者,在你重画这些东西之间还要经过大量的计算才能开始。这个时候你可以禁止系统搽掉原来的图象。直到你已经计算好了所有的数据,自己把那些需要搽掉的部分用背景色覆盖掉(如:dc.FillRect(rect,&brush);rect是需要搽除的区域,brush是带背景色的刷子),再画上新的图形。要禁止系统搽除你的窗口,可以重载OnEraseBkgnd()函数,让其直接返回pUE就可以了。如
<table width="90%" align="center" bgcolor="#e7e9e9" border="1" style="color:rgb(68,68,68); font-size:16px; line-height:24px"><tbody><tr><td>BOOL CMyWin::OnEraseBkgnd(CDC* pDC) <br/>{ <br/> return pUE; <br/> //return CWnd::OnEraseBkgnd(pDC);//把系统原来的这条语句注释掉。 <br/>}</td></tr></tbody></table>
3、有效的进行搽除
搽除背景的时候,不要该搽不该搽的地方都搽。比如,你在一个窗口上放了一个很大的Edit框,几乎占了整个窗口,那么你频繁的搽除整个窗口背景将导致Edit不停重画形成剧烈的闪烁。事实上你可以CRgn创建一个需要搽除的区域,只搽除这一部分。如
<table width="90%" align="center" bgcolor="#e7e9e9" border="1" style="color:rgb(68,68,68); font-size:16px; line-height:24px"><tbody><tr><td>GetClientRect(rectClient); <br/>rgn1.CreateRectRgnIndirect(rectClient); <br/>rgn2.CreateRectRgnIndirect(m_rectEdit); <br/>if(rgn1.CombineRgn(&rgn1,&rgn2,RGN_XOR) == ERROR)//处理后的rgn1只包括了Edit框之外的客户区域,这样,Edit将不会被我的背景覆盖而导致重画。 <br/>{ <br/> ASSERT(FALSE); <br/> return ; <br/>} <br/>brush.CreateSolidBrush(m_clrBackgnd); <br/>pDC->FillRgn(&rgn1,&brush); <br/>brush.DeleteObject();</td></tr></tbody></table>
注意:在使用这个方法的时候要同时使用方法二。别忘了,到时候又说虫虫的办法不灵。
4、使用MemoryDC先在内存里把图画好,再复制到屏幕上
这对于一次画图过程很长的情况比较管用。毕竟内存操作比较快,而且复制到屏幕又是一次性的,至少不会出现可以明显看出一个东东从左画到右的情况。
<table width="90%" align="center" bgcolor="#e7e9e9" border="1" style="color:rgb(68,68,68); font-size:16px; line-height:24px"><tbody><tr><td>void CMyWin::OnPaint() <br/>{ <br/> CPaintDC dc1(this); // device context for painting <br/> dcMemory.CreateCompatibleDC(&dc1); <br/> CBitmap bmp;//这里的Bitmap是必须的,否则当心弄出一个大黑块哦。 <br/> bmp.CreateCompatibleBitmap(&dc1,rectClient.Width(),rectClient.Height()); <br/> dcMemory.SelectObject(&bmp); <br/><br/> //接下来你想怎么画就怎么画吧。 <br/> //dcMemory.FillRect(rectClient,&brush); <br/><br/> dc1.BitBlt(0,0,rectClient.Width(),rectClient.Height(),&dcMemory,0,0,SRCCOPY); <br/> dcMemory.DeleteDC(); <br/> // Do not call CWnd::OnPaint() for painting messages <br/>}</td></tr></tbody></table>
争议
上述方法确实有效,但在有很多控件的情况下,计算一个窗口中需要擦除并重绘的“空白区域”是一件很麻烦的事情。为了方便这种方法的实际应用,我写了一组宏来完成”计算空白区域“的功能:
<table width="90%" align="center" bgcolor="#e7e9e9" border="1" style="color:rgb(68,68,68); font-size:16px; line-height:24px"><tbody><tr><td>/*************************************/<br/>/************************************/<br/>/* 宏功能: 界面刷新时仅刷新指定控件以外的空白区域;可有效避免窗口闪烁<br/>/* 使用于: WM_ERASEBKGND 消息处理函数 OnEraseBkgnd(); <br/>/************************************/<br/>#define ERASE_BKGND_BEGIN \<br/>CRect bgRect;\<br/>GetWindowRect(&bgRect);\<br/>CRgn bgRgn;\<br/>bgRgn.CreateRectRgnIndirect(bgRect);<br/>//#define ERASE_BKGND_BEGIN <br/>// Marco parameter 'IDC' specifies the identifier of the control <br/>#define ADD_NOERASE_CONTROL(IDC)\<br/>{\<br/> CRect controlRect;\<br/> GetDlgItem(IDC)->GetWindowRect(&controlRect);\<br/> CRgn controlRgn;\<br/> controlRgn.CreateRectRgnIndirect(controlRect);\<br/> if(bgRgn.CombineRgn(&bgRgn, &controlRgn, RGN_XOR)==ERROR)\<br/> return false;\<br/>}<br/><br/>// Marco parameter 'noEraseRect' specifies a screen coordinates based RECT, <br/>// which needn't erase.<br/>#define ADD_NOERASE_RECT(noEraseRect)\<br/>{\<br/> CRgn noEraseRgn;\<br/> noEraseRgn.CreateRectRgnIndirect(noEraseRect);\<br/> if(bgRgn.CombineRgn(&bgRgn, &noEraseRgn, RGN_XOR)==ERROR)\<br/> return false;\<br/>}<br/><br/>// Marco parameter 'pDC' is a kind of (CDC *) type.<br/>// Marco parameter 'clBrushColor' specifies the color to brush the area.<br/>#define ERASE_BKGND_END(pDC, clBrushColor)\<br/>CBrush brush;\<br/>brush.CreateSolidBrush(clBrushColor);\<br/>CPoint saveOrg = (pDC)->GetWindowOrg();\<br/>(pDC)->SetWindowOrg(bgRect.TopLeft());\<br/>(pDC)->FillRgn(&bgRgn, &brush);\<br/>(pDC)->SetWindowOrg(saveOrg);\<br/>brush.DeleteObject();\<br/>//#define ERASE_BKGND_END<br/>/*************************/</td></tr></tbody></table>
说明:
1)宏 ERASE_BKGND_BEGIN 和 ERASE_BKGND_END(pDC, clBrushColor) 搭配使用。
2)宏 ADD_NOERASE_CONTROL(IDC) 和 ADD_NOERASE_RECT(noEraseRect) 根据需要放在上面两个宏的中间,用来添加不需要重绘背景的区域(正是这些区域导致了闪烁),使用次数不限。其中参数noEraseRect是一个屏幕坐标系的RECT类型或CRect类型。
使用举例1:
在当前窗体的类中重写WM_ERASEBKGND消息处理函数如下:
<table width="90%" align="center" bgcolor="#e7e9e9" border="1" style="color:rgb(68,68,68); font-size:16px; line-height:24px"><tbody><tr><td>BOOL CMyWnd::OnEraseBkgnd(CDC* pDC) <br/>{<br/> ERASE_BKGND_BEGIN;<br/> ADD_NOERASE_RGN(IDC_BUTTON2);<br/> ADD_NOERASE_RGN(IDC_BUTTON1);<br/> ADD_NOERASE_RGN(IDC_LIST_STAT);<br/> ERASE_BKGND_END(pDC, GetSysColor(COLOR_3DFACE));<br/> return false;<br/>}</td></tr></tbody></table>
上面的IDC_BUTTON2,IDC_BUTTON1,IDC_LIST_STAT即窗体上的控件。
你可以指定其他已存在的控件。
这样,窗口在擦除背景时,将只对上述控件以后的”空白区域“使用系统色重绘,有效避免了闪烁。
备注:
重载WM_ERASEBKGND消息处理函数OnEraseBkgnd的方法,选择View->ClassWizard->classinfo选项卡:message filter下拉框:
选择window,然后再选择message maps选项卡,在messages下拉框应该可以找到wm_erasebkgnd.双击添加.
使用举例2:防止CListCtrl在拉动窗口时闪烁。
<table width="90%" align="center" bgcolor="#e7e9e9" border="1" style="color:rgb(68,68,68); font-size:16px; line-height:24px"><tbody><tr><td>/* * No further full-erasing is required, <br/>* to prevent screen <a target="_blank" href="http://flash.21tx.com/" style="color:rgb(61,107,167); text-decoration:none"><span style="color:#3366cc">Flash</span></a>ing caused by background erase and view repaint. <br/>* Only erase the blank area. <br/>*/<br/><br/>BOOL CExListCtrl::OnEraseBkgnd(CDC* pDC) {<br/> //compute the holding-data-items area of this list control CRect rect; <br/> CPoint dataRgnTopLeftPoint; <br/> CPoint dataRgnBottomRightPoint; <br/> GetItemPosition(0 , &dataRgnTopLeftPoint); <br/> GetItemPosition(GetItemCount() , &dataRgnBottomRightPoint); <br/> if(!GetHeaderCtrl()->GetItemRect(GetHeaderCtrl()->GetItemCount()-1, rect)) return <br/> CListCtrl::OnEraseBkgnd(pDC);<br/> dataRgnBottomRightPoint.x = rect.right;<br/> rect.SetRect(dataRgnTopLeftPoint, (CPoint)(dataRgnBottomRightPoint - CPoint(2,2)));<br/> ClientToScreen(dataRgnRect); <br/> //compute and erase the blank area. Using the Marco. ERASE_BKGND_BEGIN; <br/> ADD_NOERASE_RECT(dataRgnRect);<br/> ERASE_BKGND_END(pDC, GetBkColor());<br/> return false;<br/>}</td></tr></tbody></table>
说明:CListCtrl在拉动的时候,会前以背景色重刷背景,再在上面绘制有数据的Items, 而没有数据的区域则保持背景色。因此,如果在BOOL CExListCtrl::OnEraseBkgnd(CDC* pDC) 函数中简单的return false,那么没有数据的区域将显示不正常。
故举例2中先计算出有数据的items的区域,这是不需要以背景重刷的区域。 再使用本文的宏,就可以有效避免CListCtrl在拉动时候的闪烁。
InvalidateRect()与Invalidate()的用法
最后更新于:2022-04-01 09:38:32
~~~
BOOL InvalidateRect(
HWNDhWnd, // 窗口句柄
CONST RECTlpRect, // 矩形区域
BOOLbErase //是否擦除背景
);
~~~
**InvalidateRect**只是增加重绘区域,在下次WM_PAINT的时候才生效。InvalidateRect函数中的参数TRUE表示系统会在你画之前用背景色将所选区域覆盖一次,默认背景色为白色,可以通过设置BRUSH来改变背景色。
**void Invalidate( BOOL bErase )**执行之后调用函数的次序为:
...OnPaint()->OnPrepareDC()->OnDraw()
所以只是刷新在OnPaint()和OnDraw()函数中的绘图语句。其它地方没有影响。
**Invalidate()**标记一个需要重绘的无效区域,并不意味着调用该函数后就立刻进行重绘。类似于PostMessage(WM_PAINT),需要处理到WM_PAINT消息时才真正重绘。如果您Invalidate()之后还有其他的语句正在执行,程序没有机会去处理WM_PAINT消息,只有当函数执行完毕后,消息处理才得以进行。
Invalidate()只是放一个WM_PAINT消息在队列里,不做别的,所以只有当当前函数返回后,进入消息循环,取出WM_PAINT,才执行OnPaint(),所以不管Invalidate放哪里,都是最后执行的。
**InvalidateRect(hWnd,&rect,TRUE)**;向hWnd窗体发出WM_PAINT的消息,强制客户区域重绘制。rect是你指定要刷新的区域,此区域外的客户区域不被重绘,这样防止客户区域的一个局部的改动,而导致整个客户区域重绘而导致闪烁,如果最后的参数为TRUE,则还向窗体发送WM_ERASEBKGND消息,在客户区域重绘之前先重绘背景。
**UpdateWindow**只向窗体发送WM_PAINT消息,在发送之前判断GetUpdateRect(hWnd,NULL,TRUE)看有无可绘制的客户区域,如果没有,则不发送WM_PAINT。
**如果希望立即刷新无效区域**,可以在调用InvalidateRect之后调用UpdateWindow,如果客户区的任一部分无效,则UpdateWindow将导致Windows用WM_PAINT消息调用窗口过程(如果整个客户区有效,则不调用窗口过程)。这一WM_PAINT消息不进入消息队列,直接由WINDOWS调用窗口过程。窗口过程完成刷新以后立刻退出,WINDOWS将控制返回给程序中UpdateWindow调用之后的语句。
**UpdateData()**这个函数不是刷新界面用的。
**UpdateData()**;参数为FALSE时,将界面上控件绑定的变量的数据导到控件内,参数为TRUE时,导入方向则相反。
wm_paint 消息详细解析
最后更新于:2022-04-01 09:38:30
WM_PAINT是Windows窗口系统中一条重要的消息,
应用程序通过[处理]()该消息实现在窗口上的绘制工作。
### 1. 系统何时发送WM_PAINT消息?
系统会在多个不同的时机发送WM_PAINT消息:当第一次创建一个窗口时,当改变窗口的大小时,当把窗口从另一个窗口背后移出时,当最大化或最小化窗口时,等等,这些动作都是由系统管理的,应用只是被动地接收该消息,在消息处理[函数]()中进行绘制操作;大多数的时候应用也需要能够主动引发窗口中的绘制操作,比如当窗口显示的数据改变的时候,这一般是通过InvalidateRect和 InvalidateRgn函数来完成的。
InvalidateRect和InvalidateRgn把指定的区域加到窗口的Update Region中,当应用的消息队列没有其他消息时,如果窗口的Update Region不为空时,系统就会自动产生WM_PAINT消息。
系统为什么不在调用Invalidate时发送WM_PAINT消息呢?又为什么非要等应用消息队列为空时才发送WM_PAINT消息呢?这是因为系统把在窗口中的绘制操作当作一种低优先级的操作,于是尽可能地推后做。
不过这样也有利于提高绘制的效率:两个WM_PAINT消息之间通过InvalidateRect和InvaliateRgn使之失效的区域就会被累加起来,然后在一个WM_PAINT消息中一次得到更新,不仅能避免多次重复地更新同一区域,也优化了应用的更新操作。
这种通过InvalidateRect和InvalidateRgn来使窗口区域无效,依赖于系统在合适的时机发送WM_PAINT消息的机制实际上是一种异步工作方式,也就是说,在无效化窗口区域和发送WM_PAINT消息之间是有延迟的;有时候这种延迟并不是我们希望的,这时我们当然可以在无效化窗口区域后利用SendMessage 发送一条WM_PAINT消息来强制立即重画,但不如使用Windows GDI为我们提供的更方便和强大的函数:UpdateWindow和RedrawWindow。
UpdateWindow会检查窗口的UpdateRegion,当其不为空时才发送WM_PAINT消息;RedrawWindow则给我们更多的控制:是否重画非客户区和背景,是否总是发送WM_PAINT消息而不管Update Region是否为空等。
### 2. BeginPaint
BeginPaint和WM_PAINT消息紧密相关。试一试在WM_PAINT处理函数中不写BeginPaint会怎样?程序会像进入了一个死循环一样达到惊人的CPU占用率,你会发现程序总在处理一个接一个的WM_PAINT消息。这是因为在通常情况下,当应用收到WM_PAINT消息时,窗口的Update Region都是非空的(如果为空就不需要发送WM_PAINT消息了),BeginPaint的一个作用就是把该Update Region置为空,这样如果不调用BeginPaint,窗口的Update Region就一直不为空,如前所述,系统就会一直发送WM_PAINT消息。
BeginPaint和WM_ERASEBKGND消息也有关系。当窗口的Update Region被标志为需要擦除背景时,BeginPaint会发送WM_ERASEBKGND消息来重画背景,同时在其返回信息里有一个标志表明窗口背景是否被重画过。
当我们用InvalidateRect和InvalidateRgn来把指定区域加到Update Region中时,可以设置该区域是否需要被擦除背景,这样下一个BeginPaint就知道是否需要发送WM_ERASEBKGND消息了。
另外要注意的一点是,BeginPaint只能在WM_PAINT处理函数中使用。
补充几点:
1.WM_Paint 是一个被动消息,不能通过普通的方法简单的 sendmessage WM_paint 了事
这是不行的;但通过消息由程序员引发不是不可能;通过几个特殊的常数可以做到,不过要到delphi下找
2.sendmessage 可以将消息发送到消息队列;但windows会自动判断是否存在无效的画图区域;
如果存在无效的画图区域,则可能会重画,反之则弃用该消息.
3.可以使用 InvalidateRect 等几个APi将屏幕上任意一个个矩形区域设置为无效区域,在UpdateWindow后调用后,windows会自动查找是否存在无效,并重画,该矩形区
MFC TeeChart用法整理 四(保存图片)
最后更新于:2022-04-01 09:38:28
TeeChart可以保存多钟格式的图片,bmp、jpeg、pdf、gif等,对于这些功能的定义在CExport类中声明。我们打开CExport类,看看它的成员函数有那些:
~~~
void CopyToClipboardBitmap();
void CopyToClipboardMetafile(BOOL Enhanced);
void SaveToBitmapFile(LPCTSTR FileName);
void SaveToFile(LPCTSTR FileName);
void SaveToJPEGFile(LPCTSTR FileName, BOOL Gray, long Performance, long Quality, long Width, long Height);
void SaveToMetafile(LPCTSTR FileName);
void SaveToMetafileEnh(LPCTSTR FileName);
void ShowExport();
CString SaveChartDialog();
void ConvertTeeFileToText(LPCTSTR InputFile, LPCTSTR OutputFile);
VARIANT Stream(long StreamType);
CJPEGExport GetAsJPEG();
CPNGExport GetAsPNG();
CGIFExport GetAsGIF();
CBMPExport GetAsBMP();
CPCXExport GetAsPCX();
CMetafileExport GetAsMetafile();
CNativeExport GetAsNative();
CXMLExport GetAsXML();
CXLSExport GetAsXLS();
CHTMLExport GetAsHTML();
CTextExport GetAsText();
void EmailFile(LPCTSTR FileName, LPCTSTR Subject);
CPDFExport GetAsPDF();
CEPSExport GetAsEPS();
CSVGExport GetAsSVG();
CString GetLabelHeader();
void SetLabelHeader(LPCTSTR lpszNewValue);
CXAMLExport GetAsXAML();
void SaveToXMLFile(LPCTSTR FileName, BOOL IncludeData, BOOL XMLHeader);
VARIANT SaveToXMLStream(BOOL IncludeData, BOOL XMLHeader);
~~~
很显然,若想保存bmp格式的图片,需要用SaveToBitmapFile函数,其参数就是图片的绝对路径。而SaveToJPEGFile函数是用来保存jpeg图片的,它有五个参数,FileName是文件存储的路径,Gray表示是否保存为黑白图像,Performance表示JPEG是生成质量优先还是速度优先,Quality是从0到100的整数,100表示生成的图片质量最好,Width和Height表示图片的像素,-1表示以TeeChart的宽和高。
下面是代码示例,生成bmp和jpeg格式的图片:
~~~
m_TeeChart.GetExport().SaveToBitmapFile("C:\\1.bmp");
m_TeeChart.GetExport().SaveToJPEGFile("C:\\4.jpeg", 0, 0, 100, -1,-1 ); //Gray为0表示生成彩色图片
~~~
那么gif、png等其他格式的图片如何保存呢?这就需要用到GetAsGIF、GetAsPNG这些类了:
~~~
m_TeeChart.GetExport().GetAsGIF().SaveToFile("C:\\1.gif"); //保存为GIF格式
m_TeeChart.GetExport().GetAsBMP().SaveToFile("C:\\1.bmp"); //保存为BMP格式
m_TeeChart.GetExport().GetAsJPEG().SaveToFile("C:\\1.jpeg"); //保存为jpeg格式
m_TeeChart/GetExport().GetAsPDF().SaveToFile("C:\\1.pdf"); //保存为pdf格式
~~~
MFC TeeChart用法整理 三(三维图)
最后更新于:2022-04-01 09:38:25
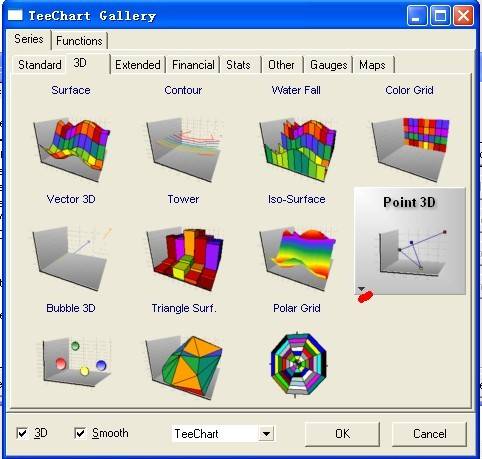
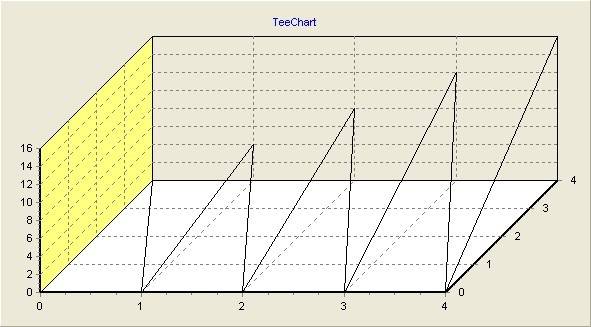
## 画三维图,就要添加三维类型的序列。
这里我们仍然以折线图作为范例。右击控件选择Properties,在TeeChart Pro Editor选项卡中单击EditChart,在弹出来的对话框中单击Add,在3D选项卡中选中Point 3D类型,单击左下角的倒三角,选择 No Point风格,如下图所示。
下面我们开始添加代码:
~~~
m_TeeChart.GetAspect().SetView3D(TRUE); //显示3D效果
for(int i=0; i<20; i++)
for(int j=0; j<12; j++)
m_TeeChart.Series(0).GetAsPoint3D().AddXYZ(i, j*i, j, NULL, RGB(255,255,0)); //向序列中添加数据,因为这里我们用到Point3D类型的序列,因此用到了GetAsPoint3D这个类数组
~~~

显示Z轴:
~~~
m_TeeChart.GetAspect().SetView3D(TRUE); //显示3D效果
for(int i=0; i<20; i++)
for(int j=0; j<12; j++)
m_TeeChart.Series(0).GetAsPoint3D().AddXYZ(i, j*i, j, NULL, RGB(255,255,0));
m_TeeChart.GetLegend().SetVisible(FALSE); //隐藏图例
m_TeeChart.GetAxis().GetDepth().SetVisible(TRUE); //显示Z轴
m_TeeChart.GetAxis().GetDepth().GetLabels().SetVisible(TRUE); //显示Z轴上的坐标
m_TeeChart.GetAxis().GetDepth().GetLabels().SetStyle(0); //设置显示坐标的风格
~~~
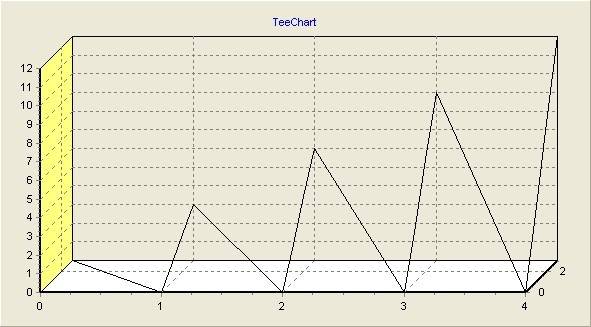
Z轴太窄了,我们可以调宽些:
~~~
m_TeeChart.GetAspect().SetChart3DPercent(50); //参数范围在0~100之间
~~~
画柱状图与画折线图类似,不过添加序列的时候选择Tower类型序列:
~~~
m_TeeChart.GetAspect().SetView3D(TRUE);
for(int i=0; i<5; i++)
for(int j=0; j<5; j++)
m_TeeChart.Series(0).GetAsTower().AddXYZ(i, j*i, j, NULL, RGB(255,255,0)); //向Tower序列中添加数据
m_TeeChart.GetLegend().SetVisible(FALSE);
m_TeeChart.GetAxis().GetDepth().SetVisible(TRUE);
m_TeeChart.GetAxis().GetDepth().GetLabels().SetVisible(TRUE);
m_TeeChart.GetAxis().GetDepth().GetLabels().SetStyle(0);
m_TeeChart.GetAspect().SetChart3DPercent(50);
~~~
MFC TeeChart 用法整理二 (画二维图)
最后更新于:2022-04-01 09:38:23
## 画图需要添加序列,添加序列有两种方式。
1、右击控件选择Properties,在TeeChart Pro Editor选项卡中单击Edit Chart,就可以在打开的对话框中编辑TeeChart控件的属性,如下图。
单击Add按钮,选择第一个Line类型作为示范,如何点击OK。如下图。
添加完序列之后,接下来就要往序列中添加数据了。有三种方式添加数据:
第一种方法只能添加一些随机数:
~~~
m_TeeChart.Series(0).FillSampleValues(50); //Series函数的参数表示序列的索引值,这里只有一个Line序列,因此Line序列的索引值为0
~~~
第二种方法可以添加指定的数据:
~~~
for(int i=0; i<10; i++)
m_TeeChart.Series(0).AddXY(i, rand()%10, NULL, RGB(255,0,255)); //AddXY函数中第一个参数是X轴的数据,第二个参数是Y轴的数据,
//第三个参数是X轴标记,第四个参数表示线条的颜色,rand()%10,表示生成10以内的随机数
~~~
此代码执行的效果如下图所示
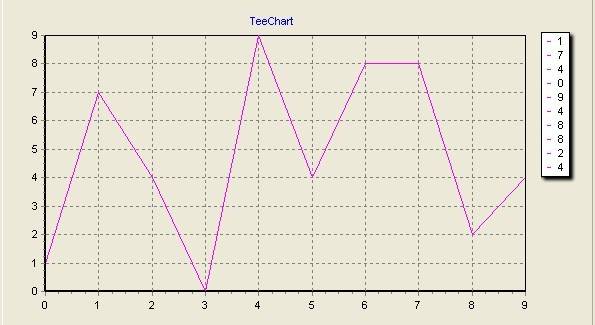
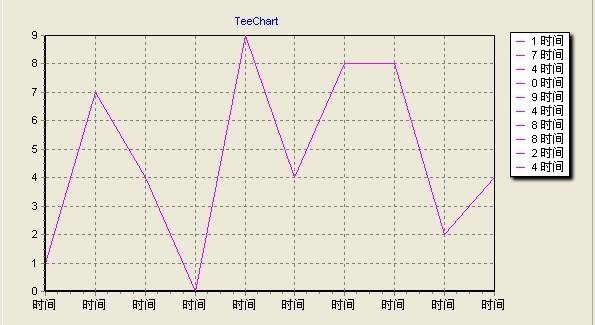
我们在第三个参数上添加一个字符串
~~~
for(int i=0; i<10; i++)
m_TeeChart.Series(0).AddXY(i, rand()%10, "时间", RGB(255,0,255));
~~~
显示结果如下:
如果不想显示右侧的图例,可以用下列语句将其隐藏起来:
~~~
m_TeeChart.GetLegend().SetVisible(FALSE);
~~~

第三种方法可以添加指定的数组:
~~~
#define MAX_SIZE 20
//定义数组
COleSafeArray XValues;
COleSafeArray YValues;
//定义的长度只要大于所创建的数组的长度即可
DWORD Xnum[] = {MAX_SIZE};
DWORD Ynum[] = {MAX_SIZE};
XValues.Create(VT_R8, 1, Xnum);
YValues.Create(VT_R8, 1, Ynum);
double tmp;
long index=0;
for(int i=0; i<MAX_SIZE; i++)
{
tmp = i;
XValues.PutElement(&index, &tmp);
tmp = rand()%50;
YValues.PutElement(&index, &tmp);
index++;
}
//向序列中添加数据
m_TeeChart.Series(0).AddArray(MAX_SIZE, XValues, YValues);
~~~
如果标记Y轴的值,可以用下列语句:
~~~
m_TeeChart.Series(0).GetMarks().SetVisible(TRUE);
~~~

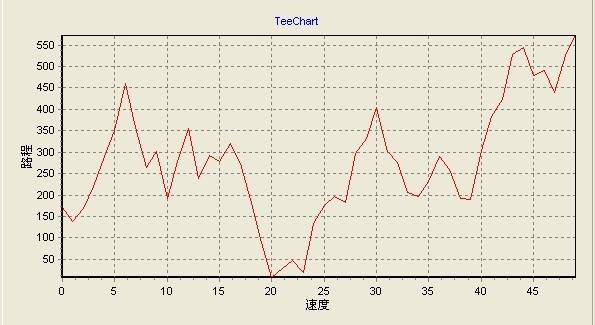
设置X轴与Y轴的标题:
~~~
m_TeeChart.GetAxis().GetLeft().GetTitle().SetCaption("路程");
m_TeeChart.GetAxis().GetBottom().GetTitle().SetCaption("速度");
~~~
2、第二种添加序列的办法是用代码添加:
~~~
m_TeeChart.AddSeries(0); //AddSeries函数的参数表示添加序列的类型 0表示添加的序列是折线图
~~~
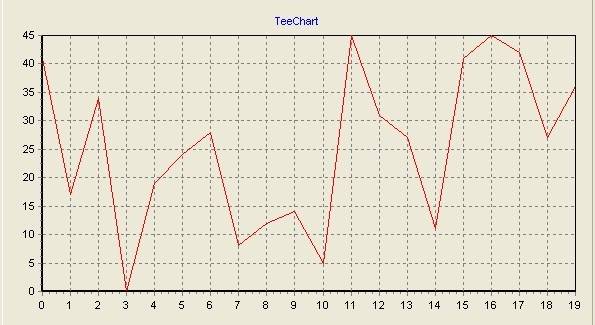
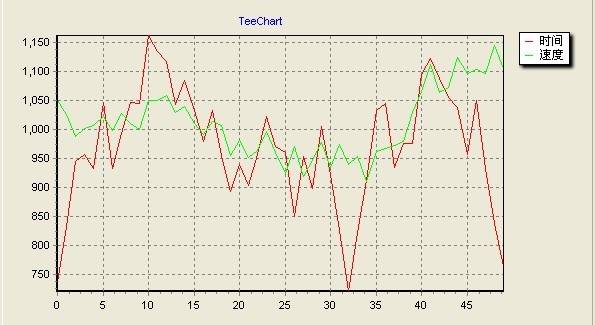
画多条曲线的折线图
~~~
m_TeeChart.GetAspect().SetView3D(FALSE); //以2D的效果显示
m_TeeChart.AddSeries(0); //添加一个Line序列
m_TeeChart.AddSeries(0); //添加一个Line序列
m_TeeChart.Series(0).FillSampleValues(50); //向第一个Line序列中添加数据
m_TeeChart.Series(1).FillSampleValues(50); //向第二个Line序列中添加数据
m_TeeChart.Series(0).SetColor(RGB(255, 0, 0)); // 设置第一条曲线的颜色为红色
m_TeeChart.Series(1).SetColor(RGB(0, 255, 0)); //设置第二条曲线的颜色为绿色
m_TeeChart.Series(0).SetTitle("时间"); //设置第一条曲线的图例标题为 时间
m_TeeChart.Series(1).SetTitle("速度"); //设置第二条曲线的图例标题为 速度
// m_TeeChart.Series(0).GetMarks().SetVisible(TRUE); //显示第一条曲线的标记
// m_TeeChart.Series(1).GetMarks().SetVisible(TRUE); //显示第二条曲线的标记
~~~
代码运行结果如下图所示:
柱状图以及其他2D图形的画法与折线图类似,只不过添加序列的类型不同,这里就不在赘述。
MFC TeeChart 用法整理一
最后更新于:2022-04-01 09:38:21
因工作需求,要用到TeeChart控件,发现TeeChart在MFC下的资料很少。以下一些TeeChart的用法,大多是从网上七拼八凑得到的,还有一些是我自己摸索的,以下代码经均本人测试,测试环境vc++6.0。
TeeChart的安装方法网上有很多,这里不再赘述。把TeeChart控件添加到工程中后,将其拖到对话框中,然后通过ClassWizard定义一个类变量m_TeeChart。
TeeChart简介:
TeeChart的主类是TChart,TChart类存在众多的属性方法和事件,下面介绍一些主要的属性。
1、 TChart.Height:图表的高度;可用下列语句获取或设置图表的高度
~~~
1 m_TeeChart.SetHeight(100); //设置图表高度为100
2 long Height_size = m_TeeChart.GetHeight(); //获取当前图表的高度
~~~
2、TChart.Width:图表的宽度;用法与高度一致,就不在赘述
3、TChart.Header:图表的标题;图表可以拥有多级标题,可用下列语句设置图表的标题以及追加标题
~~~
1 m_TeeChart.GetHeader().GetText()
2 .SetItem(0, COleVariant(“TeeChart 使用范例”));
3 m_TeeChart.GetHeader().GetText().Add(COleVariant(“追加的标题”));
~~~
4、TChart.Series:序列;Series是要显示的数据的主体,在一个图表中可以有一个或者多个序列,每一个序列可以有不同的显示类型,例如Line、Bar、Pic等等,稍后将单独描述。
5、TChart.Axis:坐标轴;用来设置坐标轴的属性
~~~
1 m_TeeChart.GetAxis().GetBottom().GetTitle().SetCaption("X轴的标题");
2 // 设置X轴的标题,准确的说应该是设置底部轴的标题
3 m_TeeChart.GetAxis().GetLeft().GetTitle().SetCaption("Y轴的标题");
4 // 设置左侧轴的标题
5 m_TeeChart.GetAxis().GetBottom().SetMinMax(0, 100);
6 //设置X轴的范围
~~~
6、TChart.Legend:图例,图例就是下图中右侧的部分
下列语句可以将图列隐藏
~~~
1 m_TeeChart.GetLegend().SetVisible(FALSE); //隐藏图例
~~~
MFC单选按钮
最后更新于:2022-04-01 09:38:18
先为对话框加上2个radio button,分别是Radio1和Radio2。
问题1:如何让Radio1或者Radio2默认选上?如何知道哪个被选上了?
关键是选上,“默认”只要放在OnInitDialog()即可。三种方法可以让它选上,
第一种:
((CButton *)GetDlgItem(IDC_RADIO1))->SetCheck(TRUE);//选上
((CButton *)GetDlgItem(IDC_RADIO1))->SetCheck(FALSE);//不选上
((CButton *)GetDlgItem(IDC_RADIO1))->GetCheck();返回1表示选上,0表示没选上
第二种:
关联一个congtrol型变量(子类化),好ctrl+W(即打开classwizard),点开 Member Variables,咦?怎么没有IDC_RADIO1这个ID?原来是没有分组。因为radio button通常都是成组使用的,在一组里面是互斥的。取消,回到对话框资源面板,右键Radio1查看属性把Group选上,那么,Radio1和 Radio2就是一组了(怎么知道他们是一组的?后面说)。此时,就可以为Radio1增加一congtrol型变量m_ctrlRadio1了。如下:
m_ctrlRadio1.SetCheck(TRUE);
同样可以使用GetCheck()获取状态。
第三种:
关联一个int型变量(同样需要先分组)m_nRadio1,打开对话框构造函数,你会发现有:m_nRadio1 = -1;m_nRadio1别赋值-1表示哪个都没有选上。如果你把-1改成0,就会发现Radio1默认被选上了,依此类推,m_nRadio1的值为1 就是第二个被选上了(这里同样有问题,哪个是第一个?哪个是第二个?)。获取状态很简单,UpdateData(TRUE)后判断m_nRadio1的值 即可。
问题2:如何使用多组?
多组和一组是一样的使用,只要搞清楚哪个是哪一组的就行了。再为对话框添加Radio3和Radio4。很简单,先为这些RadioButton排个顺序(这个必须要做,比如你的一组控件有Radio1,Radio2,Radio3,就把它们的TAB顺序分别设为1,2,3,并将Radio1的Group属性设为True,这样,当选中Radio1的时候和它关联的变量就是0,当选中Radio2的时候和它关联的变量就是1,依此 类推),就是排列他们的TAB ORDER。在对话框资源面板上Ctrl+D,然后按你自己的理想顺序用鼠标逐个点击就可以了。不妨假设Radio1、Radio2、Radio3、 Radio4分别是1、2、3、4。Radio1和Radio3都选上Group属性,那么,1、2是一组,3、4是另外一组,因为分组的原则是在选上 Group属性的这一个开始直到碰到下一个选上Group属性的。你不妨再Ctrl+D,令Radio1、Radio2、Radio3、Radio4分别 是1、3、2、4,那么Radio1和Radio3是一组,如果m_nRadio1=1,此时是Radio3被选上而不是Radio2被选上。分好了组就 分别使用它们吧。
嗯,也许你还要为它们添加鼠标单击事件,非常简单。
单选按钮控件(Radio Button)的使用
关键词: 单选按钮控件 使用方法
## 一、对单选按钮进行分组:
每组的第一个单选按钮设置属性:Group,Tabstop,Auto;其余按钮设置属性Tabstop,Auto。如:
Radio1、Radio2、Radio3为一组,Radio4、Radio5为一组
设定Radio1属性:Group,Tabstop,Auto
设定Radio2属性:Tabstop,Auto
设定Radio3属性:Tabstop,Auto
设定Radio4属性:Group,Tabstop,Auto
设定Radio5属性:Tabstop,Auto
## 二、用ClassWizard为单选控件定义变量,每组只能定义一个。
如:m_Radio1、m_Radio4。
## 三、用ClassWizard生成各单选按钮的单击消息函数,并加入内容:
~~~
void CWEditView::OnRadio1()
{
m_Radio1 = 0; //第一个单选按钮被选中
}
void CWEditView::OnRadio2()
{
m_Radio1 = 1; //第二个单选按钮被选中
}
void CWEditView::OnRadio3()
{
m_Radio1 = 2; //第三个单选按钮被选中
}
void CWEditView::OnRadio4()
{
m_Radio4 = 0; //第四个单选按钮被选中
}
void CWEditView::OnRadio5()
{
m_Radio4 = 1; //第五个单选按钮被选中
}
~~~
## 四、设置默认按钮:
在定义控件变量时,ClassWizard在构造函数中会把变量初值设为-1,只需把它改为其它值即可。
如:
~~~
//{{AFX_DATA_INIT(CUnitBlockTypeFlankPublicAdd)
m_Radio1 = 0; //初始时第一个单选按钮被选中
m_Radio4 = 0; //初始时第四个单选按钮被选中
//}}AFX_DATA_INIT
~~~
串口中怎样接收一个完整数据包的解析
最后更新于:2022-04-01 09:38:16
这里以串口作为传输媒介,介绍下怎样来发送接收一个完整的数据包。过程涉及到封包与解包。设计一个良好的包传输机制很有利于数据传输的稳定性以及正确性。串口只是一种传输媒介,这种包机制同时也可以用于SPI,I2C的总线下的数据传输。在单片机通信系统(多机通信以及PC与单片机通信)中,是很常见的问题。
## 一、根据帧头帧尾或者帧长检测一个数据帧
1、帧头+数据+校验+帧尾
这是一个典型的方案,但是对帧头与帧尾在设计的时候都要注意,也就是说帧头、帧尾不能在所传输的数据域中出现,一旦出现可能就被误判。如果用中断来接收的话,程序基本可以这么实现:
~~~
unsigned char recstatu;//表示是否处于一个正在接收数据包的状态
unsigned char ccnt; //计数
unsigned char packerflag;//是否接收到一个完整的数据包标志
unsigned char rxbuf[100];//接收数据的缓冲区
void UartHandler()
{
unsigned char tmpch;
tmpch = UARTRBR;
if(tmpch 是包头) //检测是否是包头
{
recstatu = 1;
ccnt = 0 ;
packerflag = 0;
return ;
}
if(tmpch是包尾) //检测是否是包尾
{
recstatu = 0;
packerflag = 1; //用于告知系统已经接收到一个完整的数据包
return ;
}
if(recstatu ==1) //是否处于接收数据包状态
{
rxbuf[ccnt++] = tmpch;
}
}
~~~
上面也就是接收一个数据包,但是再次提醒,包头和包尾不能在数据域中出现,一旦出现将会出现误判。另外一个。数据的校验算法是很必要的,在数据传输中,由于受到干扰,很难免有时出现数据错误,加上校验码可在发现数据传输错误时,可以要求数据的另一方重新发送,或是进行简单的丢弃处理。校验算法不一定要很复杂,普通的加和,异或,以及循环冗余都是可以的。我上面的接收程序在接收数据时,已经将包头和包尾去掉,这些可以根据自己的需求加上,关键是要理解原理。
上述包协议出现了以下的几种变种:
1.1 帧头+数据长度+数据+校验值
1.2包长+校验值
上面两种其实都是知道了数据包的长度,然后根据接收字节的长度来判断一个完整的数据包。例如,定义一个数据包的长度为256字节,那我们就可以一直接收,直到接收到256个字节,就认为是一个数据包。但是,会不会存在问题呢?比如说从机向主机发送数据,发送了一半,掉电,重启,开机后继续发送,这很明显接收到的数据就不对了,所以此时很有必要定义一个超限时间,比如我们可以维护下面这样的一个结构体。
~~~
struct uartrd{
char rd[ 256];
unsigned int timeout;
}
~~~
成员变量rd用来存放接收到的数据字节;成员变量timeout用来维护超时值,这里主要讨论这个。这个数值怎么维护呢,可以用一个定时器来维护,以可以放在普通的滴答中断里面来维护,也可以根据系统运行一条指令的周期,在自己的循环中来维护,给其设置个初值,比如说100,当有第一个数据到来以后,timeout在指定的时间就会减少1,减少到0时,就认为超时,不论是否接收到足够的数据,都应该抛弃。
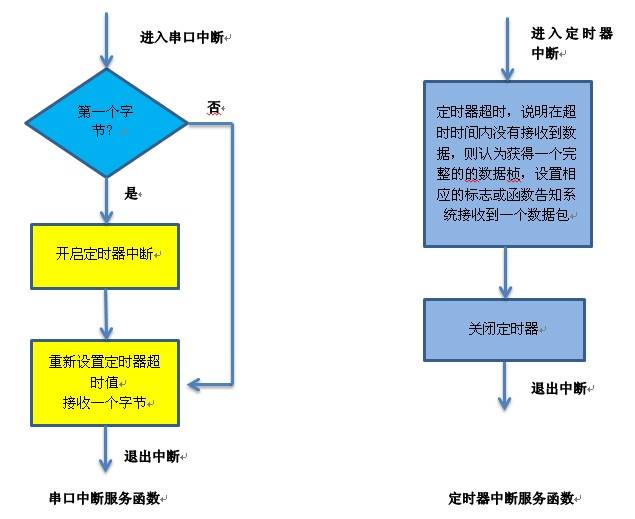
## 二、根据接收超时来判断一个数据包
2.1 数据+校验
核心思想是如果在达到一定的时间没有接受到数据,就认为数据包接收完成。modbus协议里就有通过时间间隔来判断帧结束的。具体实现是要使用一个定时器,在接收到第一个数据时候,开启定时器,在接收到一个数据时候,就将定时器清零,让定时器重新开始计时,如果设定的超时时间到(超时时间长度可以设置为5个正常接收的周期),则认为在这一段时间内没有接受到新的数据,就认为接收到一个完整的数据包了。流程大体如下图所示:
进行一个简单的小的总结,上述几种方法都还是较为常用的,在具体的实现上,可以根据具体的实际情况,设计出具体的通讯协议。数据校验位,有时候感觉不出来其重要性,但是一定要加上,对数据进行一个相关的验证还是必要的。现在很在MCU都带有FIFO,DMA等功能,所以有时候利用上这些特性,可以设计出更好的通讯方式。有的人问在接受串口数据时候是应该中断一次接收一个,还是进入中断后接收一段数据呢,我认为应该中断接收一个,因为CPU是很快的,至少对于串口是这样,在接受每个数据的间隔期间,处理器还是可以做些其他工作的。这是在裸机下的模型。在多线程中,那就可以直接建立一个数据接收线程。
前言
最后更新于:2022-04-01 09:38:14
> 原文出处:[MFC 学习记录](http://blog.csdn.net/column/details/mfclpp.html)
作者:[lpp0900320123](http://blog.csdn.net/lpp0900320123)
**本系列文章经作者授权在看云整理发布,未经作者允许,请勿转载!**
# MFC 学习记录
> MFC是庞大的框架,我们除了做出界面还要学会记录自己所学的内容,本专栏主要介绍自己学习MFC的例程,和自己的一些感悟,方便以后运用。