How to Create a Free 7Gb RAM Windows VPS from Github
最后更新于:2022-03-26 21:31:35
格尺建站系统(GeChiUI.com)是基于WordPress深度定制中文版建站系统,优秀的主题与插件都可以无缝迁移到GeChiUI中使用。
There is currently a trick to help you create a free 7GB Ram WINdows VPS from Github combined with Ngrok. The tutorial on creating a 15Gb ram VPS has been fixed, but how to create a free Windows VPS from Github is still usable, especially if you don’t need a credit card or account verification. To create a free terrible configuration Windows VPS, you do the following:
目录
Steps to create a free Windows 7Gb RAM VPS from Github
Because VPS is free, Github only allows you to use up to 6 hours, but in return VPS has a terrible configuration. After 6 hours you can create another github account then follow below steps to create new free Windows 7Gb RAM VPS, but old data will be lost.
Pros:
- How to create simple, unlimited number
- RAM 7Gb
- 2 CPUs
- HDD 255 Gb
- Windows Server 2019
- 下载 speed 75Mb/s
Cons:
- Only used for 6 hours
- Remote speed is not as fast as Google’s VPS
Step 1. Get authtoken of Ngrok
Now you need to create a Ngrok account to get access token authtoken.
After creating an account, go to https://dashboard.ngrok.com/get-started/setup.
Scroll down to see 2. Connect your account, copy the authtoken code.

Step 2. Create a Free Windows 7Gb RAM VPS from Github
Using Gmail Create a Github account.
Then visit https://github.com/proavipatil/AviRDP.git (New update link June 22, 2021)
Click on the Fork button in the upper corner to get this project on your Github.

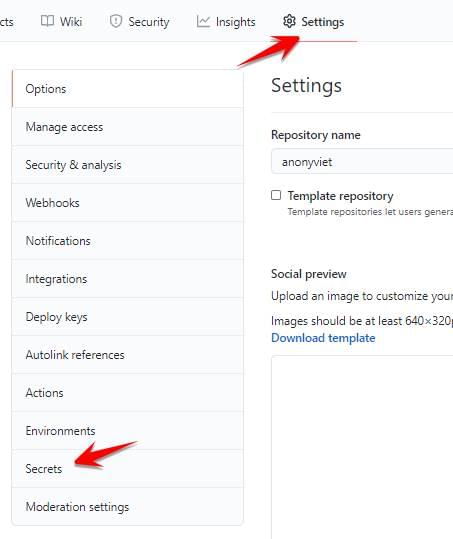
Next, Click Menu Settings -> Secrets -> New repository secret
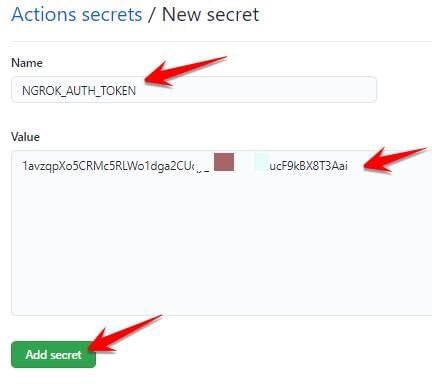
Enter the following information:
- Name: NGROK_AUTH_TOKEN
- Value: Enter the authtoken code in Step 1
- Click Add secret.
Next, go to Actions Menu -> I understand my workflows, go ahead and enable them.

Look at the menu on the left, select Cl.

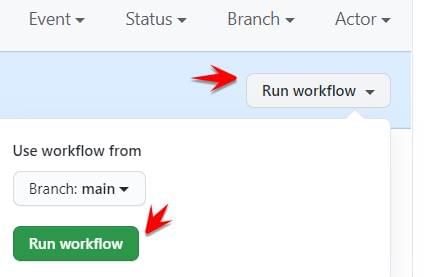
Look to the right click on Run workflow -> Run workflow
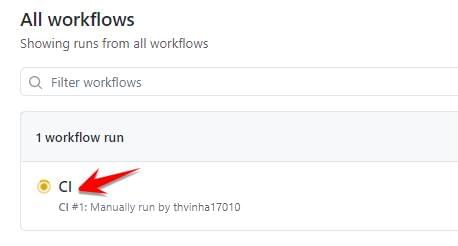
Now you press F5 to reload the page, you will see the VPS is being created, to see the VPS creation progress, click on the color Cl.
Continue to click on Build
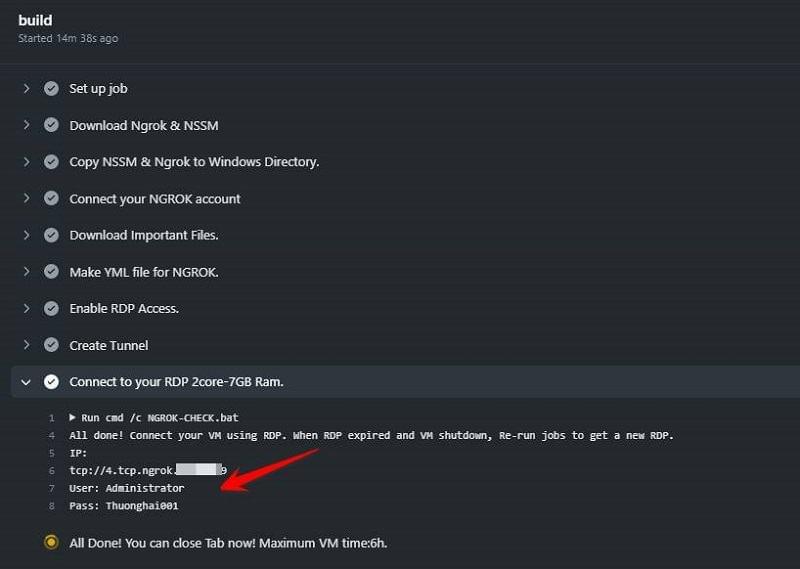
Wait for the “Connect to your RDP 2core-7GB Ram” paragraph, click the arrow to get Remote information to the Windows VPS. This process takes about 3-5 minutes.
Step 3. Connect to Github’s Windows VPS
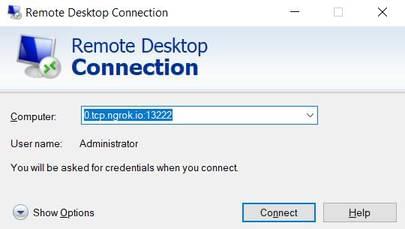
Open Run (Windows + R) enter the mstsc command to open the remote Desktop program.
Enter the IP assigned from Ngrok, remove the tcp:// word.
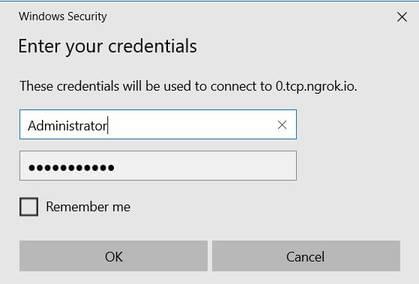
- Username: Administrator
- Password: as provided in the picture on github
You will enter the Github Windows 2019 Datacenter VPS screen, a good thing is that the VPS has pre-installed Firefox, Chrome …, now you like to install or 下载 / Upload whatever is up to you.