11——Qt Quick Particles Examples – Affectors
最后更新于:2022-04-01 07:21:29
本系列所有文章可以在这里查看[http://blog.csdn.net/cloud_castle/article/category/2123873](http://blog.csdn.net/cloud_castle/article/category/2123873)
接上文[Qt5官方demo解析集10——Qt Quick Particles Examples - Emitters](http://blog.csdn.net/cloud_castle/article/details/33306133)
Affectors是Qt官方粒子系统demo中的第二个例程,它是在Emitters上的进一步扩展。我们将看到,通过使用Affectors,我们能够创造更加灵活的粒子显示以及交互行为。
首先还是看下介绍:This is a collection of small QML examples relating to using Affectors in the particle system. Each example is a small QML file emphasizing a particular type or feature.
很简短,告诉我们这个demo依然是由多个使用Affectors的小例子构成。运行后是同样的选择框:
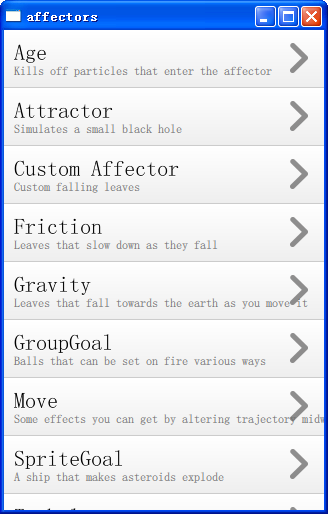
一共有10个例子,我们还是从第一个开始:
(1)Age
来看看是个什么效果:进入图中矩形框的雪花都变小并逐渐消失了。
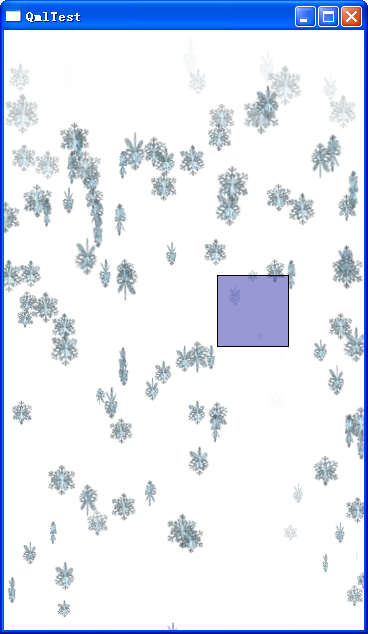
来看看这个小例子是怎么写的吧~ age.qml:
~~~
import QtQuick 2.0
import QtQuick.Particles 2.0
Rectangle {
id: root
width: 360
height: 600
color: "white"
ParticleSystem { id: particles }
ImageParticle { // 这里向我们展示另外一种图像粒子的设置
system: particles
sprites: Sprite { // sprites属性用来定义一组帧图片来作为粒子,这样粒子可以像GIF一样拥有自己的动画
name: "snow"
source: "../../images/snowflake.png" // 这是一张具有51帧的雪花图形
frameCount: 51
frameDuration: 40 // 帧动画的基本设置
frameDurationVariation: 8
}
}
Emitter {
system: particles
emitRate: 20
lifeSpan: 8000
velocity: PointDirection { y:80; yVariation: 40; } // 加速度下落
acceleration: PointDirection { y: 4 }
size: 36
endSize: 12
sizeVariation: 8
width: parent.width
height: 100
}
MouseArea {
id: ma
anchors.fill: parent
hoverEnabled: true
}
Rectangle { // 这里使用Rectangle作为Age的父类,当然Age可以定义自己的坐标以及区域,但是加入Rectangle可视化效果更好
color: "#803333AA" // 半透明的湛蓝色
border.color: "black"
x: ma.mouseX - 36 // 这里用到属性绑定使得该矩形可以跟随鼠标的移动,并以鼠标为中心点
y: ma.mouseY - 36
width: 72
height: 72
//! [0]
Age { // Age继承自Affector,其实在上一篇Emitters中我们就接触了一个Affector:Turbulence,它可以提供一个气流的效果,而这里的Age则允许我们改变粒子的生命周期。
anchors.fill: parent
system: particles
once: true // 每个粒子只影响一次
lifeLeft: 1200 // 粒子剩下的时间
advancePosition: false // 退化是否影响位置、速度、和加速度
}
//! [0]
}
}
~~~
雪花图太长,截一部分好了:

(2)Attractor
这个小例子使用Affector中的Attractor(吸引者)向我们展示了如何使用粒子系统模拟一个黑洞。
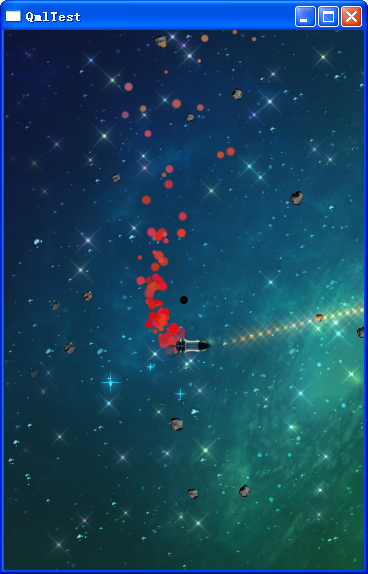
可以看到图中心有一个“黑洞”,靠近黑洞的粒子会被改变运行轨迹,太近的粒子会被吸进去。如果需要我们自己来写这种速度改变的代码可能会相当繁琐,好在QtQuick给我们提供了Attractor这个Affector,来看看它怎么使用的~attractor.qml
~~~
import QtQuick 2.0
import QtQuick.Particles 2.0
Rectangle {
id: root
width: 360
height: 540
color: "black"
Image {
source: "qrc:/images/finalfrontier.png"
anchors.centerIn:parent
}
ParticleSystem {
id: particles
anchors.fill: parent
Emitter { // 星星发射器
group: "stars"
emitRate: 40
lifeSpan: 4000
enabled: true
size: 30
sizeVariation: 10
velocity: PointDirection { x: 220; xVariation: 40 }
height: parent.height // height定义了发射发射区域的高度,否则粒子从(0,0)发出
}
Emitter { // 陨石发射器
group: "roids"
emitRate: 10
lifeSpan: 4000
enabled: true
size: 30
sizeVariation: 10
velocity: PointDirection { x: 220; xVariation: 40 }
height: parent.height
}
ImageParticle { // 星星
id: stars
groups: ["stars"]
source: "qrc:///particleresources/star.png"
color: "white"
colorVariation: 0.5
alpha: 0
}
ImageParticle { // 陨石
id: roids
groups: ["roids"]
sprites: Sprite { // 这里再次使用了帧动画,由于没有定义frameDurationVariation,所有陨石的旋转速度都是相同的
id: spinState
name: "spinning"
source: "qrc:/images/meteor.png"
frameCount: 35
frameDuration: 60
}
}
ImageParticle { // 飞船子弹
id: shot
groups: ["shot"]
source: "qrc:///particleresources/star.png"
color: "#0FF06600"
colorVariation: 0.3
}
ImageParticle { // 尾气
id: engine
groups: ["engine"]
source: "qrc:///particleresources/fuzzydot.png"
color: "orange"
SequentialAnimation on color { // 属性动画
loops: Animation.Infinite
ColorAnimation {
from: "red"
to: "cyan"
duration: 1000
}
ColorAnimation {
from: "cyan"
to: "red"
duration: 1000
}
}
colorVariation: 0.2
}
//! [0]
Attractor { // Affector家族中的一员,可以形成吸引其他粒子的效果
id: gs; pointX: root.width/2; pointY: root.height/2; strength: 4000000; // pointX,pointY是其作为目标点,同其他Affector一样,设置其x,y,height,weidth改变的是其影响区域
affectedParameter: Attractor.Acceleration // 设置为影响加速度
proportionalToDistance: Attractor.InverseQuadratic // 影响效果与距离的比例关系
}
//! [0]
Age { // 在Attractor周围再安装一个Age,因为这里没有设置lifeLeft,粒子进入该区域变消失了
x: gs.pointX - 8; // Age的影响区域
y: gs.pointY - 8;
width: 16
height: 16
}
Rectangle { // 用矩形画圆的方法
color: "black"
width: 8
height: 8
radius: 4
x: gs.pointX - 4
y: gs.pointY - 4
}
Image { // 飞行器
source:"qrc:/images/rocket2.png"
id: ship
width: 45
height: 22
//Automatic movement
SequentialAnimation on x { // 属性动画,这里使用了弹线轨迹
loops: -1
NumberAnimation{to: root.width-45; easing.type: Easing.InOutQuad; duration: 2000}
NumberAnimation{to: 0; easing.type: Easing.OutInQuad; duration: 6000}
}
SequentialAnimation on y {
loops: -1
NumberAnimation{to: root.height-22; easing.type: Easing.OutInQuad; duration: 6000}
NumberAnimation{to: 0; easing.type: Easing.InOutQuad; duration: 2000}
}
}
Emitter { // 尾气粒子
group: "engine"
emitRate: 200
lifeSpan: 1000
size: 10
endSize: 4
sizeVariation: 4
velocity: PointDirection { x: -128; xVariation: 32 }
height: ship.height
y: ship.y
x: ship.x
width: 20
}
Emitter { // 子弹粒子
group: "shot"
emitRate: 32
lifeSpan: 1000
enabled: true
size: 40
velocity: PointDirection { x: 256; }
x: ship.x + ship.width
y: ship.y + ship.height/2
}
}
}
~~~
(3)Custom Affector
在这个例子中我们将了解到如何实现一个自定义的Affector,以及通过这个Affector实现落叶飘落的效果。当Affector的子类都不能满足我们的需求的时候,这种方式就显得尤为重要了。
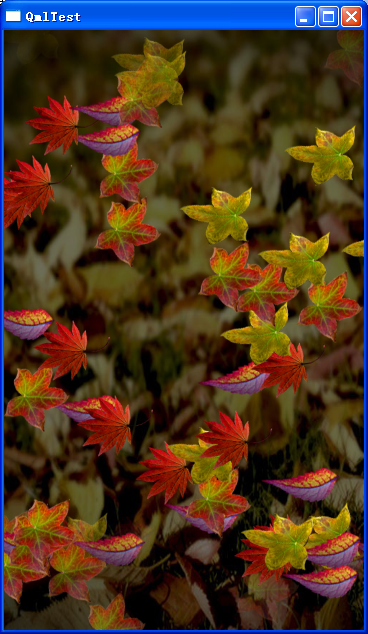
直接上代码,由于我会调试这些代码因此其图片的路径被我改成了资源路径,希望没有影响到大家。customaffector.qml:
~~~
import QtQuick 2.0
import QtQuick.Particles 2.0
Item { // 如果这个文件作为一个组件,Image作为根项目将使使用这个组件的人可以对其任意修改
width: 360
height: 600
Image { // 因此不推荐将Image作为根目录,而是以Item作为替代,而嵌套Image
source: "qrc:/images/backgroundLeaves.jpg"
anchors.fill: parent
}
ParticleSystem {
anchors.fill: parent
Emitter {
width: parent.width // 粒子出现的点为(0,0)到(360,0)
emitRate: 4
lifeSpan: 14000
size: 80
velocity: PointDirection { y: 60 } // 初始速度
}
Wander { // 一个系统自带的Affector:Wander(漫步者),它可以用来提供随机的粒子轨迹,这样形成了左右晃动的叶子
anchors.fill: parent
anchors.bottomMargin: 100 // 与设置Affector的height类似,确定Wander的影响区域
xVariance: 60 // x方向上的变化率
pace: 60 // 最大步长
}
//! [0]
Affector { // 基本的Affector类不会改变粒子任何属性,但我们可以在合适的时候发出信号来做出相应的处理
property real coefficient: 0.1 // 自定义属性“同步系数”和“速度”
property real velocity: 1.5
width: parent.width
height: parent.height - 100 // 底部100像素不再产生影响
onAffectParticles: { // 只要有粒子被该Affector影响,这个handler就被触发。通过它我们可以定义自己的Affector行为。类似onEmitterParticles,由于使用了javaScript数组以及计算,我们同样不推荐在包含大量粒子的系统中使用它。
//Linear movement // 这一段是在源码中被注释的,它提供了线性摇动的计算
// if (particle.r == 0) {
// particle.r = Math.random() > 0.5 ? -1 : 1;
// } else if (particle.r == 1) {
// particle.rotation += velocity * dt; // 不知道这个dt是什么,只知道是一个比较小的小数...
// if (particle.rotation >= maxAngle)
// particle.r = -1;
// } else if (particle.r == -1) {
// particle.rotation -= velocity * dt;
// if (particle.rotation <= -1 * maxAngle)
// particle.r = 1;
// }
//Wobbly movement
for (var i=0; i<particles.length; i++) { // 这是一个摇摆算法,相对上面的代码而言更加精妙
var particle = particles[i];
if (particle.r == 0.0) { // 在QML中我们可以将参数定义与赋值放在一起
particle.r = Math.random() + 0.01; // 将 0.01 定义为particle.r的最小值
}
particle.rotation += velocity * particle.r * dt; // 随机的particle.r保证每片叶子的旋转角度都是随机的
particle.r -= particle.rotation * coefficient; // 然后这里通过“同步系数”适当改变particle.r,系数越大,叶片晃动越剧烈。根据QML属性绑定的原则,当particle.r被改变,particle.rotation随之改变。正向的旋转角度使particle.r变小,导致particle.rotation变小,叶片方向旋转,反之亦然,得到晃动效果
if (particle.r == 0.0) // 如果为0给其一个改变量
particle.r -= particle.rotation * 0.000001;
particle.update = 1;
}
}
}
//! [0]
//! [1]
Affector { // 定义“地面”的摩擦减速效果
x: -60
width: parent.width + 120
height: 100
anchors.bottom: parent.bottom
onAffectParticles: {
for (var i=0; i<particles.length; i++) {
var particle = particles[i];
var pseudoRand = (Math.floor(particle.t*1327) % 10) + 1; // Math.floor取到一个整数,并对10取余。叶子生命周期越长,这个数会越大,也就更容易被“减速”
var yslow = dt * pseudoRand * 0.5 + 1;
var xslow = dt * pseudoRand * 0.05 + 1;
if (particle.vy < 1) // 速度低于 1 则停止
particle.vy = 0;
else
particle.vy = (particle.vy / yslow); // 否则除以摩擦系数
if (particle.vx < 1)
particle.vx = 0;
else
particle.vx = (particle.vx / xslow);
particle.update = true;
}
}
}
//! [1]
ImageParticle {
anchors.fill: parent
id: particles
sprites: [Sprite { // 将多个png赋予图像粒子的方法
source: "qrc:/images/realLeaf1.png"
frameCount: 1
frameDuration: 1 // 类似“导入者”,其生命周期很短,1ms后它将变成后面的图像
to: {"a":1, "b":1, "c":1, "d":1} // 有1/4的概率变成"a",1/4的概率变成"b"...后面类似
}, Sprite { // 当该图像没有可转变的内容,它将重复播放自己
name: "a"
source: "qrc:/images/realLeaf1.png"
frameCount: 1 // 我们的单帧静态图也就是仅有一帧的连续图
frameDuration: 10000
},
Sprite {
name: "b"
source: "qrc:/images/realLeaf2.png"
frameCount: 1
frameDuration: 10000
},
Sprite {
name: "c"
source: "qrc:/images/realLeaf3.png"
frameCount: 1
frameDuration: 10000
},
Sprite {
name: "d"
source: "qrc:/images/realLeaf4.png"
frameCount: 1
frameDuration: 10000
}
]
z:4 // 在图像中的层次
}
}
}
~~~
(4)Friction
在上面的例子中我们看到了如何使用代码来模拟一个摩擦效果,但是Qt Quick已经为我们提供了一个模拟摩擦效果的Affector,它就是Friction。
这个例子与上面的例子类似:
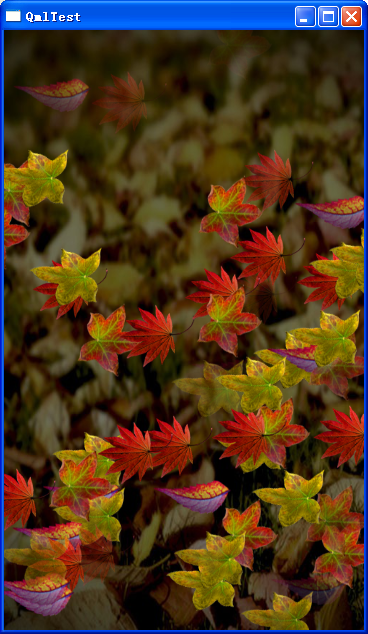
代码十分简练。friction.qml:
~~~
import QtQuick 2.0
import QtQuick.Particles 2.0
Item {
width: 360
height: 600
Image {
source: "qrc:/images/backgroundLeaves.jpg"
anchors.fill: parent
}
ParticleSystem {
anchors.fill: parent
Emitter {
width: parent.width
emitRate: 4
lifeSpan: 14000
size: 80
velocity: PointDirection { y: 160; yVariation: 80; xVariation: 20 } // xVariation给了叶子水平方向上移动的能力,但是达不到wander的“摆动”效果
}
ImageParticle { // 图像粒子同上
anchors.fill: parent
id: particles
sprites: [Sprite {
source: "qrc:/images/realLeaf1.png"
frameCount: 1
frameDuration: 1
to: {"a":1, "b":1, "c":1, "d":1}
}, Sprite {
name: "a"
source: "qrc:/images/realLeaf1.png"
frameCount: 1
frameDuration: 10000
},
Sprite {
name: "b"
source: "qrc:/images/realLeaf2.png"
frameCount: 1
frameDuration: 10000
},
Sprite {
name: "c"
source: "qrc:/images/realLeaf3.png"
frameCount: 1
frameDuration: 10000
},
Sprite {
name: "d"
source: "qrc:/images/realLeaf4.png"
frameCount: 1
frameDuration: 10000
}
]
width: 100
height: 100
x: 20
y: 20
z:4
}
//! [0]
Friction { // Friction为粒子带来摩擦效果,我们可以设置一个阈值,使Friction只影响速度大于该阈值的粒子。该阈值默认为0
anchors.fill: parent
anchors.margins: -40
factor: 0.4 // 摩擦系数,值越大摩擦力越大
}
//! [0]
}
}
~~~
(5)Gravity
类似的,除了摩擦力,我们还有一个Affector用来模拟万有引力。它展示了叶片向地面加速飘落的效果。
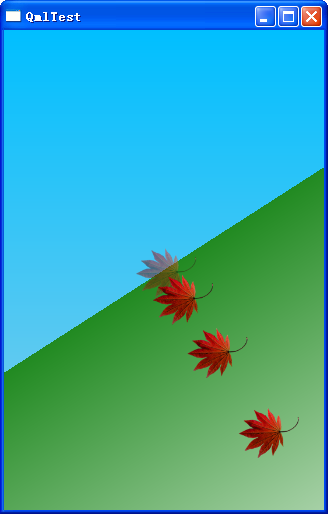
图中的绿色是"地面",可以拖动它360度旋转,叶片始终向“地面”的中心加速下落。gravity.aml:
~~~
import QtQuick 2.0
import QtQuick.Particles 2.0
Item {
id: window
width: 320; height: 480
Rectangle {
id: sky
anchors.fill: parent // 蓝色的背景覆盖了整个矩形范围
gradient: Gradient {
GradientStop {
position: 0.0
color: "DeepSkyBlue"
}
GradientStop {
position: 1.0
color: "SkyBlue"
}
}
}
Rectangle { // 因为在后面要实现“地面”的旋转,所以设置了较大的尺寸
id: ground
width: parent.height * 2
height: parent.height
y: parent.height/2
x: parent.width/2 - parent.height
transformOrigin: Item.Top // 用来设置旋转和缩放的中心点
rotation: 0
gradient: Gradient {
GradientStop { position: 0.0; color: "ForestGreen"; }
GradientStop { position: 1.0; color: "white"; }
}
}
MouseArea {
anchors.fill: parent
onPositionChanged: { // 该信号在鼠标按下并移动位置时放出,如果不需要按下鼠标,可设置hoverEnabled为true
var rot = Math.atan2(mouseY - window.height/2,mouseX - window.width/2) * 180/Math.PI; // 返回当前鼠标方向矢量与X 轴正方向的夹角
ground.rotation = rot; // 以该角度旋转
}
}
ParticleSystem { id: sys }
//! [0]
Gravity { // 当使用Gravity时,要注意它对整个场景的吸引力都是相同的,如果角度和加速度恒定,最好直接在Emitter中设置
system: sys // 但在此例中如果直接设置Emitter,角度的计算会比较复杂
magnitude: 32 // 强度
angle: ground.rotation + 90 // 运动方向
}
//! [0]
Emitter {
system: sys
anchors.centerIn: parent
emitRate: 1
lifeSpan: 10000
size: 64
}
ImageParticle {
anchors.fill: parent
system: sys
source: "qrc:/images/realLeaf1.png"
}
}
~~~
(6)GroupGoal
在前面我们学习到我们可以设置ImageParticle的groups属性,从而让不同的Emitter发送不同的粒子。更进一步,使用ParticleGroup和GroupGoal可以实现粒子在特定状态下的跳变。
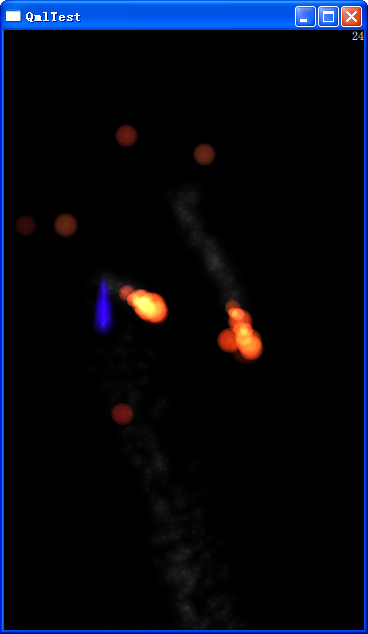
可以看到,这些红色的小光点在经过蓝色火焰后被点燃成火苗,同时被鼠标滑过的也将被点燃。界面的右上角还有个数字用来记录被点燃的火苗数。
代码如下,groupgoal.qml:
~~~
import QtQuick 2.0
import QtQuick.Particles 2.0
Rectangle {
id: root
width: 360
height: 600
color: "black"
property int score: 0 // 设置一个属性用来记录分数
Text {
color: "white"
anchors.right: parent.right
text: score
}
ParticleSystem {
id: particles
anchors.fill: parent
// ![unlit]
ParticleGroup { // 这个元素有点类似状态机的概念,它将一种状态下的粒子群以打包的形式放在一起,然后通过name跳转
name: "unlit"
duration: 1000 // 1s后进入下一个状态
to: {"lighting":1, "unlit":99} // 设置百分之一的光球可以自燃
ImageParticle {
source: "qrc:/images/particleA.png" // 资源文件中的一个光点,有点类似常用的glowdot,但是更大一些
colorVariation: 0.1
color: "#2060160f" // 光点的颜色为红褐色
}
GroupGoal { // 继承自Affector,提供特定条件满足下的状态跳转
whenCollidingWith: ["lit"] // 当碰撞到正在燃烧的火苗时
goalState: "lighting" // 跳转为"lighting"状态
jump: true // 设置为立刻跳转
}
}
// ![unlit]
// ![lighting]
ParticleGroup { // 一个过渡状态,正在被点亮的状态
name: "lighting"
duration: 100 // 0.1秒后跳转到"lit"
to: {"lit":1}
}
// ![lighting]
// ![lit]
ParticleGroup { // 被点亮状态
name: "lit"
duration: 10000 // 终态粒子的生命周期
onEntered: score++; // 分数加一
TrailEmitter { // 使用TrailEmitter构建尾部火焰
id: fireballFlame
group: "flame" // 粒子"flame"是基于下方定义的ImageParticle
emitRatePerParticle: 48 // 每个lit后跟随48玫"火焰"
lifeSpan: 200 // 生命周期与焰尾长度成正比
emitWidth: 8
emitHeight: 8
size: 24
sizeVariation: 8
endSize: 4 // 尾部体积更小
}
TrailEmitter { // 另一个TrailEmitter用来构建烟雾
id: fireballSmoke
group: "smoke" // smoke在下方定义
// ![lit]
emitRatePerParticle: 120
lifeSpan: 2000 // 较长的生命周期用来进行自己的动画
emitWidth: 16
emitHeight: 16
velocity: PointDirection {yVariation: 16; xVariation: 16}
acceleration: PointDirection {y: -16} // 烟雾首先向下运动,随之向上升腾
size: 24
sizeVariation: 8
endSize: 8
}
}
ImageParticle { // 灰色烟雾粒子
id: smoke
anchors.fill: parent
groups: ["smoke"]
source: "qrc:///particleresources/glowdot.png"
colorVariation: 0
color: "#00111111"
}
ImageParticle { // 蓝色闫焰苗粒子
id: pilot
anchors.fill: parent
groups: ["pilot"]
source: "qrc:///particleresources/glowdot.png"
redVariation: 0.01
blueVariation: 0.4 // 设置RGB中蓝色的变化率
color: "#0010004f"
}
ImageParticle { // 红色火焰粒子
id: flame
anchors.fill: parent
groups: ["flame", "lit", "lighting"]
source: "qrc:/images/particleA.png"
colorVariation: 0.1
color: "#00ff400f"
}
Emitter { // 用来发射易燃小球
height: parent.height/2
emitRate: 4
lifeSpan: 4000//TODO: Infinite & kill zone // demo中的注释,TODO表示还要做的事,FIXME表示代码待修改,XXX表示有待商榷
size: 24
sizeVariation: 4
velocity: PointDirection {x:120; xVariation: 80; yVariation: 50}
acceleration: PointDirection {y:120}
group: "unlit"
}
Emitter { // 用来构建焰苗
id: flamer
x: 100
y: 300
group: "pilot"
emitRate: 80
lifeSpan: 600
size: 24
sizeVariation: 2
endSize: 0
velocity: PointDirection { y:-100; yVariation: 4; xVariation: 4 } // 粒子向上移动形成焰苗的升腾感
// ![groupgoal-pilot]
GroupGoal {
groups: ["unlit"] // 设置被影响的粒子群
goalState: "lit"
jump: true // 直接跳转,否则默认为过渡时间结束后再跳转
system: particles
x: -15
y: -55
height: 75
width: 30
shape: MaskShape {source: "qrc:/images/matchmask.png"} // 这张图片是一个焰苗的图形,使用它可以使Affector影响一个非矩形区域
}
// ![groupgoal-pilot]
}
// ![groupgoal-ma]
//Click to enflame
GroupGoal {
groups: ["unlit"] // 设置其可以影响的粒子群
goalState: "lighting" // 目标状态
jump: true
enabled: ma.pressed // 按下事件使能
width: 18 // 作用区域
height: 18
x: ma.mouseX - width/2
y: ma.mouseY - height/2
}
// ![groupgoal-ma]
MouseArea {
id: ma
anchors.fill: parent
}
}
}
~~~
(7)Move
这个例子展示了直接使用Affector影响粒子运动(位置、速度、加速度)的方法。
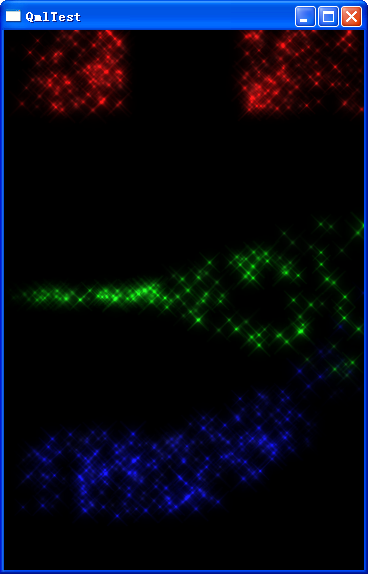
代码很简单,我们大致看一下好了,move.qml:
~~~
import QtQuick 2.0
import QtQuick.Particles 2.0
Rectangle {
width: 360
height: 540
color: "black"
ParticleSystem { // 第一束红色粒子
anchors.fill: parent
ImageParticle {
groups: ["A"]
anchors.fill: parent
source: "qrc:///particleresources/star.png"
color:"#FF1010"
redVariation: 0.8 // 形成"明红"到"暗红"的颜色差异
}
Emitter {
group: "A"
emitRate: 100
lifeSpan: 2800
size: 32
sizeVariation: 8
velocity: PointDirection{ x: 66; xVariation: 20 }
width: 80 // 产生粒子的区域是(0,0)到(80,80)的矩形范围
height: 80
}
//! [A]
Affector {
groups: ["A"] // Affector作用于A
x: 120 // 影响区域
width: 80
height: 80
once: true
position: PointDirection { x: 120; } // x 增加120
}
//! [A]
ImageParticle { // 第二束绿色粒子
groups: ["B"]
anchors.fill: parent
source: "qrc:///particleresources/star.png"
color:"#10FF10"
greenVariation: 0.8
}
Emitter {
group: "B"
emitRate: 100
lifeSpan: 2800
size: 32
sizeVariation: 8
velocity: PointDirection{ x: 240; xVariation: 60 }
y: 260
width: 10
height: 10
}
//! [B]
Affector {
groups: ["B"]
x: 120
y: 240
width: 80
height: 80
once: true
velocity: AngleDirection { angleVariation:360; magnitude: 72 } // 角度变化范围和强度
}
//! [B]
ImageParticle { // 第三束蓝色粒子
groups: ["C"]
anchors.fill: parent
source: "qrc:///particleresources/star.png"
color:"#1010FF"
blueVariation: 0.8
}
Emitter {
group: "C"
y: 400
emitRate: 100
lifeSpan: 2800
size: 32
sizeVariation: 8
velocity: PointDirection{ x: 80; xVariation: 10 }
acceleration: PointDirection { y: 10; x: 20; }
width: 80
height: 80
}
//! [C]
Affector {
groups: ["C"]
x: 120
y: 400
width: 80
height: 120
once: true
relative: false
acceleration: PointDirection { y: -80; } // 在y方向的加速度下降80
}
//! [C]
}
}
~~~
(8)SpriteGoal
这个例子向我们展示了如何对使用sprites的ImageParticle做特殊的处理,使其在我们想要它改变时进行状态的跳转。
如图是“星际迷航”中的飞船,它将撞毁其接触到的陨石。
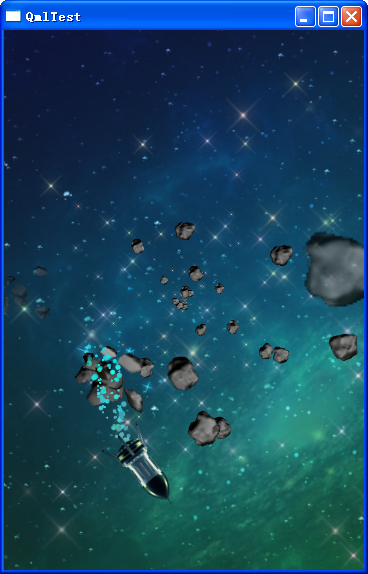
spritegoal.qml:
~~~
import QtQuick 2.0
import QtQuick.Particles 2.0
Item {
id: root
width: 360
height: 540
MouseArea {
id: ma
anchors.fill: parent
}
ParticleSystem { id: sys }
Image {
source: "qrc:/images/finalfrontier.png" // 星际迷航
transformOrigin: Item.Center // 以中心点旋转,一共有9个点可选,四个边角,四个边线中心,以及中心点
anchors.centerIn: parent
NumberAnimation on rotation { // 背景缓慢旋转
from: 0
to: 360
duration: 200000
loops: Animation.Infinite
}
}
ImageParticle { // 星星粒子
system: sys
groups: ["starfield"]
source: "qrc:///particleresources/star.png"
colorVariation: 0.3
color: "white"
}
Emitter {
id: starField
system: sys
group: "starfield"
emitRate: 80
lifeSpan: 2500
anchors.centerIn: parent
//acceleration: AngleDirection {angleVariation: 360; magnitude: 200}//Is this a better effect, more consistent velocity?
acceleration: PointDirection { xVariation: 200; yVariation: 200; } // 上面是源码中的注释,作者留给我们一个问题,这个从中心点向外散射的粒子,是使用AngleDirection还是PointDirection?笔者想了下,以第一行代码发射的话,所有粒子的速度都将是相同的,而第二行代码则具有更大的随机性。以星星的散射而言,第二行代码更合理。
size: 0
endSize: 80
sizeVariation: 10
}
Emitter { // 陨石的发射器
system: sys
group: "meteor"
emitRate: 12
lifeSpan: 5000
acceleration: PointDirection { xVariation: 80; yVariation: 80; } // 与星星的发射类似
size: 15
endSize: 300 // 增大的endSize形成由远及进感
anchors.centerIn: parent
}
ImageParticle { // 陨石粒子,由sprites的多帧图像构成
system: sys
groups: ["meteor"]
sprites:[Sprite {
id: spinState // 自旋陨石
name: "spinning"
source: "qrc:/images/meteor.png"
frameCount: 35
frameDuration: 40
randomStart: true // 从随意的一帧开始
to: {"explode":0, "spinning":1} // 由于"explode"为0,因此spinning实际上是无限循环。"explode": 0可以不写。但为了逻辑清楚,加上更好
},Sprite { // 碎裂陨石
name: "explode"
source: "qrc:/images/_explo.png"
frameCount: 22
frameDuration: 40
to: {"nullFrame":1} // 去到一个空白图像
},Sprite {//Not sure if this is needed, but seemed easiest // 作者称不确定这个空白图像是否需要,但是带上它似乎更好
name: "nullFrame"
source: "qrc:/images/nullRock.png"
frameCount: 1
frameDuration: 1000
}
]
}
//! [0]
SpriteGoal { // 这就是Affector中的SpriteGoal了
groups: ["meteor"] // 与groupGoal不同,GroupGoal影响的ParticleGroup,而SpriteGoal影响的是这里使用Sprites的粒子
system: sys
goalState: "explode" // 目标状态
jump: true // 立刻跳转
anchors.fill: rocketShip // 作用范围跟随飞船
width: 60
height: 60
}
//! [0]
Image { // 企业号飞船,因为要使飞船绕一个固定的中心点旋转,坐标与旋转的计算全部放在Image中比较麻烦,我们可以使用两个Item来进行逻辑上的圆周计算
id: rocketShip
source: "qrc:/images/rocket.png"
anchors.centerIn: holder
rotation: (circle.percent+0.25) * 360 // 随着所在圆周位置的不同对自身进行旋转。由于原图飞船是向上的,因此将其初始旋转90度
z: 2
}
Item { // 通过下面的圆心和连续变化的百分比,这个Item用来得到实际的坐标
id: holder
x: circle.x - Math.sin(circle.percent * 6.28316530714)*200 // 百分比乘以2π,200为半径
y: circle.y + Math.cos(circle.percent * 6.28316530714)*200
z: 1
}
Item {
id: circle
x: root.width / 1.2 // 圆心的位置
y: root.height / 1.7
property real percent: 0 // 定义一个百分比属性
SequentialAnimation on percent { // 4秒的1到0循环
id: circleAnim1
loops: Animation.Infinite
running: true
NumberAnimation {
duration: 4000
from: 1
to: 0
}
}
}
ImageParticle { // 飞船的尾气粒子
z:0 // 其z值比飞船小,这样这些粒子不会覆盖在飞船上面
system: sys
groups: ["exhaust"]
source: "qrc:///particleresources/fuzzydot.png"
color: "orange"
SequentialAnimation on color {
loops: Animation.Infinite
ColorAnimation {
from: "red"
to: "cyan"
duration: 1000
}
ColorAnimation {
from: "cyan"
to: "red"
duration: 1000
}
}
colorVariation: 0.2
}
Emitter { // 喷气粒子发射器
id: trailsNormal2
system: sys
group: "exhaust"
emitRate: 300
lifeSpan: 500
y: holder.y
x: holder.x
velocity: PointDirection { xVariation: 40; yVariation: 40; }
velocityFromMovement: 16
acceleration: PointDirection { xVariation: 10; yVariation: 10; }
size: 4
sizeVariation: 4
}
}
~~~
(9)Turbulence
在上篇博文的最后一个小例子——飞翔的火焰 中我们其实已经接触到了Turbulence,它用来为粒子提供一个气流的效果。在这个例子中我们可以更清晰地看到它的用法。
可以看到Turbulence为火苗和烟雾带来的效果:
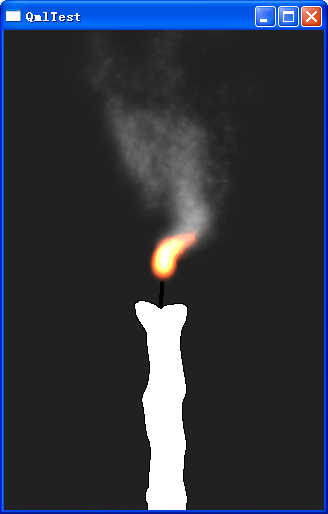
Turbulence.qml:
~~~
import QtQuick 2.0
import QtQuick.Particles 2.0
Rectangle {
width: 320
height: 480
color: "#222222"
id: root
Image {
source: "qrc:/images/candle.png" // 一根空白的蜡烛
anchors.bottom: parent.bottom
anchors.horizontalCenter: parent.horizontalCenter
anchors.bottomMargin: -60 // 这张图下面有一段空白
anchors.horizontalCenterOffset: 2 // 水平中心向右平移2个像素
}
ParticleSystem {
anchors.fill: parent
MouseArea { // 点击后关闭/打开Turbulence效果
anchors.fill: parent
onClicked: turb.enabled = !turb.enabled
}
//! [0]
Turbulence {
id: turb
enabled: true
height: (parent.height / 2) - 4
width: parent.width
x: parent. width / 4
anchors.fill: parent
strength: 32 // 可以为strength添加一个NumberAnimation,然后通过设置Easing,可以达到更逼近现实的气流效果
NumberAnimation on strength{from: 16; to: 64; easing.type: Easing.InOutBounce; duration: 1800; loops: -1}
}
//! [0]
ImageParticle { // 烟雾
groups: ["smoke"]
source: "qrc:///particleresources/glowdot.png"
color: "#11111111"
colorVariation: 0
}
ImageParticle { // 火苗
groups: ["flame"]
source: "qrc:///particleresources/glowdot.png"
color: "#11ff400f"
colorVariation: 0.1
}
Emitter { // 火苗粒子由窗口中心发出
anchors.centerIn: parent
group: "flame"
emitRate: 120
lifeSpan: 1200
size: 20
endSize: 10
sizeVariation: 10
acceleration: PointDirection { y: -40 }
velocity: AngleDirection { angle: 270; magnitude: 20; angleVariation: 22; magnitudeVariation: 5 }
}
TrailEmitter {
id: smoke1
width: root.width
height: root.height/2
group: "smoke"
follow: "flame"
emitRatePerParticle: 1
lifeSpan: 2400
lifeSpanVariation: 400
size: 16
endSize: 8
sizeVariation: 8
acceleration: PointDirection { y: -40 }
velocity: AngleDirection { angle: 270; magnitude: 40; angleVariation: 22; magnitudeVariation: 5 }
}
TrailEmitter { // 第二个TrailEmitter用来在更高一点的地方释放出更浓郁的烟雾
id: smoke2
width: root.width
height: root.height/2 - 20
group: "smoke"
follow: "flame"
emitRatePerParticle: 4
lifeSpan: 2400
size: 36
endSize: 24
sizeVariation: 12
acceleration: PointDirection { y: -40 }
velocity: AngleDirection { angle: 270; magnitude: 40; angleVariation: 22; magnitudeVariation: 5 }
}
}
}
~~~
(10)Wander
同样我们在本文第三个小例子中已经接触过wander了,在那我们使用wander为落叶添加了摇摆的飘落效果。在这个例子中我们将了解到,除了速度,wander还可以进一步作用于位置和加速度。
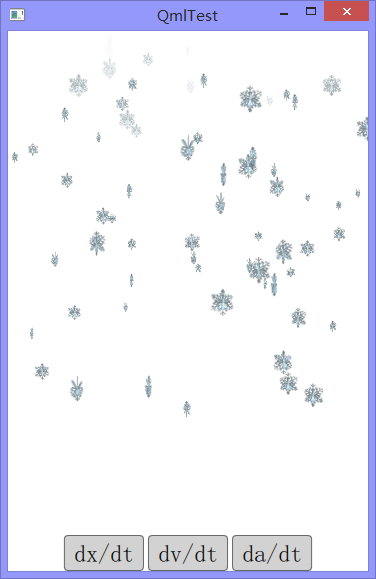
可以看到在飘落的雪花背景中,有三个按钮分别用来选择位置,速度,以及加速度。通过点击这些按钮,可以改变这些雪花在x方向上的不同运动效果。这些按钮是在另一个Qml文件中定义的,代码比较简单,贴在下面,就不一句句介绍了。
GreyButton.qml:
~~~
import QtQuick 2.0
Item {
id: container
property string text: "Button"
property string subText: ""
signal clicked
width: buttonLabel.width + 20; height: col.height + 12
MouseArea {
id: mouseArea;
anchors.fill: parent;
onClicked: container.clicked();
onPressed: background.color = Qt.darker("lightgrey");
onReleased: background.color="lightgrey";
}
Rectangle {
id: background
anchors.fill: parent
color: "lightgrey"
radius: 4
border.width: 1
border.color: Qt.darker(color)
}
Column {
spacing: 2
id: col
x: 10
y: 6
Text {
id: buttonLabel; text: container.text; color: "black"; font.pixelSize: 24
}
Text {
id: buttonLabel2; text: container.subText; color: "black"; font.pixelSize: 12
}
}
}
~~~
wander.qml:
~~~
import QtQuick 2.0
import QtQuick.Particles 2.0
Rectangle {
width: 360
height: 540
ParticleSystem { id: particles }
ImageParticle { // 雪花粒子
system: particles
sprites: Sprite {
name: "snow"
source: "../../images/snowflake.png"
frameCount: 51
frameDuration: 40
frameDurationVariation: 8
}
}
//! [0]
Wander { // wander
id: wanderer
system: particles
anchors.fill: parent
xVariance: 360/(wanderer.affectedParameter+1); // xVariance与pace必须都定义,由于没有定义yVariance因此不会影响y方向的运动
pace: 100*(wanderer.affectedParameter+1); // 这里wanderer.affectedParameter实际等于0,不太懂这里的意思
}
//! [0]
Emitter {
system: particles
emitRate: 20
lifeSpan: 7000
velocity: PointDirection { y:80; yVariation: 40; }
acceleration: PointDirection { y: 4 }
size: 20
sizeVariation: 10
width: parent.width
height: 100
}
Row { // 这里使用了一个布局器
anchors.bottom: parent.bottom
anchors.horizontalCenter: parent.horizontalCenter
spacing: 4
GreyButton {
text:"dx/dt"
onClicked: wanderer.affectedParameter = Wander.Position; // 点击改变Wander的影响属性
}
GreyButton {
text:"dv/dt"
onClicked: wanderer.affectedParameter = Wander.Velocity;
}
GreyButton {
text:"da/dt"
onClicked: wanderer.affectedParameter = Wander.Acceleration;
}
}
}
~~~