第十一课:2D文本
最后更新于:2022-04-01 04:37:37
# 第十一课:2D文本
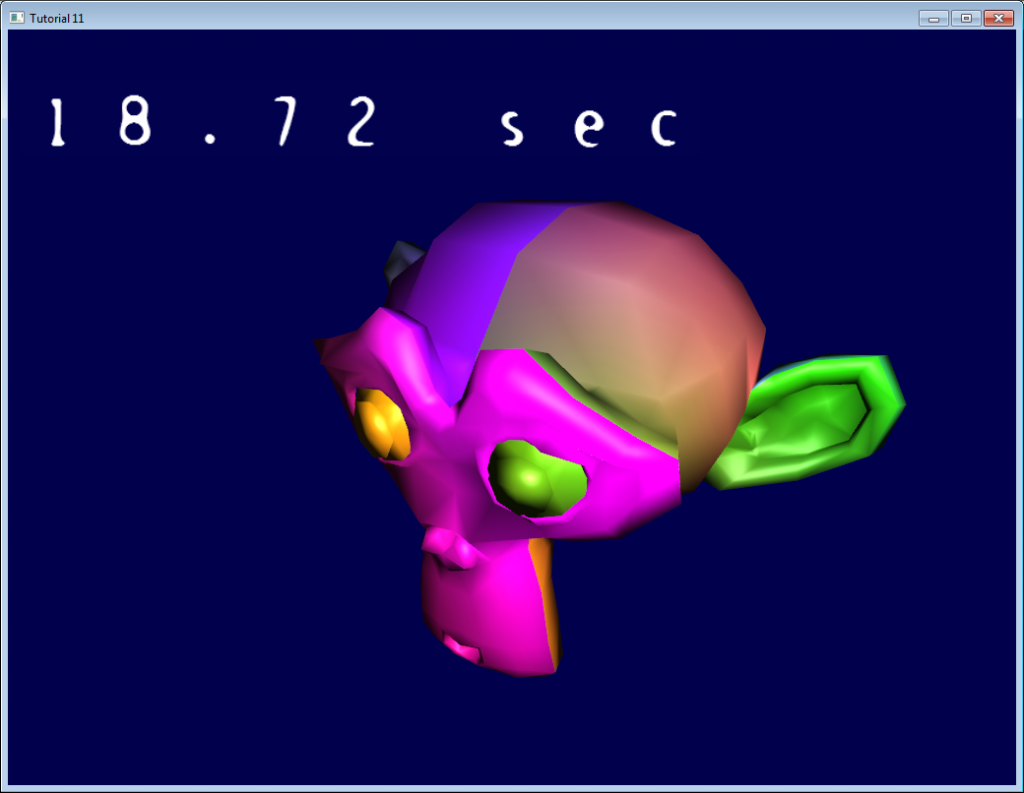
本课将学习如何在三维场景之上绘制二维文本。本例是一个简单的计时器:

## API
我们将实现这些简单的接口(位于`common/text2D.h`):
~~~
void initText2D(const char * texturePath);
void printText2D(const char * text, int x, int y, int size);
void cleanupText2D();
~~~
为了让代码在640*480和1080p分辨率下都能正常工作,x和y的范围分别设为[0-800]和[0-600]。顶点着色器将根据实际屏幕大小做对它做调整。
完整的实现代码请参阅`common/text2D.cpp`。
## 纹理
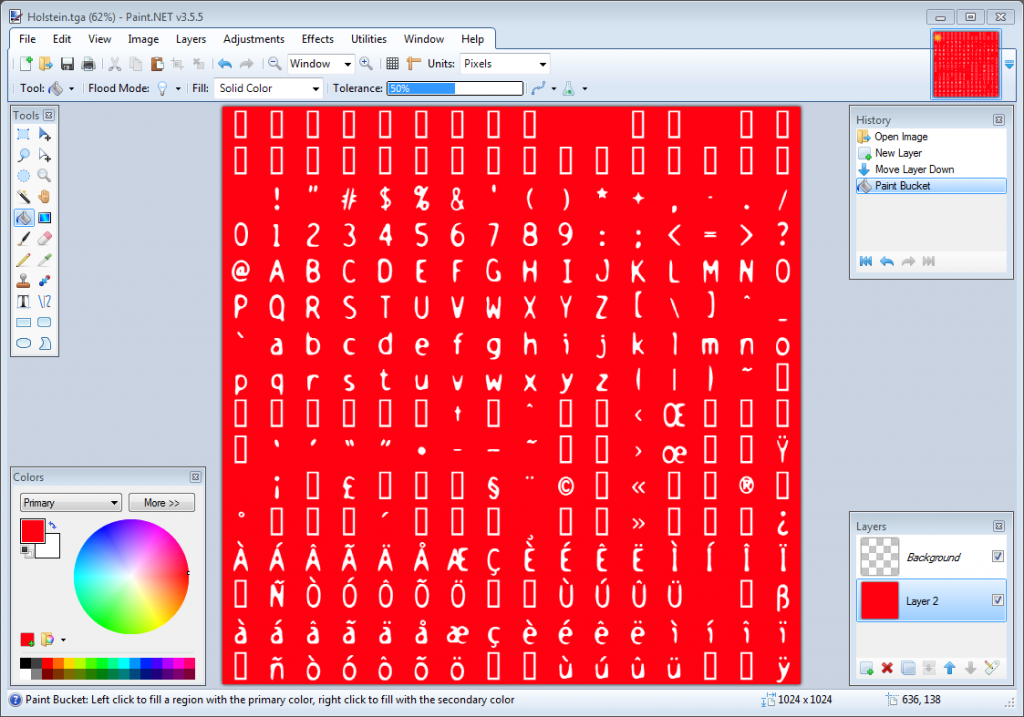
`initText2D`简单地读取一个纹理和一些着色器,很好理解。来看看纹理:

该纹理由[CBFG](http://www.codehead.co.uk/cbfg/)生成。CBFG是诸多从字体生成纹理的工具之一。把纹理加载到Paint.NET,加上红色背景(仅为了观察方便;本教程中的红色背景,都代表透明)。
`printText2D()`在屏幕的适当位置,生成一个纹理坐标正确的四边形。
## 绘制
首先,填充这些缓冲区:
~~~
std::vector<glm::vec2> vertices;
std::vector<glm::vec2> UVs;
~~~
文本中的每个字母,都要计算其四边形包围盒的顶点坐标,然后添加两个三角形(组成一个四边形):
~~~
for ( unsigned int i=0 ; i<length ; i++ ){
glm::vec2 vertex_up_left??? = glm::vec2( x+i*size???? , y+size );
glm::vec2 vertex_up_right?? = glm::vec2( x+i*size+size, y+size );
glm::vec2 vertex_down_right = glm::vec2( x+i*size+size, y????? );
glm::vec2 vertex_down_left? = glm::vec2( x+i*size???? , y????? );
vertices.push_back(vertex_up_left?? );
vertices.push_back(vertex_down_left );
vertices.push_back(vertex_up_right? );
vertices.push_back(vertex_down_right);
vertices.push_back(vertex_up_right);
vertices.push_back(vertex_down_left);
~~~
轮到UV坐标了。计算左上角的坐标:
~~~
char character = text[i];
float uv_x = (character%16)/16.0f;
float uv_y = (character/16)/16.0f;
~~~
这样做是可行的(基本可行,详见下文),因为[A的ASCII值](http://www.asciitable.com/)为65。65%16 = 1,因此A位于第1列(列号从0开始)。
65/16 = 4,因此A位于第4行(这是整数除法,所以结果不是想象中的4.0625)
两者都除以16.0以使之落于[0.0 - 1.0]区间内,这正是OpenGL纹理所需的。
现在只需对顶点重复相同的操作:
~~~
glm::vec2 uv_up_left = glm::vec2( uv_x , 1.0f - uv_y );
glm::vec2 uv_up_right = glm::vec2( uv_x+1.0f/16.0f, 1.0f - uv_y );
glm::vec2 uv_down_right = glm::vec2( uv_x+1.0f/16.0f, 1.0f - (uv_y + 1.0f/16.0f) );
glm::vec2 uv_down_left = glm::vec2( uv_x , 1.0f - (uv_y + 1.0f/16.0f) );
UVs.push_back(uv_up_left );
UVs.push_back(uv_down_left );
UVs.push_back(uv_up_right );
UVs.push_back(uv_down_right);
UVs.push_back(uv_up_right);
UVs.push_back(uv_down_left);
}
~~~
其余的操作和往常一样:绑定缓冲区,填充,选择着色器程序,绑定纹理,开启、绑定、配置顶点属性,开启混合,调用glDrawArrays。欧也,搞定了。
注意非常重要的一点:这些坐标位于[0,800][0,600]范围内。也就是说,这里**不需要**矩阵。vertex shader只需简单换算就可以把这些坐标转换到[-1,1][-1,1]范围内(也可以在C++代码中完成这一步)。
~~~
void main(){
// Output position of the vertex, in clip space
// map [0..800][0..600] to [-1..1][-1..1]
vec2 vertexPosition_homoneneousspace = vertexPosition_screenspace - vec2(400,300); // [0..800][0..600] -> [-400..400][-300..300]
vertexPosition_homoneneousspace /= vec2(400,300);
gl_Position = vec4(vertexPosition_homoneneousspace,0,1);
// UV of the vertex. No special space for this one.
UV = vertexUV;
}
~~~
fragment shader的工作也很少:
~~~
void main(){
color = texture( myTextureSampler, UV );
}
~~~
顺便说一下,别在工程中使用这些代码,因为它只能处理拉丁字符。否则你的产品在印度、中国、日本(甚至德国,因为纹理上没有ß这个字母)就别想卖了。这幅纹理是我用法语字符集生成的,在法国用用还可以(注意 é, à, ç等字母)。修改其他教程的代码时注意库的使用。其他教程大多使用OpenGL 2,和本教程不兼容。很可惜,我还没找到一个足够好的、能处理UTF-8字符集的库。
顺带提一下,您最好看看Joel Spolsky写的[The Absolute Minimum Every Software Developer Absolutely, Positively Must Know About Unicode and Character Sets (No Excuses!)](http://www.joelonsoftware.com/articles/Unicode.html)。
如果您需要处理大量的文本,可以参考这篇[Valve的文章](http://www.valvesoftware.com/publications/2007/SIGGRAPH2007_AlphaTestedMagnification.pdf)。